A Comprehensive Guide on How to Print Passport Photos
In today's world of travel and documentation, having accurate passport photos is essential. Whether you're applying for a new passport, renewing an old one, or need them for visa applications, having the right size and quality of photos is crucial. However, the process of printing passport photos can sometimes be daunting, especially with varying requirements across different countries and agencies.
Fear not, as we're here to simplify the process for you. In this comprehensive guide, we'll walk you through each step of printing passport photos with ease and precision. From understanding the necessary specifications to choosing the right printing method, we'll cover everything you need to know. By the end of this guide, you'll feel confident in your ability to produce passport size photos that meet all requirements, ensuring a hassle-free experience for your documentation needs. So let’s take a look at how to print passport photos!
Part 1. How to Print Passport Photos at Home
Printing passport photos at home offers convenience and cost-effectiveness, sparing you the hassle of visiting stores. With the right software and a few simple steps, you can create professional-quality passport photos in the comfort of your own space. One highly recommended software for this task is Passport Photo Maker, known for its user-friendly interface and comprehensive toolkit.
To begin the process, you'll need to capture a suitable photo, ensuring proper lighting and background. Once you have your image, follow these steps to know how to print passport size photo:
Step 1: Take a Photo and Open It
Utilize a camera or smartphone to capture your photo in front of a plain white or creamy background. Upload the image to your computer and open it in Passport Photo Maker.
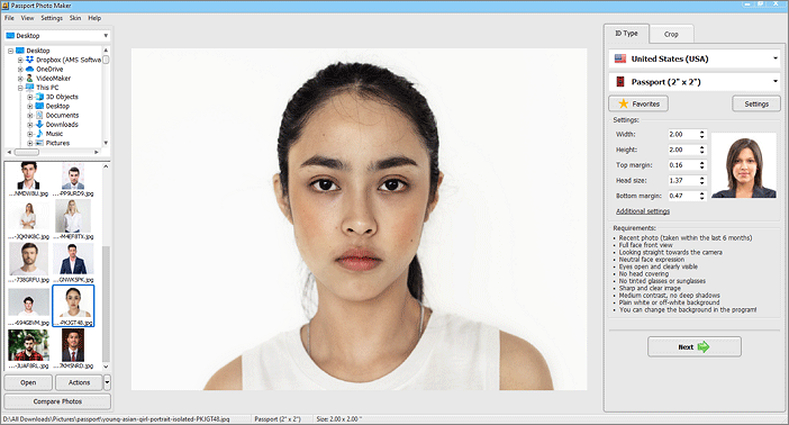
Step 2: Crop the Photo With a Template
Select the appropriate country and ID template for your passport photo. The software will automatically crop the image to the required size, ensuring compliance with the chosen document type.
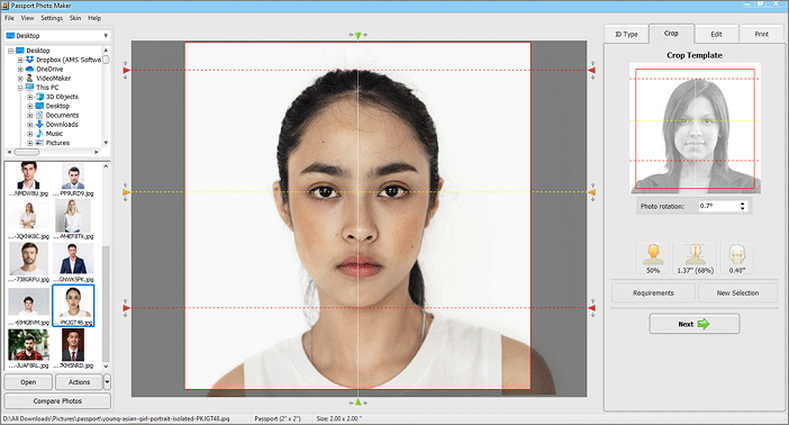
Step 3: Print Your Passport Photo
Navigate to the Print tab within the software. Choose the paper size, whether 4x6 or another suitable option, and set the number of copies needed. You can even print multiple ID photos on a single sheet for added convenience.
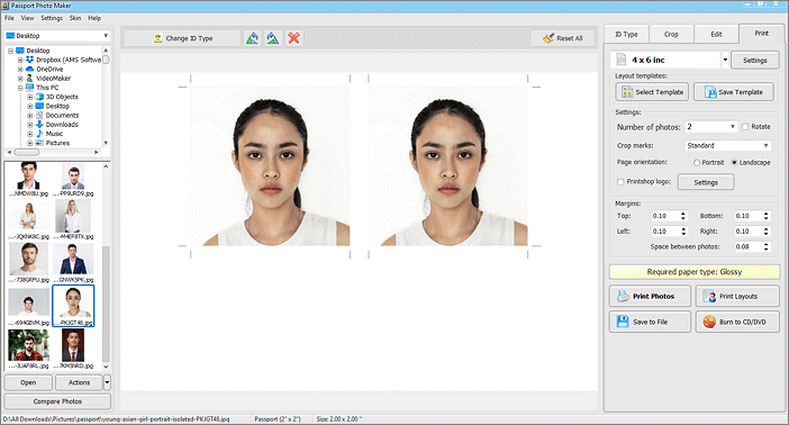
By following these straightforward steps for how to print photo in passport size, you can produce high-quality passport photos at home, saving both time and money. Additionally, consider the type of printer you'll be using to ensure optimal results in your DIY photo endeavors. With Passport Photo Maker, creating passport photos has never been easier or more accessible.
Part 2. How to Make a Perfect Passport Photo with HitPaw FotorPea
As we explore various methods for creating impeccable passport photos, another standout option is utilizing HitPaw FotorPea. While Passport Photo Maker offers an extensive toolkit for passport photo creation, HitPaw FotorPea brings a unique set of features powered by artificial intelligence (AI).
Transitioning from the previous section, where we discussed the convenience of printing passport photos at home, HitPaw FotorPea provides an alternative approach, leveraging advanced AI algorithms to enhance and manipulate images effortlessly.
Features
- Generates passport photo templates instantly with a single click.
- Maintains image quality and resolution while creating passport-size images.
- Produces multiple passport-size photos simultaneously.
- Instantly enhances image quality and resolution with a single click.
- Effortlessly reduces blurriness and eliminates noise from pictures.
- Enlarges and upscales photos without any loss of quality, preserving clarity and detail impeccably.
With HitPaw FotorPea's versatile features, creating the perfect passport photo becomes a breeze, offering unparalleled convenience and quality.
Steps
Step 1:
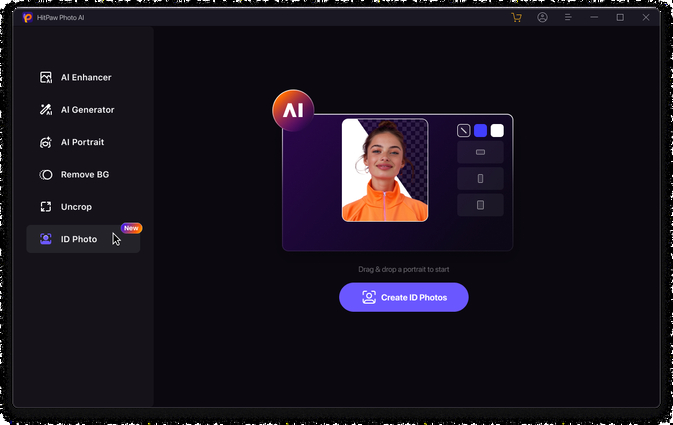
Install HitPaw FotorPea and launch the program. Click the "ID Photo" button and then select the "Create ID Photos" icon to import your preferred photo for passport size conversion.
Step 2:
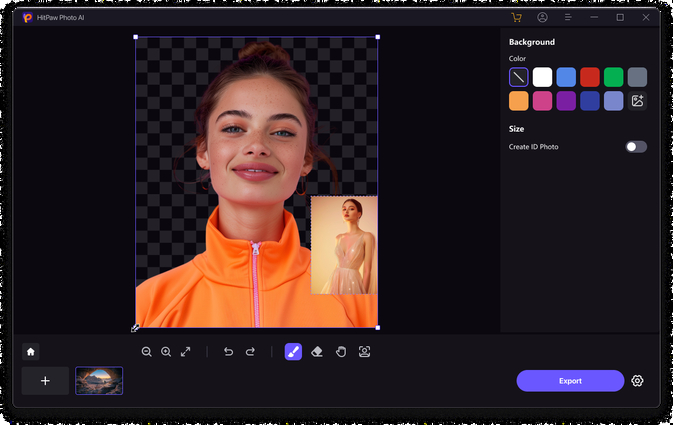
Once the photos are uploaded, use the "Brush" tool to select the area of the photo you wish to retain for the passport photo.
Step 3:
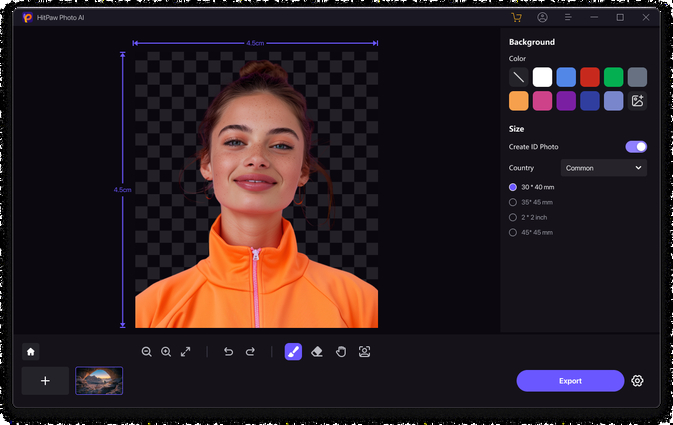
Choose the desired dimensions for the images to ensure they match passport size requirements.
Step 4:
Preview the images to confirm they meet your specifications. Click on the "Export" button to download the passport photos to your computer.
Step 5:
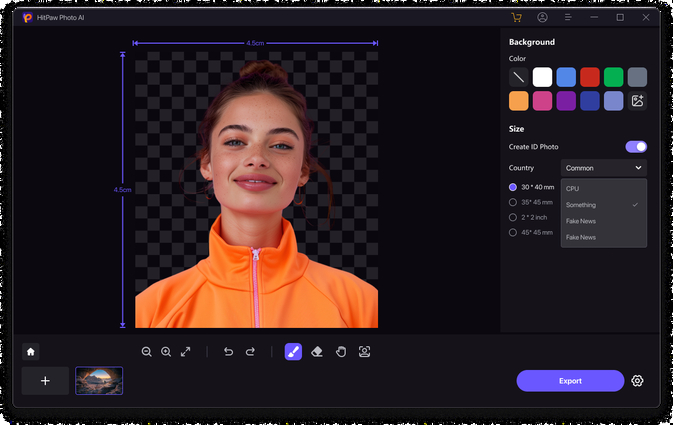
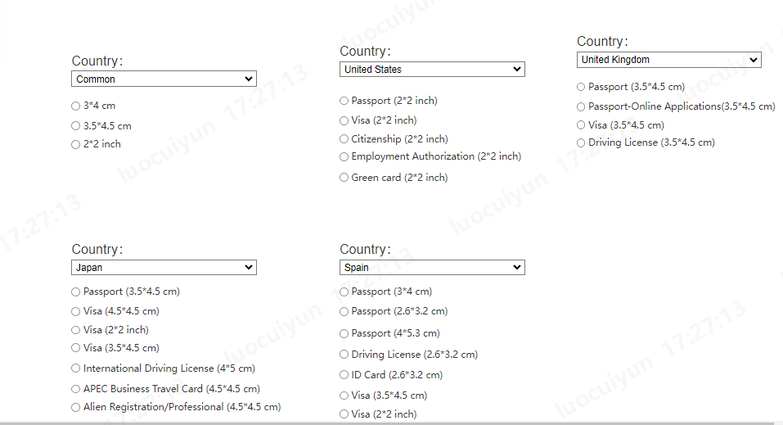
Also, you can adjust the size as you want.
Part 3. FAQs of How to Print Passport Photos
Q1. What are the dimensions for a standard passport photo?
A1. A standard passport photo typically measures 2 inches by 2 inches (or 51mm by 51mm). However, the exact dimensions may vary slightly depending on the country's regulations. It's crucial to adhere to these dimensions to ensure that your passport photo meets the requirements set by the issuing authority. In addition to the size, other specifications such as head size, positioning, and background color are also essential factors to consider when taking or printing passport photos. Therefore, it's recommended to verify the specific requirements for passport photos based on the country or organization you're applying to.
Q2. Are there any specific requirements for the background color of passport photos?
A2. Yes, there are specific requirements for the background color of passport photos. In most cases, passport photos must have a plain white or off-white background. The purpose of this requirement is to ensure consistency and clarity in the photos, making it easier for authorities to verify identity details. Using a neutral background minimizes distractions and enhances facial features, which are crucial for accurate identification. It's essential to avoid backgrounds with patterns, textures, or colors that may obscure or detract from the subject. Adhering to these background color requirements helps to ensure that your passport photo meets the necessary standards for official documentation purposes.
Conclusion
Printing passport photos at home offers convenience and flexibility, eliminating the need for visits to stores. Understanding the standard dimensions and background color requirements is essential for ensuring compliance with official regulations. In this article, we looked at the easiest methods for how to print passport photo size.
Additionally, utilizing software like HitPaw FotorPea can streamline the process, offering advanced features powered by artificial intelligence.


 HitPaw Video Object Remover
 HitPaw Photo Object Remover
 HitPaw VikPea (Video Enhancer)

Share this article:
Select the product rating:
Daniel Walker
Editor-in-Chief
My passion lies in bridging the gap between cutting-edge technology and everyday creativity. With years of hands-on experience, I create content that not only informs but inspires our audience to embrace digital tools confidently.
View all ArticlesLeave a Comment
Create your review for HitPaw articles