[Detailed Guide] How to Overlay Images in Word
You are looking to make the work in the Word document look elegant and sublime so you'd like to place the multiple images on the Word. Rather than merging the images on the Word document, you're looking to overlay the images allowing you to place each image's part over each other.
If you don't know how to overlay images in Word, you can dig into this guide to get the all important answer.
Part 1. How to Overlay Images in Word?
Before overlaying the images together in the Microsoft word, configuring the text wrapping feature is compulsory to allow you. Text wrapping feature tends to affect the objects in the document, including the images.
Otherwise, you won't be able to place the image beneath or above another one. If you've set the text wrapping to ''In Like with Text'', you'll have to change it before the overlaying works there.
Here's how to adjust the text wrapping options images in your Word document.
1.Launch the Word document with the photos.
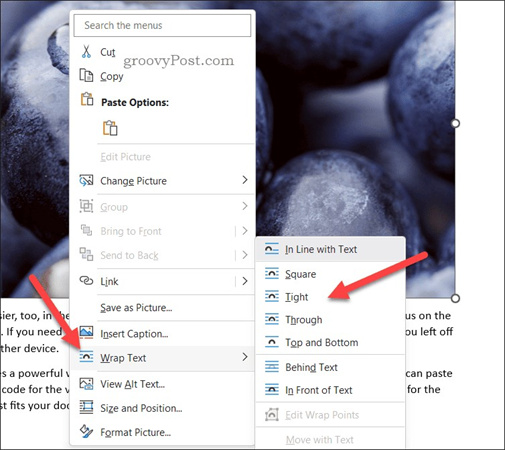
2.Right press the image and navigate to the Wrap Text. Choose the appropriate text wrapping option, but you must not choose the ''In Line with Text'' icon.
3.You can repeat the image in the image you'd like to overlay.

Enabling the image overlapping in Word
Now, Word can automatically let the Word overlap the images. Unfortunately, if you cannot place a photo on the top of another image, configuring the image layout options to turn on the image overlapping is essential. Here's how to enable the image overlapping in Word.
1.Navigate to the Word document having the images. Choose the photo and select the ''Picture Format'' button.
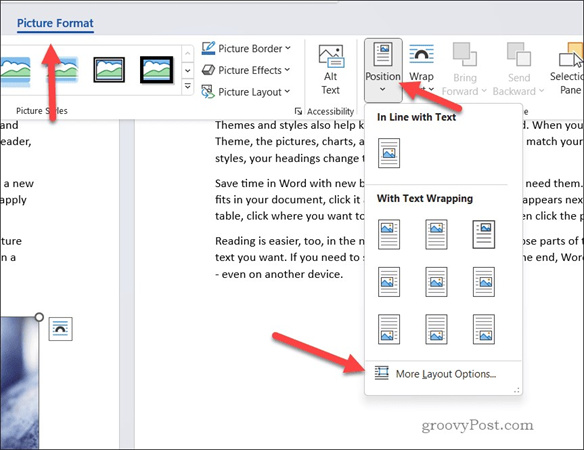
2.Click on the Position icon and hit the ''More Layout Options'' afterwards.

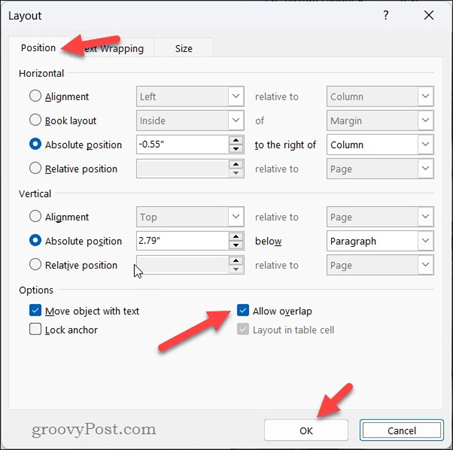
3.After entering the Layout menu, you must choose the Position icon. Turn on the Allow Overlap and select the OK button afterwards.

Overlaying the images
After putting all the details together, in this phase you'll need to know how to overlay text on an image by looking at the guide listed below.
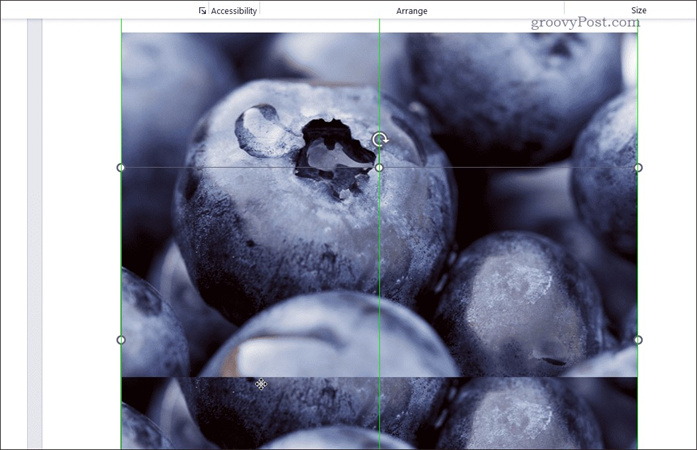
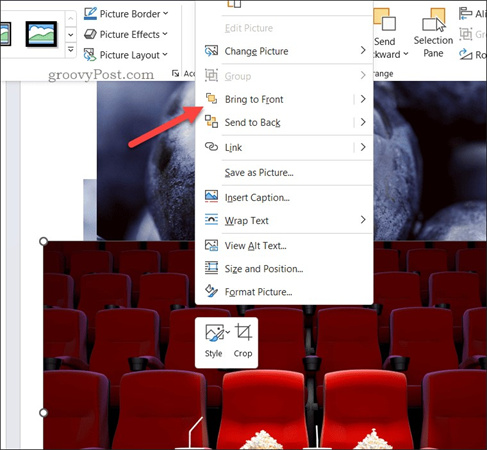
1.The images could have been overlaid if you look at the steps mentioned above, but if you intend to rearrange the photo's position, you'll need to right-press the photo and click on the Bring to Front or Bring Forward button to move ahead.

2.Click on the Send to Back or Send Backward button to put the things in order. That's all you've had to do to know how to overlay an image in Word. After doing it, you'll be able to use the inserted images as your will, allowing you to perform the fascinating operations on the MS word.

Part 2. How to Change Photo Background with HitPaw FotorPea
After uploading the images into the timeline of Microsoft Word, if you aren't satisfied with the background of the images, HitPaw FotorPea can also let you customize the image background.
Besides enabling you to remove the photo background, HitPaw Photo Enhancer can also apply various commendable and sensational background colors to the images. On top of that, HitPaw FotorPea doesn't mess up the image, and you can improve the photo quality courtesy of the amazing photo upscaling features of the HitPaw FotorPea.
Features- Allows you to remove the background of MS word inserted images quickly
- Apply the fascinating background colors to the images
- Doesn't mess up with the image quality
- One click to enhance the photo quality automatically
- It lets you upscale and enlarge the images quickly
- It enables you to process multiple images simultaneously
- Supports the Mac and Windows
Here's the step by step guide to change the photo background on Microsoft Word.
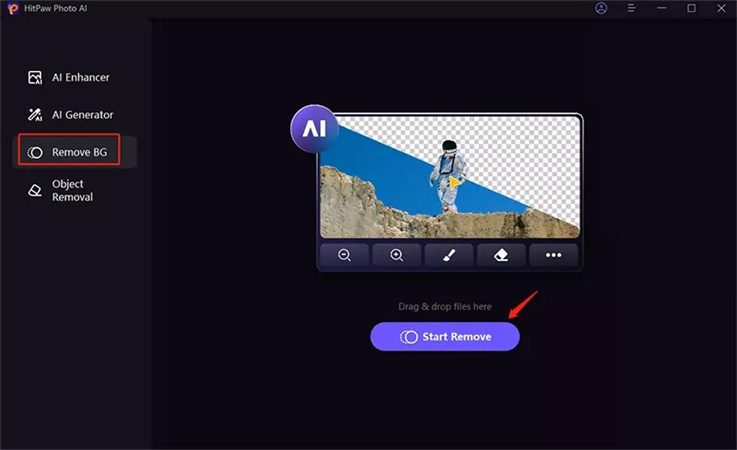
Step 1:Install the HitPaw FotorPea on the computer and start the program afterwards. Click on the ''Remove BG'' button and import the photo from which you want to change the image background.

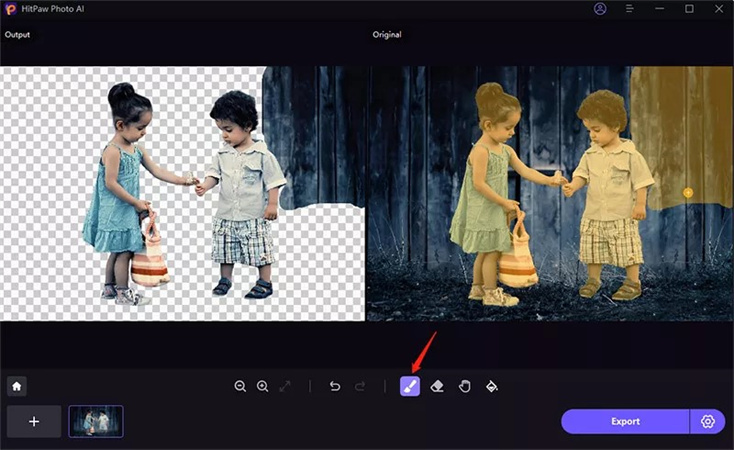
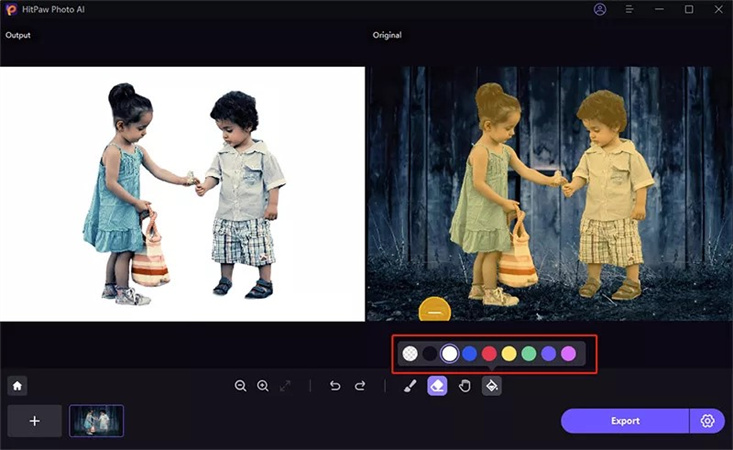
Step 2:Once you've uploaded the image into the HitPaw FotorPea's timeline, this tool automatically detects the image background. You can see two images, with one image having the background removed and the other the original image.

Step 3:You can use the Brush button to manipulate the original image and decide the part of the photo you'd like to keep.

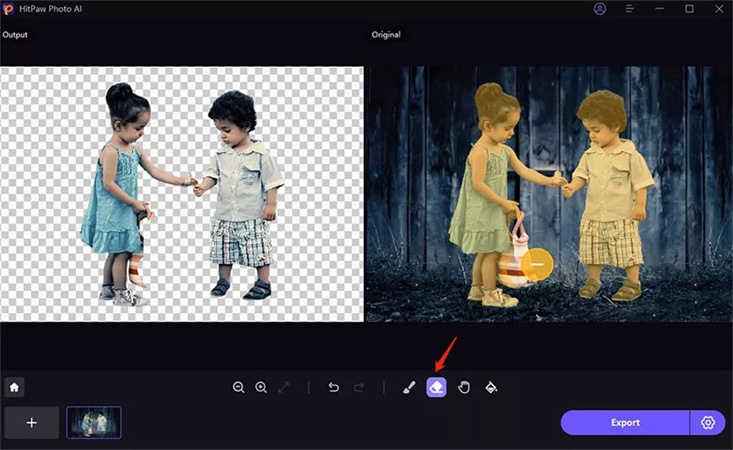
Step 4:You can tap on the Erase button to select the part of the image of the original image you'd like to delete.

Step 5:After removing the photo background, you can choose the color you want to apply to the images.

Step 6:In this phase, you'll need to preview the images and click the Export button to download the pictures on the computer.

Enhancing photo quality through HitPaw FotorPea
Step 1:After installing the HitPaw FotorPea on the computer, you'll need to start the program and hit the AI Enhancer button afterwards. Tap the AI Enhancer button to upload the photo you'd like to upscale the quality.

Step 2:HitPaw FotorPea blesses you with 7 outstanding AI models to select from, including the Face Model, Denoise Model, General Model, Color Calibration, Colorize Model, Low light model, and Scratch Model. You can use any of these AI models to improve the quality of the images.

Step 3:Tap on the Preview icon to review the changes you've made, and upon being satisfied with all the results, you'll need to tap on the Export button to download the images to the computer.

Part 3. FAQs of How to Overlay Images in Word
Q1. Can I layer two pictures in Word?
A1.
You can indeed overlay the two images in Word document. To do it, you'll need to enable the Overlay option before importing the images you'd like to overlay. To get things done, all you need to do here is choose the photo and select the Layout Options afterward.
Press the ''See More'' icon and choose the image you'd like to overlay before hitting the ''Picture Format'' icon and selecting the Position button. In the next phase, you can click on the ''More Layout Options to overlay the two images magnificently.
Q2. How do I stack two images in Word?
A2.
Stacking the two images in a Word document is quite simple. You must choose what to move down or up in a stack. You can also press and hold the Ctrl to move various objects simultaneously.
Tap on the Home button, select the Arrange button, and choose one of the options given below, including the Bring Forward, allowing you to move the selected object one layer up.
Bottom Line
Learning how to overlay images in Word has become a possibility courtesy of this insightful and inspirational post. We have revealed the step by step guide to help you know how to overlay two images without affecting the quality of the images.
On top of that, we've also recommended the HitPaw FotorPea as the best tool to change the image background. It enables you to customize the photo background without tinkering with the image quality, and HitPaw Photo is also reasonably useful at upscaling the image quality.








 HitPaw Edimakor
 HitPaw VikPea (Video Enhancer)


Share this article:
Select the product rating:
Daniel Walker
Editor-in-Chief
My passion lies in bridging the gap between cutting-edge technology and everyday creativity. With years of hands-on experience, I create content that not only informs but inspires our audience to embrace digital tools confidently.
View all ArticlesLeave a Comment
Create your review for HitPaw articles