[Detailed Guide] How to Fix Overexposed Photos
Capturing the perfect moment can be exhilarating, but sometimes, the result falls short due to overexposed lighting. Whether it's the sun's glare washing out your subject or indoor lighting casting harsh shadows, overexposure can dampen the impact of your photographs.
But fear not! With the right tools and techniques, you can rescue your overexposed photos and breathe new life into them. In this comprehensive guide on how to fix overexposed photos, we'll take you through step-by-step methods to fix overexposed photos, from utilizing advanced AI-powered software to harnessing the editing capabilities of your iPhone.
So, without further ado, let's dive into the world of photo enhancement and discover how to turn overexposed images into captivating works of art.
Part 1: How to Fix Overexposed Photos with HitPaw FotorPea
Introducing HitPaw FotorPea – your ally in rescuing overexposed images and revitalizing your photo collection. With its intuitive interface and robust features, HitPaw FotorPea emerges as a dependable companion for enhancing your photographs.
Let's explore its capabilities. HitPaw FotorPea presents a diverse array of editing options tailored to meet the needs of photographers at every skill level. From precise exposure correction to nuanced color adjustments and effective noise reduction, HitPaw FotorPea offers a comprehensive toolkit for elevating your images.
Additionally, can you fix an overexposed photo? Yes, with HitPaw FotorPea, you can effectively address overexposure issues and restore balance to your images. Whether it's adjusting exposure levels, fine-tuning colors, or reducing noise, HitPaw FotorPea equips you with the tools necessary to rescue your photos from overexposure and transform them into stunning works of art.
Features
- Advanced tools for fixing overexposed photos by adjusting exposure levels.
- Effortlessly remove unwanted elements from your photos for a cleaner composition.
- Streamline your workflow by applying edits to multiple photos simultaneously.
- Comprehensive suite of editing options, including color adjustments and sharpening tools.
- Intuitive layout and navigation cater to users of all skill levels, ensuring accessibility and ease of use.
- Compatible with the Mac and Windows
- Colorize the Black and white images
Here's the step-by-step guide to enlighten images via HitPaw FotorPea.
-
Step 1.
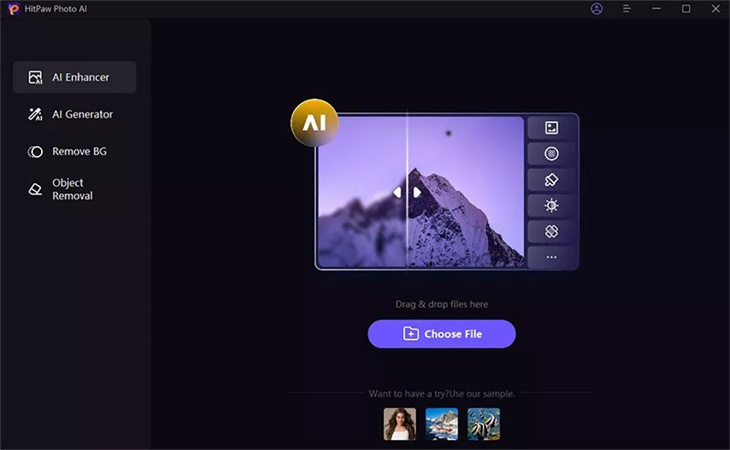
After jumping into the official webpage of the HitPaw FotorPea, you'll need to install the software on the computer and start the program afterward. Select the AI enhancer button to begin the proceedings and click on the Choose Files button to import the photo you'd like to enlighten.
-
Step 2.

-
Step 3.
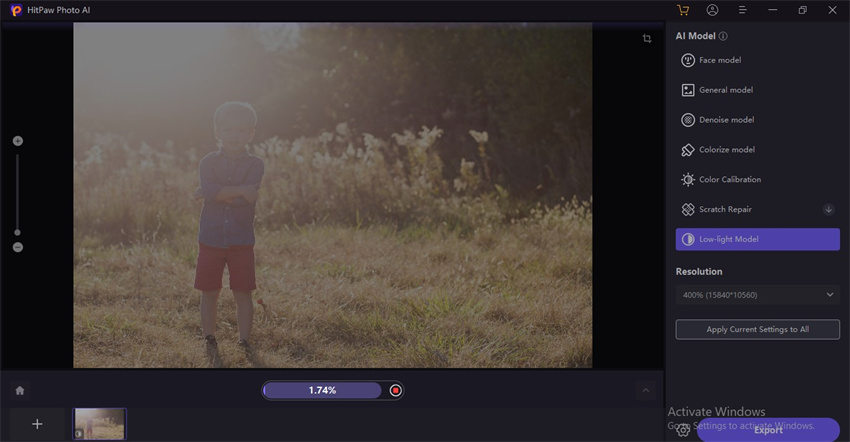
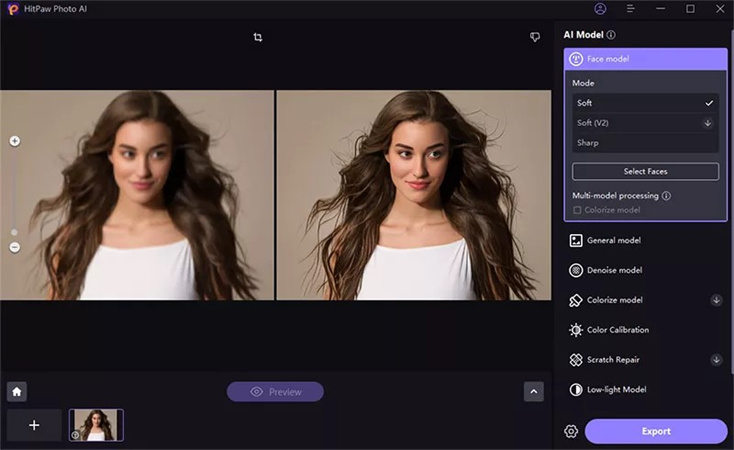
After applying the Low light model, you'll need to press the Preview button to review the changes it has made and then hit the Export icon to get the image downloaded on the computer.

Enhancing Photo Quality
-
Step 1:
Navigate to the official webpage of HitPaw FotorPea and initiate the installation process to integrate the tool into your system. Following a successful installation, launch the program to commence your editing journey. Locate and click on the prominently displayed "AI Enhancer" button to activate the enhancement features.

-
Step 2:
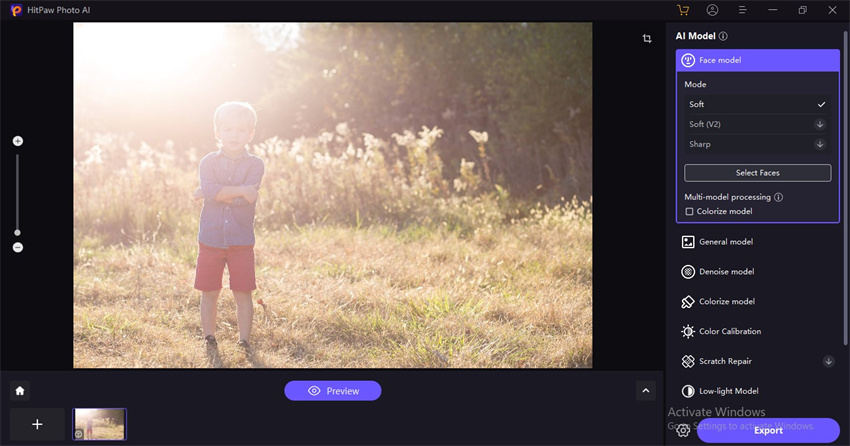
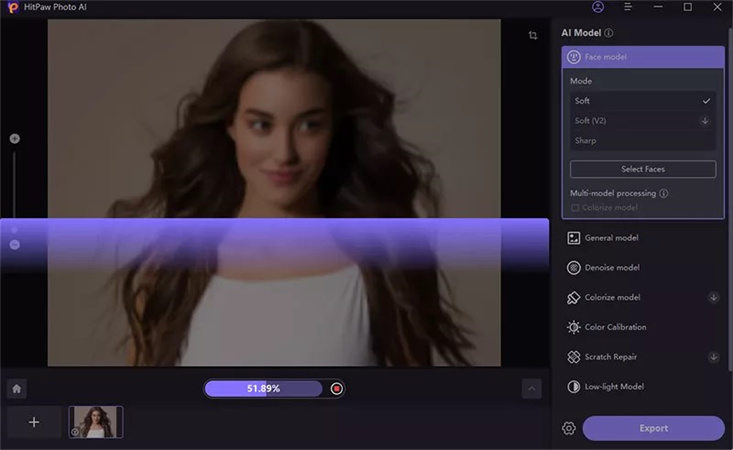
Upon entering the dynamic interface of HitPaw FotorPea, you'll be greeted by a visually engaging timeline showcasing seven distinct AI models. Take your time to explore each model and select the one that best suits your editing requirements. Once you've made your choice, apply the selected AI model to the photo you're currently editing.

-
Step 3:.
Before finalizing your edits, it's essential to review the adjustments made to your images. Utilize the "Preview" button to scrutinize the details and ensure the desired enhancements have been achieved. Once you're content with the results, proceed to download the images by clicking on the "Export" icon, securing your edited photos for further use and enjoyment.

Part 2: How to Fix Overexposed Photos on iPhone
Fixing overexposed photos on your iPhone is a seamless process that empowers you to wield the power of photo editing right from the palm of your hand. Here's a comprehensive breakdown of the steps to guide you in reclaiming your picture-perfect moments and how to fix overexposed photos on iPhone:
-
Step 1.
Embark on your editing journey by launching the Photos app, a quintessential feature conveniently located on your iPhone's home screen. This intuitive app serves as your gateway to effortlessly managing and editing your extensive photo library, making the process accessible to users of all levels.
-
Step 2.
Navigate through your meticulously curated photo collection and locate the overexposed photo eagerly awaiting your expert touch. With a simple tap, open the photo in full-screen mode, presenting you with a canvas ripe for transformative edits and enhancements.
-
Step 3.
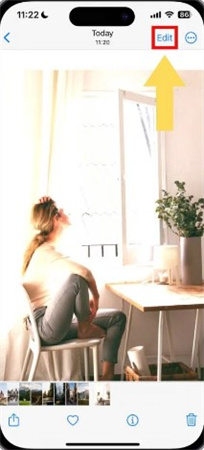
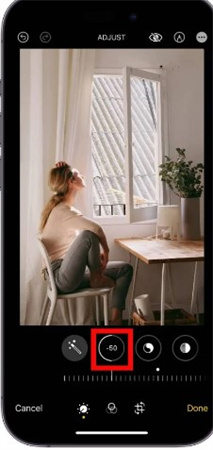
As you immerse yourself in the photo viewing mode, your eyes will gravitate towards the prominent "Edit" button nestled in the upper right corner of the screen. A gateway to a world of creative possibilities, this button beckons you to explore its myriad editing tools. Among these tools, the "Exposure" adjustment tool stands out, marked by its distinctive slider icon, offering you precise control over the luminance of your image.

-
Step 4.
Dive into the heart of exposure adjustment as you delicately maneuver the slider to the left, gradually taming the overexposure that once marred your image. With each subtle adjustment, witness the transformative power of balanced exposure as your photo regains its vibrancy and clarity.

-
Step 5.
But the journey to perfection doesn't end with exposure adjustment alone. Embrace the opportunity to fine-tune additional facets of your photo, including brightness, contrast, and saturation. Allow your creative instincts to flourish as you experiment with different adjustments, sculpting your image into a captivating masterpiece that speaks to your unique vision and style.
-
Step 6.
Having meticulously crafted your masterpiece, it's time to immortalize your edits. With a sense of satisfaction, tap on the "Done" button nestled in the lower right corner of the screen, signaling the completion of your creative journey. As your edited photo seamlessly replaces the original version in your photo library, bask in the satisfaction of a job well done, knowing that your vision has been brought to life with precision and finesse.

Q1. Is there a way to fix overexposed film?
A1. Yes, fixing overexposed film is possible through various post-processing techniques. However, it's essential to handle the film delicately during editing to preserve its quality and integrity.
Q2. How can I prevent overexposure in my photos?
A2. To prevent overexposure, consider adjusting your camera settings before capturing the shot. Experiment with exposure compensation, utilize ND filters, and pay attention to lighting conditions to achieve well-balanced exposure.
Bottom Line
In conclusion, overcoming overexposed photos is no longer an impossible challenge. Whether you opt for HitPaw FotorPea or utilize the editing tools on your iPhone, restoring balance to your images is within reach. Embrace the art of photo editing and let your creativity shine!
For seamless photo enhancement and how to fix overexposed photos, we highly recommend giving HitPaw FotorPea a try. Elevate your photography game and unlock the full potential of your images today!




 HitPaw Edimakor
 HitPaw Watermark Remover
  HitPaw VikPea (Video Enhancer)

Share this article:
Select the product rating:
Daniel Walker
Editor-in-Chief
My passion lies in bridging the gap between cutting-edge technology and everyday creativity. With years of hands-on experience, I create content that not only informs but inspires our audience to embrace digital tools confidently.
View all ArticlesLeave a Comment
Create your review for HitPaw articles