[Full Guide] How to Do Generative Expand Photoshop
Adobe Photoshop is one of the earlier photo editing tools that comes up with several new updates now and then. Its new release in 2023, generative expand Photoshop, has surely taken the world to a storm.
With this feature, you can save a lot of your time editing the parameters of photos. Tune into this post to learn what Photoshop generative expand is and how to expand an image in Photoshop.
Part 1. What is Generative Expand Photoshop?
Expand selection Photoshop is a powerful feature introduced by Photoshop that helps you remove, edit, and fill in image elements in a few clicks. It is powered by AI technology, and it takes no time to generate flawless images in a few seconds. Photoshop, in this feature, tends to analyze each image's pixel matching the coloring, perspective, shadows, and lighting, making the images look realistic and flawless.
The tool empowers you to revert the changes effortlessly if you're not satisfied with the outcome of the time. With Photoshop expand image feature appearing on the scenes, you can do a lot of creative work on the images easily.
Part 2. How to Do Generative Expand Photoshop?
Learning how to expand image in Photoshop is what most people nowadays tend to ask about. You can easily use the generative expand Photoshop to perform the various image parameters. Follow the step by step guide to learn how to expand photo in Photoshop AI.
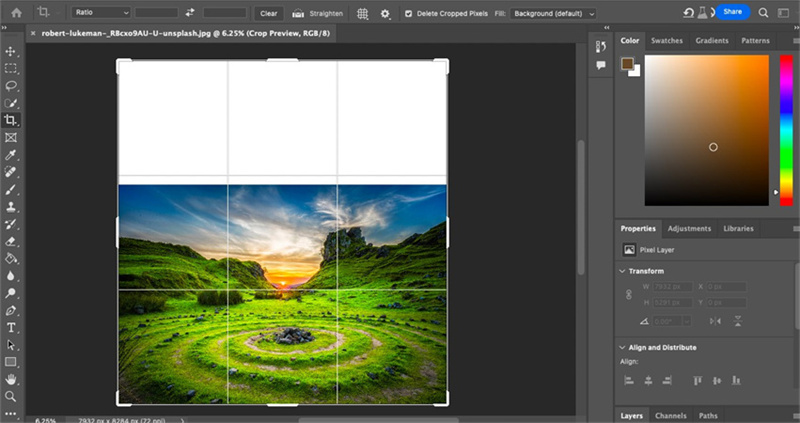
Step 1:To begin with, you'll need to install the software after visiting the official webpage of Adobe Photoshop. Before doing anything, you must increase the canvas size to generate the space for your new background. You can expand the image by cropping the tool, as the Generative Expand tool relies upon the conjuration and the crop tool out there.
You can now choose the crop tool after visiting the toolbar on your left side, or opt for the keyboard shortcut by clicking the C. Next, you'll need to push the Crop tool's bounding handles into your canvas space beyond your image. Now, you'll see the cropped image preview there.
This way you'll carry active selection fully prepared to fill through AI generated imagery.
Step 2:Upon creating the active crop selection, you'll see that the generative expand button appears automatically in the crop tools. Next, you'll need to check the fill box, and then you can see three options appearing, including the Content-Aware Fill, Generative Expand, and Background (Default). Proceed ahead by selecting the Generative Expand option.
A contextual task must emerge when you click on Generative Expand. If you can't see the option, you can get it by clicking the Edit icon and then choosing the Generative Expand.
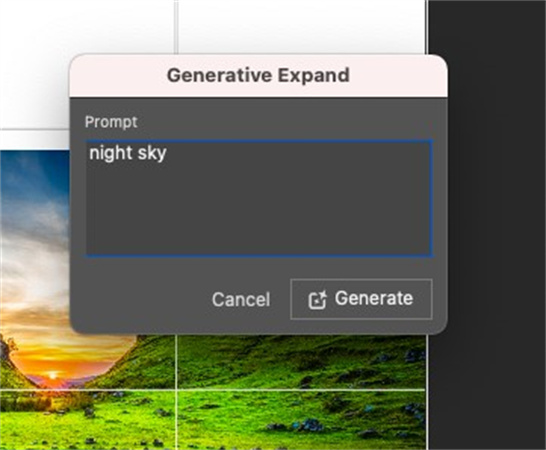
Step 3:In this phase, you'll need to type in the expansion you'd like to produce in your Generative Expand taskbar. It is necessary to be concise and write down clear instructions there.You must be able to let the AI algorithm know what you want while expanding the dimensions of the images.

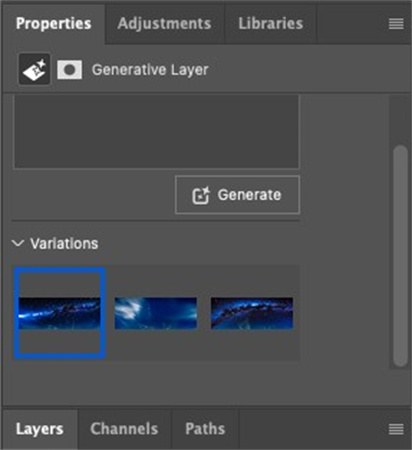
Step 4:After entering the text prompt, you'll need to press the Generate button. Now, AI generative expand Photoshop has three amazing variations depending upon the text prompt you've entered. You can see the variations of different Thumbnail previews after visiting the properties panel on the left side of the canvas workspace.
Tap the Previews icon in your properties panel and access them in the Canvas icon. The generated expansion images are melded seamlessly with the original image. You can now select the best variation suiting the design purposes magnificently.
Part 3. The Best Tool to Generate Images with HitPaw FotorPea
Using the Photoshop generative expand feature is brilliant to expand the images, but what about creating the images in different designs and styles? The arrival of the HitPaw FotorPea has made it easier allowing you to enter the text prompt to produce the mesmerizing images.
This magnificent tool doesn't ask you to do much to create stunning AI-generated images, as it relies upon AI technology to get your job done in a few clicks. After entering the text prompt and generating the flawless images, you can export the images into the preferred file location.
Features- Lets you generate amazing images through text prompt
- Compatible with the Mac Windows
- Produces the images in excellent resolution
- Supports multiple image formats
- Lets you export the images in original image quality
- 100% safe
- Doesn't insert the watermark on the images
Here's the step by step guide to use the HitPaw FotorPea to create the AI generated images.
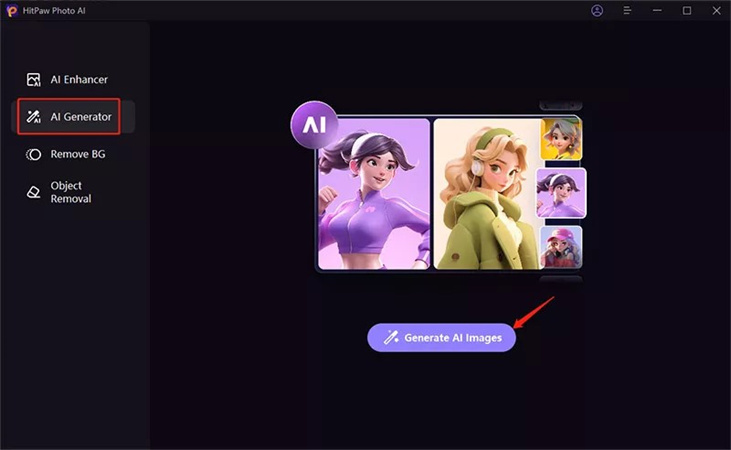
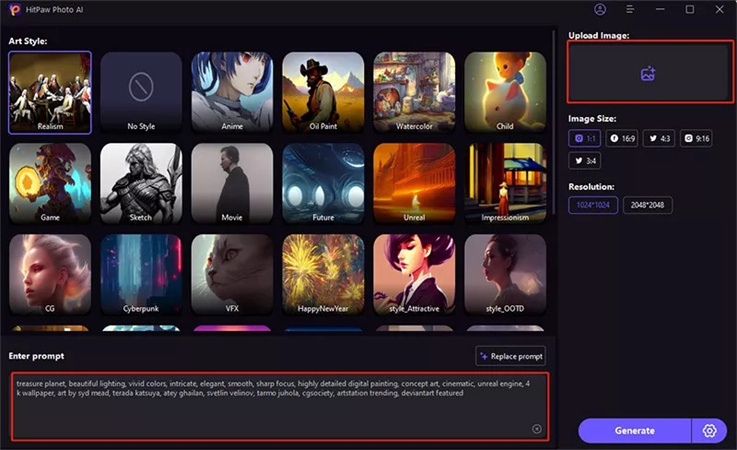
Step 1:Visit the official webpage of HitPaw FotorPea and then download the software to your computer. After downloading the tool, you must install the software before launching it. Click on the AI generator to begin the proceedings.

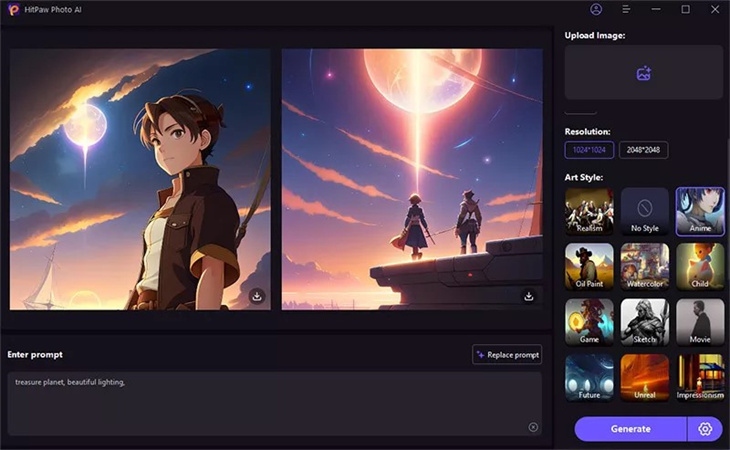
Step 2:In this phase, you'll need to enter the text prompt you're looking to produce the images according to. HitPaw FotorPea also lets you select the appropriate design and styles before accessing the sensational AI generated photos.

Step 3:Review the credentials of the generated image by tapping on the Preview icon. Once satisfied with the image outcome, you can press the Export button to download the images in their original resolution in the preferred file location.

Apart from generating amazing images via HitPaw FotorPea, you can upscale the image quality, making it look brilliant and stunning. Here's how to upscale the photos through HitPaw FotorPea.
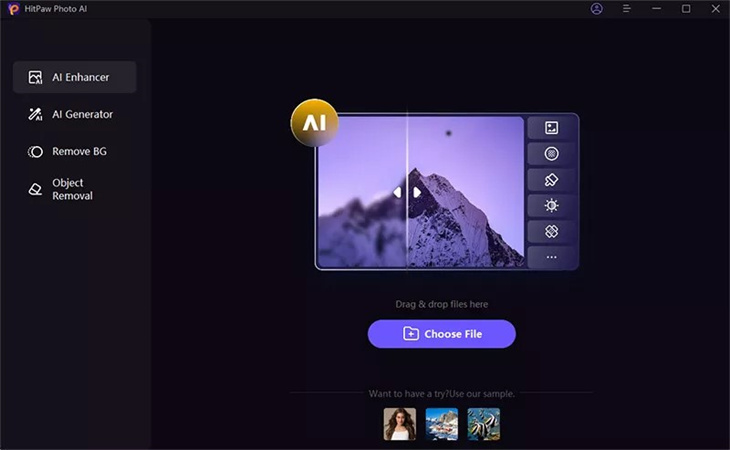
Step 1:Jump into the official webpage of HitPaw FotorPea and install the software afterward. Click on the AI Enhancer button and press the Choose File button to upload the photo you want to enhance the quality.

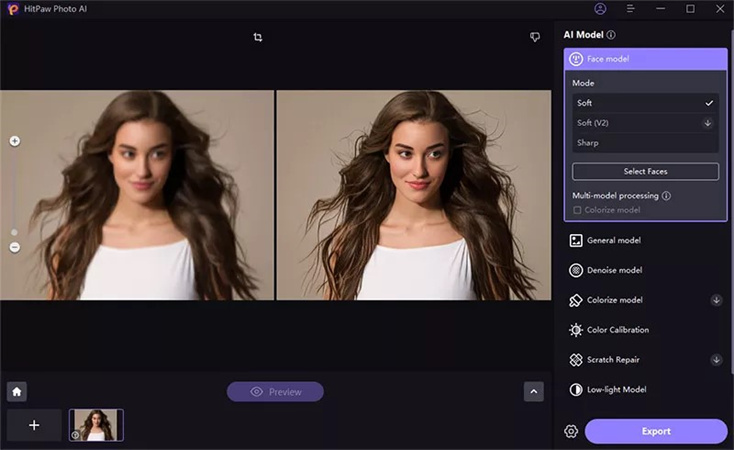
Step 2:HitPaw FotorPea prompts the 7 outstanding AI models, including the Face Model, Denoise Model, General Model, Low light model, Scratch repair model, and color calibration model. You can use these AI models to upscale the image quality, as HitPaw FotorPea doesn't mess up the image quality while enhancing the photos.

Step 3:HitPaw FotorPea only takes a few seconds before applying the selected AI model to the images. You can review the edited photos by tapping the Preview button. This way, you can make last-minute adjustments to make the images look majestic and fascinating.
After reviewing the images, you can tap the Export button to download the photos on the computer.
Bottom Line
The presence of the generative expand of Photoshop is nothing less spectacular and a blessing for people wanting to produce the AI generated images. We have listed the step by step guide to help you learn how to expand a photo in Photoshop in amazing image quality. HitPaw FotorPea is easily the most efficient and cost friendly option when creating the AI generated images.
With this tool, you can get your hands into high-resolution images by only entering the text prompt.






 HitPaw Edimakor
 HitPaw VikPea (Video Enhancer)


Share this article:
Select the product rating:
Daniel Walker
Editor-in-Chief
My passion lies in bridging the gap between cutting-edge technology and everyday creativity. With years of hands-on experience, I create content that not only informs but inspires our audience to embrace digital tools confidently.
View all ArticlesLeave a Comment
Create your review for HitPaw articles