


How to Take Professional Product Photos with iPhone Step by Step
As we all know in today's digital marketplace, eye-catching product photos have a massive weight. They have the ability to make or break the sale and take your online store to new heights. But you know what? You don't always need to have expensive camera equipment to capture stunning product photography results.
With an iPhone and a few simple techniques, you can take professional-looking product photos and enhance your brand's image. Wondering how to take product photos with iPhone? Well, this guide is for you. In this article, we will dive deep into how to take professional-grade product photos using just your iPhone. Besides this, there will be some tips and techniques to achieve the maximum results.
Part 1: How to Take Good Product Photos with an iPhone
1. Choosing the Right Location
The first and most important step in taking great photos is choosing the right location. A perfect spot that is clean and uncluttered with consistent lighting can make the product image standout. Therefore, look for a clean, uncluttered area with plenty of natural light.

2. Lighting Considerations
To make your product image standout, lighting is not something you would want to ignore. For product photography using an iPhone, avoid harsh and direct light, as it can create unwanted shadows and distort the color of the product.
Therefore, aim for a soft and diffused light, and you can achieve this using softbox lights or a ring light. However, if you have big studio lights, a white sheet or reflector can help soften any harsh lighting. But if you're shooting in darker conditions, your iPhone's night mode can come in handy, but be cautious as it might compromise image sharpness.
3. Background Selection
To make your product stand out, aim for a clean, simple background. It is because simple background ensures the focus remains on the product. Generally, plain white or a light-colored backdrop works well for most photos. However, to give your product a more dynamic look, consider using textured surfaces like wood, marble, or fabric that complement your product without overpowering it.
4. Camera Settings and Features
If you are using an iPhone to capture the product photo, explore the camera setting and make your product photo look professional. For example, you can enable the grid feature to help with composition and alignment, while HDR will help balance exposure in tricky lighting situations.
Similarly, you can adjust exposure, focus, and use portrait mode to blur the background slightly and focus on the product. And if you want to capture multiple shots in quick succession, you can use burst mode.
5. Composition Tips
In product photography, good composition makes a huge difference. Therefore, when shooting with your iPhone, take good care of framing and angles, as it will help you create visually appealing photos. To make most of it, try these techniques:
- Rule of Thirds: Place your product at the intersection points of an imaginary 3x3 grid.
- Negative Space: Leave some empty space around your product to create a sense of balance.
- Angles: Experiment with different angles to showcase your product's best features.
- Symmetry: For certain products, a symmetrical composition can be very striking.
6. Utilizing Props and Styling
Props can help enhance your product photos by providing context or a sense of scale. However, while using them, always make sure to only use the ones that are relevant to the product, compliment it, and tell a story. Besides this, use them sparingly to avoid distracting from the main subject. For example, if you're photographing a coffee mug, consider adding a book or a pair of glasses, as this will create a cozy and inviting scene.
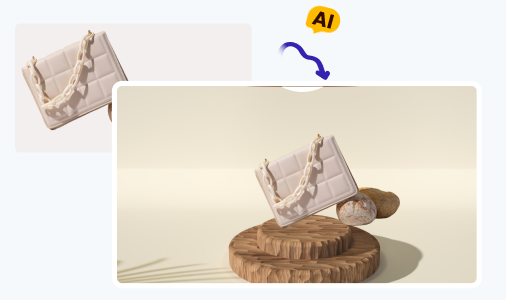
Part 2: How to Enhance Product Photos in Seconds
Now you know how to take product photos with iPhone, the next step is to make them shine with a little tweaking. This is where HitPaw FotorPea comes in handy.
HitPaw FotorPea is a powerful yet user-friendly photo editor that helps the users edit and perfect their images with minimal efforts. Powered by AI, this advanced software offers a variety of features to transform your product photos from good to great in no time.
Some of the key features of HitPaw FotorPea include:
HitPaw FotorPea - All-in-one Photo Editing Tool for Win & Mac
Secure Verified. 212,820 people have downloaded it.
- AI background removal to create own style
- Auto enhancement to make product photo clear
- Easy-to-use interface for new beginners
- Batch processing for multiple photos
- Brightness and contrast adjustment
Secure Verified. 212,820 people have downloaded it.
How to Make Product Photo Stunning with HitPaw FotorPea:
Wondering how to remove and change product photo background with HitPaw FotorPea? Follow these steps:
Step 1: Upload Your Photo
Download and Install Hitpaw From the official website. Then launch the software and click on "BG Remover" to upload the photo you want to edit. Alternatively, you can simply drag and drop the image into the editing area.


Step 2: Let the AI remove background
Once you have added the photo, ai will take few seconds to process it. Then it will automatically detect the background and remove it.
Step 3: Fine-tune the areas using brush
Now using the brush tool you can further adjust the parts of the image you want to keep. For more precise changes, you can adjust the size of the brush.
Step 4: Refine the Removed Areas
Using the the Eraser tool, you can fine-tune the parts of the image that you don't want to keep.
Step 5: Change the background
Now change the background by choosing a new color to apply as the background.
Step 6: Export the Photo
Once you are satisfied with the result, click on "Export" and download it to your desired location.
Part 3: FAQs about Taking Product Photos with iPhone
Q1. Can I take professional-quality product photos with an iPhone?
A1. Yes, iPhones have advanced camera features that help you capture stunning professional-grade photos.
Q2. What's the best way to capture true colors in product photos?
A2. Use natural light whenever possible and consider using a white balance card to ensure accurate color representation.
Conclusion
Many iPhone users were unsure how to take product photos with the IPhone. In this article, we discussed taking professional product photos with an iPhone is not an uphill task. It's pretty simple and straightforward, and you just need to pay attention to location, lighting, and composition.
However, even the great photos do require some tweaking, and in this regard, AI editing tools like HitPaw FotorPea can help the cause. Powered by AI, this amazing tool allows you to enhance your images by removing backgrounds, adjusting brightness, and cropping for a clean, professional look.

 HitPaw Univd (Video Converter)
 HitPaw VoicePea
  HitPaw VikPea (Video Enhancer)


Share this article:
Select the product rating:
Daniel Walker
Editor-in-Chief
This post was written by Editor Daniel Walker whose passion lies in bridging the gap between cutting-edge technology and everyday creativity. The content he created inspires the audience to embrace digital tools confidently.
View all ArticlesLeave a Comment
Create your review for HitPaw articles