Explore What is Color Banding and How to Fix it on Photos in 2025
Did you ever pay attention to occasional lines and zones in the gradients of your pictures, for instance, in skies or shadows? The problem has a quite clear name - color banding, which is not a rarity, and turning the perfect picture into less professional.
Let's delve deeper into what color banding is and how it is possible to eliminate it if you are a professional or simply an amateur who enjoys photography. By the end of the article, you will be able to not only identify it but also address it with some of the best practices in instruments and approaches of 2024.
Part 1: What is Color Banding?
This is a type of artifact where you will find fluent transitions between shades of the same color are missing, and instead, there are regions of fully developed color interrupted by regions of little-developed color in between.
This problem is particularly noticeable in areas of an image where the transition zone is blurred, such as the sky fog or any other out-of-focus objects. If the bit depth of an image is not a high number, the bit can not give enough color information to create a smooth transition.
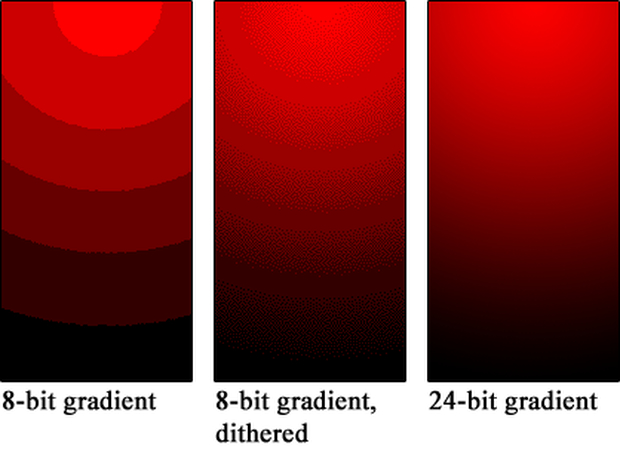
This is why, instead of a cleanly integrated transition, we see a series of ‘steps.' This not only changes the given picture – while its appearance is altered – but can also be disconcerting to the viewer.
Common Causes of Color Banding
- 1. Low Bit Depth:Many colors depicted in images that have been encoded in the low bit-depth format, like 8-bit, normally display color banding. This is the case because, the lower the bit depth, the number of colors that are available is small; hence, there are few transitions between them. Those images achieving the 16 bits of depth display much smoother gradations.
- 2. Technical Insight:An image with 16-bit can give over 65,000 shades per channel, while an 8-bit image only has 256 shades. The difference is discernible when working with refinement gradients.
- 3. Compression Artifacts:Compression also results in color banding, and this is even more so when using formats such as JPEG. This is usually because of failure to load the color data, especially when resaving such images at lower quality.
- 4. Monitor Limitations:There are situations where the problem does not lie in the picture but in your screen. If you're using low low-quality or non-calibrated monitor, you may feel that your picture is actually suffering from color banding when it is not.
- 5. Editing Techniques:Among other issues that arise from editing an image, such as the highlights, shadows, or saturation, over-editing an image will result in color banding. This is especially the case when using an 8-bit image in a program such as Photoshop on the computer.
Examples of Color Banding
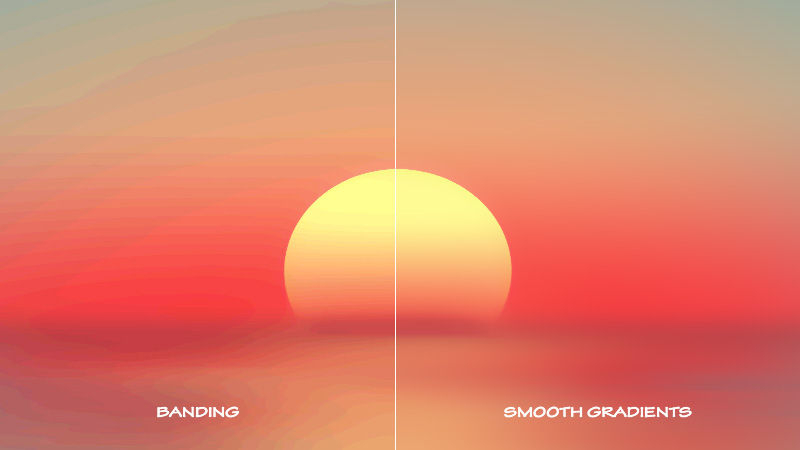
Visual amazement equals taking a photograph of the niche, fo,r example, a sunset. Most important, the sky must blend into orange and pass smoothly into purple. However, because of color banding, the transition can turn out to be a set of separate color stages rather than a smooth transition between two colors. Another common example is in the hazy area; the softer natural gradations of shady areas break up into visible stripes of colors.
Part 2: How to Fix Color Banding with 3 Easy Ways
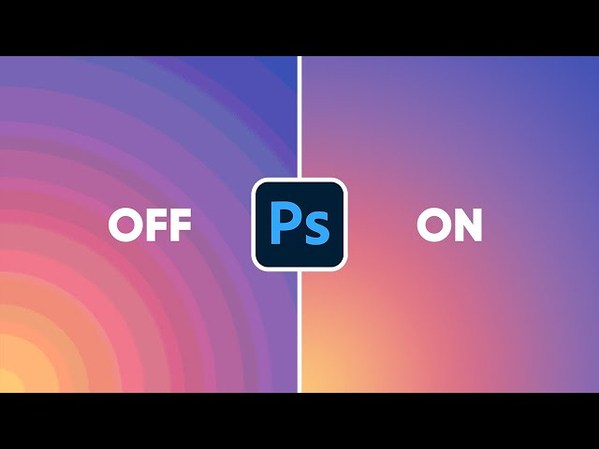
Correcting the color bands may be accomplished by using a number of options depending on the seriousness of the problem and the available tools. Here are three of the most effective methods:
1. Using Photoshop Edits
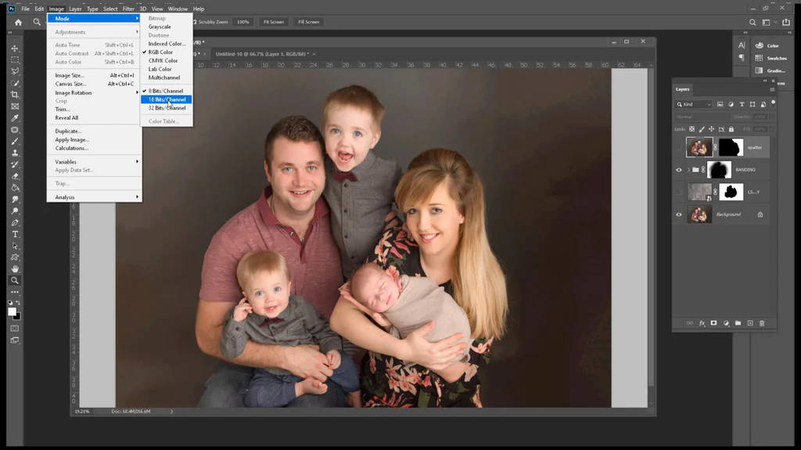
Another one of the best ways we can correct color banding in Photoshop is by changing your image mode from an 8-bit depth to a 16-bit. Higher bit depth results in more measurements of color that will help in the elimination of major steps in gradients.
Step-by-Step Guide:
- Open your image in Photoshop.
- Navigate to image> Mode > 16 Bits/Channel.
- This converts your image to a higher bit depth, which helps reduce banding.
- Additionally, you can use Photoshop's Gradient Toolto manually smooth out problematic areas by creating more subtle transitions.
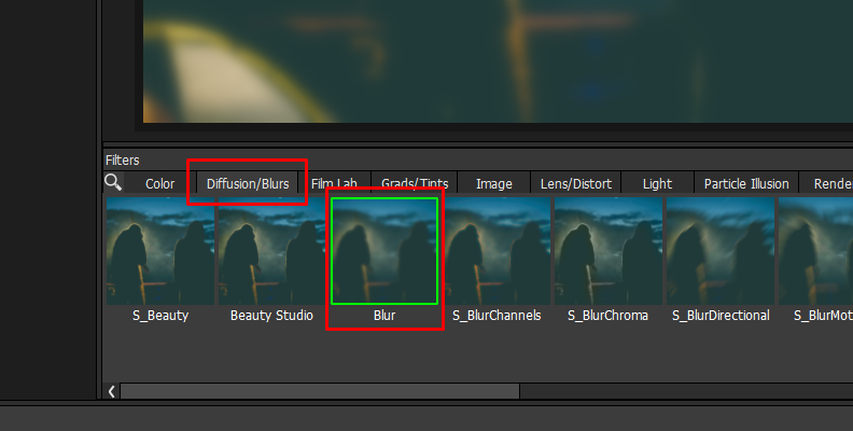
2. Add Blur to the Images
Another way of preventing the shock of change caused by the color banding is by applying a subtle blur. To do this you should apply a blur to the mentioned above areas since it helps to blend the colors together and make the bands less distinguishable.
How to Apply Blur in Photoshop:
- Open your image and select the area with color banding.
- Go to Filter > Blur > Gaussian Blur.
- Adjust the blur radius to the point where the bands become less prominent. A light blur of 1-3 pixels is often enough to reduce banding without distorting the image.
3. Add Noise and a Layer Mask to the Photos
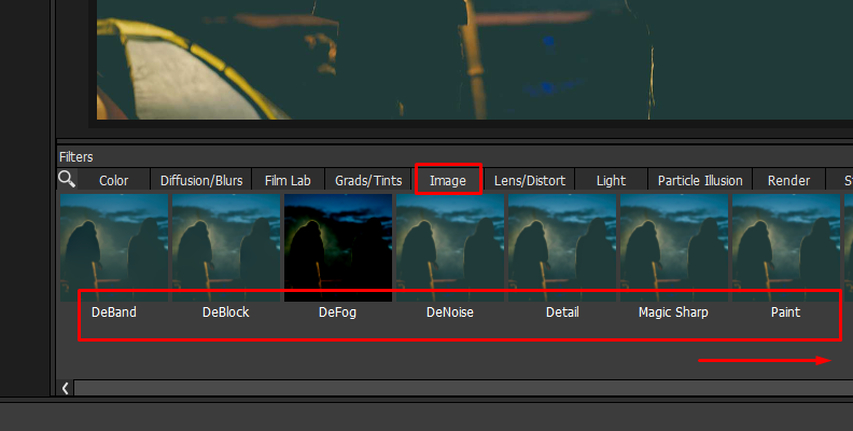
The next slight improvement to the method of fixing color banding is to add noise to the image. This might sound counterintuitive, but noise helps as the variants of colors are added to disguise the harsh jumps due to banding.
Steps to Add Noise:
- In Photoshop, go to Filter > Noise > Add Noise.
- Choose a low amount of noise (typically between 1% to 3%) and set the distribution to Uniform.
- Use a layer mask to apply the noise only to the areas affected by color banding. This ensures that the rest of your image remains sharp.
Part 3: How to Recognize Color Banding
The first thing in knowing about color banding is that you know about fixing it. You have to look out for:
- Harsh Transitions
- Posterization
- Visible Artifacts in Compression
The best way to illustrate color banding is perhaps in images of the sky, where what you expect to be a smooth transition from lighter blue to darker blue is rendered as thin alternating bands. Likewise, when the surroundings are foggy or misty, the mild grays may turn to harsh lines.

Part 4: Extra Tip to AI Correct Photo Color Fast
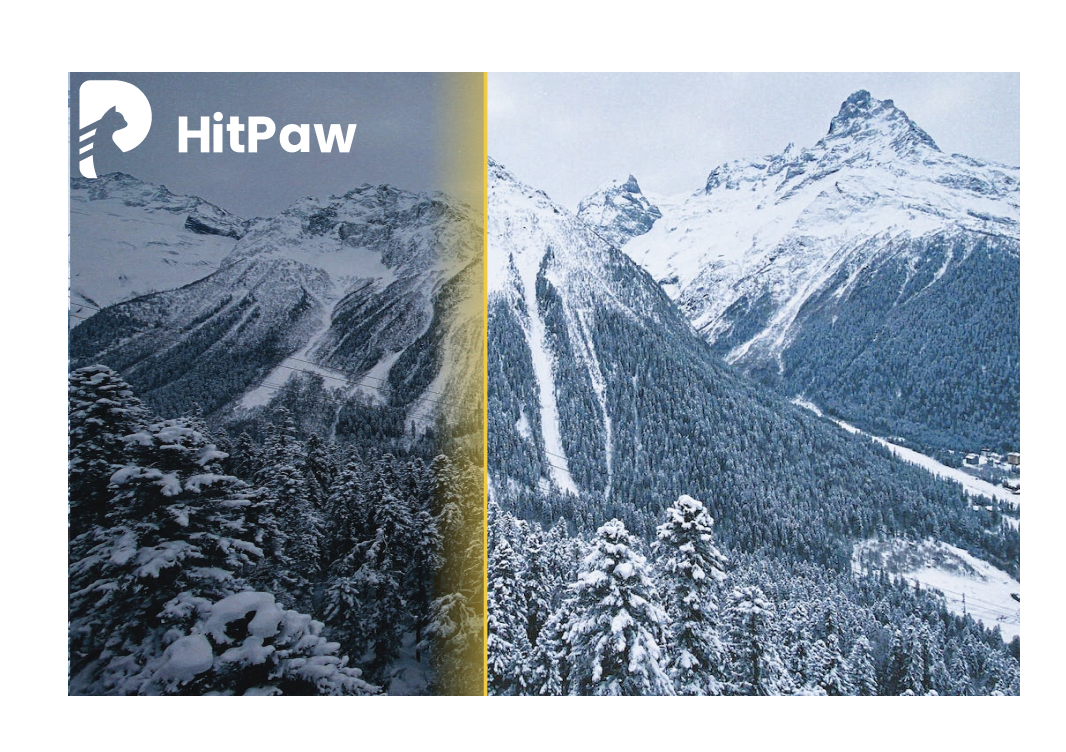
Apart from correcting color banding problems, many of the images have problems like underexposure or even overexposure. It is particularly useful for photographers who need a quick response: using AI, HitPaw FotorPea can adjust color saturation simultaneously for different parts of the picture, making it an effective tool for color correction.

Features of Applying HitPaw FotorPea for Improvement
HitPaw FotorPea - All-in-one Photo Editing Tool for Win & Mac
Secure Verified. 212,820 people have downloaded it.
- Intelligent color adjustment to recognize color problems
- Automatic color correction within a short span of time
- Noise reduction to enhance photo details
- Restore the proper color of damaged photos
Secure Verified. 212,820 people have downloaded it.
This is the ultimate guide of HitPaw FotorPea
Conclusion
In this guide, we have discussed what color banding is, what produces it, and how it can be corrected with the help of Photoshop and AI photo editors such as HitPaw FotorPea. By applying these techniques, you are going to learn how to prevent color bands from appearing in your images or, in other words, make them as impeccable as you want them to be. Do not let issues such as banding affect your photos - consider the options above today and see a difference.


 HitPaw Univd (Video Converter)
 HitPaw VoicePea
  HitPaw VikPea (Video Enhancer)


Share this article:
Select the product rating:
Daniel Walker
Editor-in-Chief
My passion lies in bridging the gap between cutting-edge technology and everyday creativity. With years of hands-on experience, I create content that not only informs but inspires our audience to embrace digital tools confidently.
View all ArticlesLeave a Comment
Create your review for HitPaw articles