2025 Full 6 Methods on How to Fix Blurry Photos in Lightroom
There are many instances when we capture the shot of the most beautiful sight or moment but it turns out blurry. These blurry photos can be very frustrating, especially when those moments are hard to recreate. Generally, this can happen because of slow shutter speeds, camera shake, or incorrect focus.
However, fortunately Adobe Lightroom provides a powerful set of tools to enhance and rescue these blurry photos. Wondering how? Well, in this article we will dive deep into the detailed methods on how to fix a blurry photo in Lightroom.
Part 1: Why Is Your Photo Blurry?

Before diving into how to fix blurry photos in Lightroom. It's important to understand what causes blurriness in photos. Here are some of the most common reasons:
- Camera Shake
- Out-of-Focus Shots
- Low Light Conditions
- Slow Shutter Speed
- Incorrect Lens Settings
- Subject Movement
While clicking the photo without a tripod, any movement of the hand can result in a blurry photo.
If you haven't properly focused the subject, the entire image or some areas may appear blurry.
Sometimes in poor lightning, the camera can struggle to capture the sharp or crisp image. As a result, noise or grain may appear, causing the blurriness.
When your camera's shutter remains open too long, any movement can cause blur.
Using improper aperture or focal length settings can result in depth-of-field issues, which result in unsharp photos.
While capturing the fast-moving subjects without appropriate shutter speed may also result in a blurred image
Part 2: How to Fix Blurry Pictures in Lightroom (6 Methods)
Method 1: Using the Sharpening Panel
If you have encountered a blurry photo and now you want to fix it using Lightroom, the sharpening panel is your first line of defense. This tool is one of the most straightforward ways to bring back clarity in a blurry image.
Here's how to unblur a photo in Lightroom. all you need to do is:
Step 1: Choose Your Photo
Open Lightroom Classic and go to the Develop section.
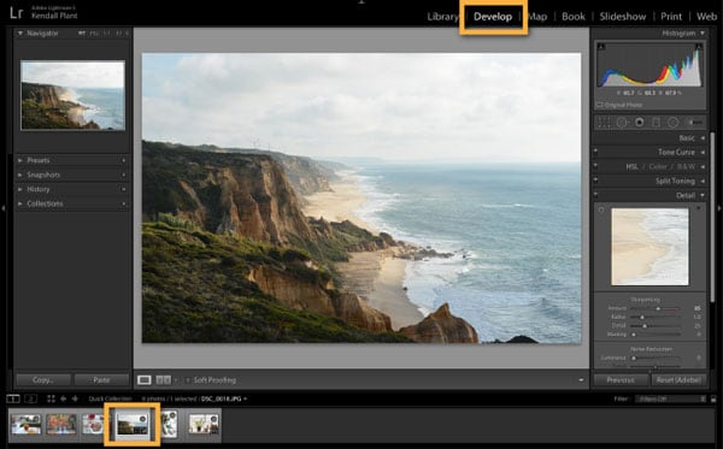
Step 2: Open the Detail Panel.
On the right side, you'll see a Detail panel. This is where you will sharpen your photo and make it clear.
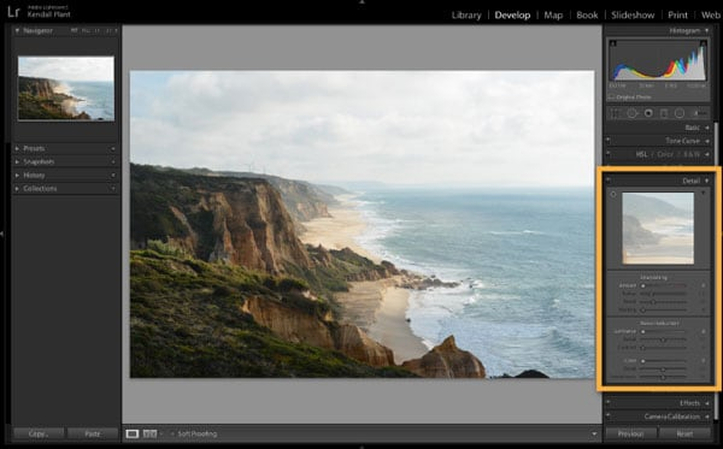
Step 3: Adjust Sharpening Settings
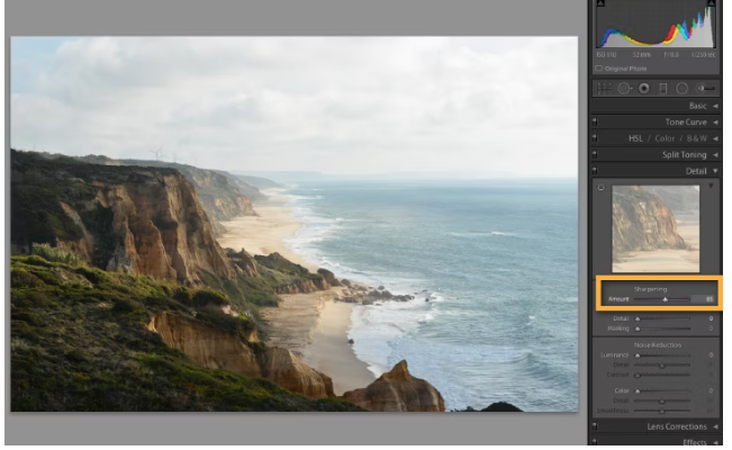
In the Detail panel, find the Sharpening section. Here, you'll find four sliders:
- Amount: This controls how sharp your photo will look. Move it to see the results in real time.
- Radius: This determines how wide the sharpening effect will apply around edges. For photos with lots of small details, like landscapes, keep this low.
- Detail: This controls how much sharpening is applied to fine details. A higher number makes textures clearer, while a lower number helps remove blurriness.
- Masking: This allows you to target specific areas for sharpening.
Step 4: Preview Your Changes
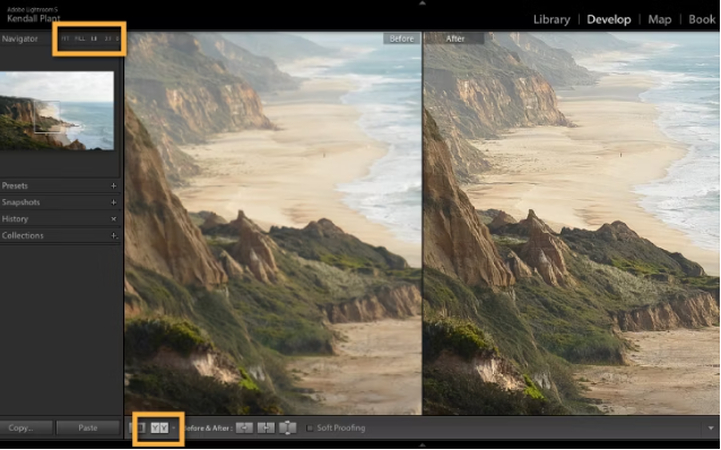
Once you have applied all these changes, preview it to see the results.
Method 2: Applying Clarity and Texture Adjustments
Although it is not strictly a sharpening tool, the clarity and texture slider can enhance the perceived sharpness of your photos significantly.
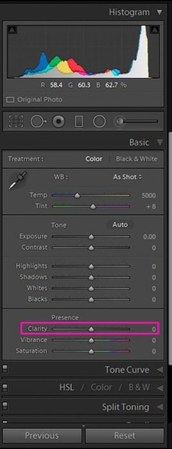
Here's how to use them:
- In the Develop module, find the basic panel.
- In Basic Panel, locate the Clarity and Texture sliders.
- Increase the Clarity slider for stronger mid-tone contrast. Start with a value around +20 and adjust to taste.
- Adjust texture to enhance fine details in the image. Begin with a value of +15 and fine-tune from there.
- However, while using it, make sure to be cautious because too much color can make the photo look unnatural or too harsh.
Method 3: Using the Adjustment Brush
If you are looking to sharpen a specific area, the adjustment brush is your best friend.
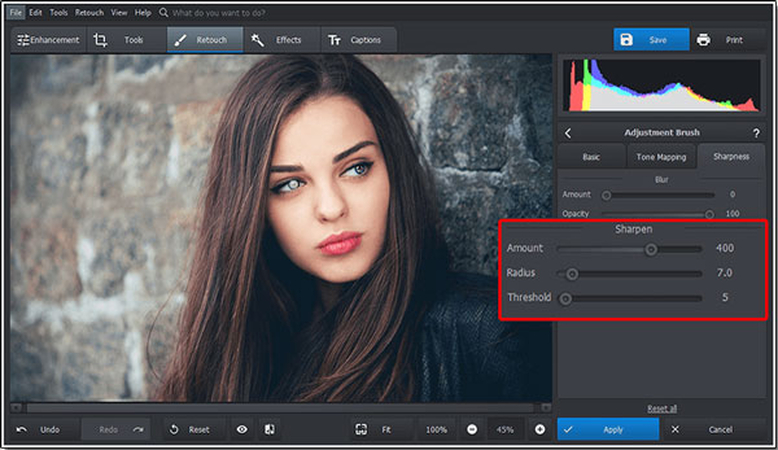
- Select the Adjustment Brush tool from the toolbar.
- In the tool panel, set Sharpness to a positive value (start with +50).
- Use feather and flow adjustments to control the brush's softness and intensity.
- Paint over the areas you want to sharpen.
This method is particularly effective for fixing focus issues in selective areas, such as eyes in portraits.
Method 4: Using Presets
Preset is particularly useful if you are looking for a time-saving solution to fix blurry photos.
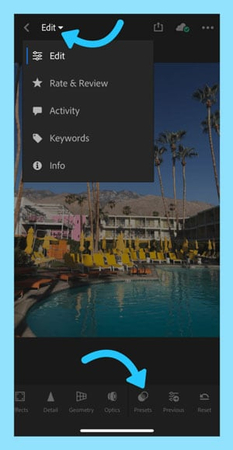
- In the Develop module, expand the Presets panel on the left.
- Browse for a sharpening preset that fits your image type (e.g., portrait or landscape).
- Hover over a preset to preview its effect on your photo.
- Click to apply the preset that best improves your image.
- Fine-tune the settings in the Details Panel if needed.
Method 5: Using the Basic and Details Panel
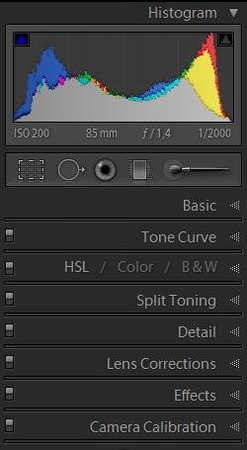
Sometimes, a combination of adjustments from different panels, such as the Basic and Details Panel, delivers the best results.
- Start in the Basic panel by adjusting exposure, contrast, and whites/blacks to enhance the overall definition of the image.
- Move to the Detail panel to fine-tune sharpening.
- Return to the Basic panel and fine-tune clarity and texture.
- Use noise reduction to balance any grain introduced by sharpening.
Method 6: Using Radial and Graduated Filters
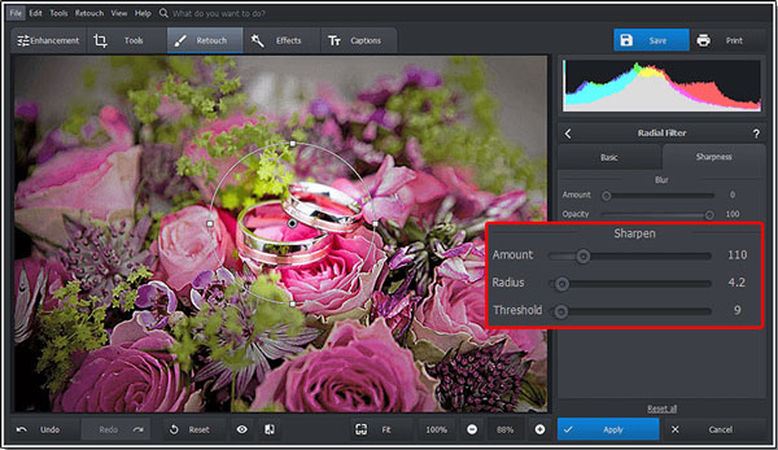
Radial and graduated filters offer a unique way to sharpen specific sections or add focus to an area. You can do this by:
- Selecting the radial filter or graduated filter from the toolbar.
- Then drag it across the area you want to sharpen.
- Next, adjust the sharpness and clarity sliders inside the filter.
- Now use Invert Mask for the Radial Filter if you need to sharpen inside the circle.
This technique is useful, especially for drawing attention to specific parts of your image.
Part 3: Advanced Tip: Fixing Blurry Photos with One Click
Although Adobe Lightroom provides a comprehensive solution to fix blurry photos, sometimes you might want a quicker solution. In this scenario, advanced tools like HitPaw FotorPea come in handy. Powered by AI, this amazing tool also analyzes the images and automatically applies the enhancement to correct blurriness.
Some of the main features of HitPaw FotorPea include:
HitPaw FotorPea - All-in-one Photo Editing Tool for Win & Mac
Secure Verified. 212,820 people have downloaded it.
- Easy-to-use interface to start the photo editing
- Batch processing to enhance multiple photos
- Noise reduction to make blurry photo clear
- Multiple AI filters to create stunning photo effects
Secure Verified. 212,820 people have downloaded it.
How to fix blurry photos with HitPaw?
Wondering how to use HitPaw FotorPea to fix blurry photos? Follow this step by step guide:
Step 1: Download and Install Hitpaw FororPea
First you need to download and install HitPaw FotorPea. Download and install the software from the official website.
Step 2: Upload the blurry Image you want to fix
Next, select “AI Enhancer” from the main menu and click on “Choose Files” to upload the blurry image that you want to fix. You can also upload it by using drag and drop option.

Step 3: Select the desired AI Model
Now from the given options, (Face Model, General Model, Denoise Model, Colorize Model, Color Calibration, Scratch Repair, Low-light Model) select the desired ai model.
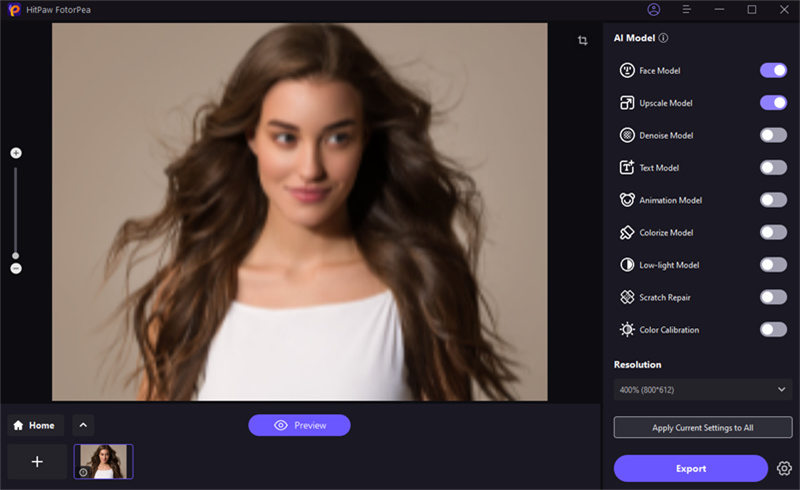
Then click on preview and wait for a few minutes and let the changes happen.
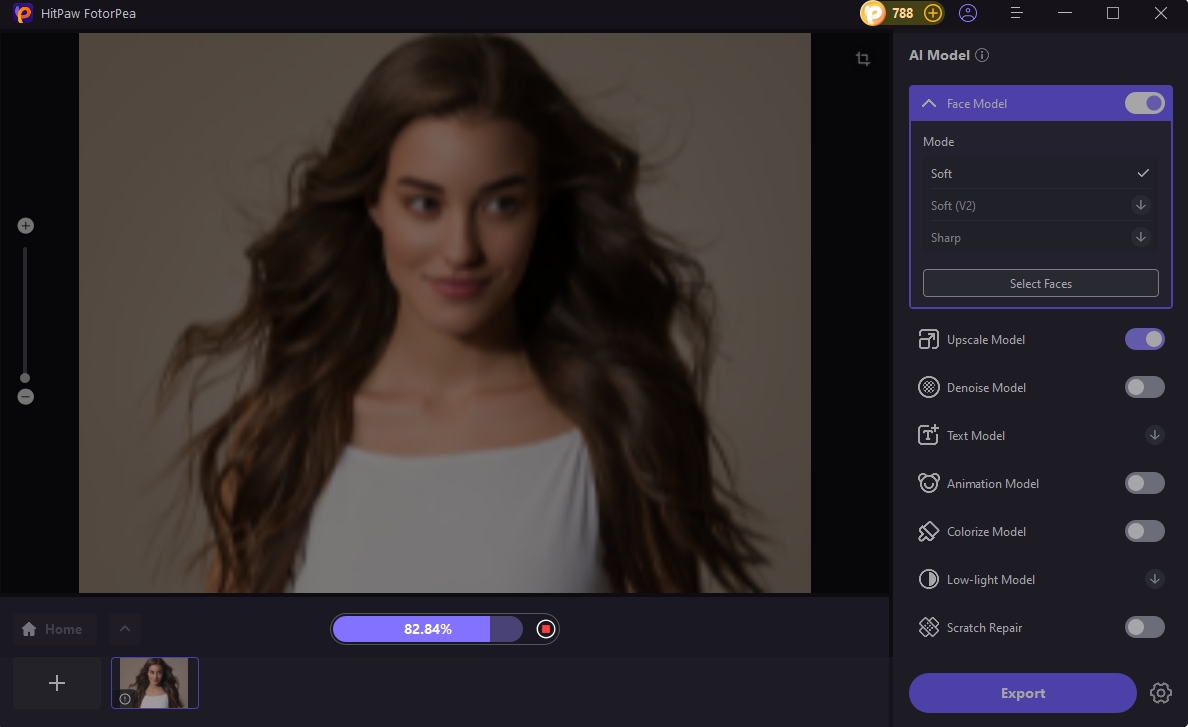
Step 4: Export the clear image
Now, preview the changes. You will see a clear and unblurry image on the right. If satisfied with the result, click on Export.
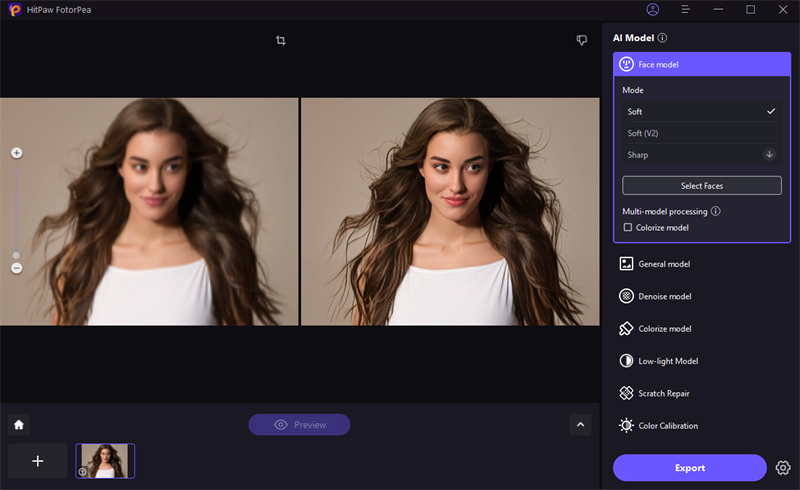
AI Tools to Fix Blurry Photos Easily
Part 4: FAQs about How to Sharpen Photos in Lightroom
Q1. Can Lightroom fix extremely blurry photos?
A1. Generally, Lightroom works well for slight to moderate blur, but to fix extremely blurry images, you may require advanced tools.
Q2. Does sharpening introduce noise to the image?
A2. Yes, oversharpening can add noise, but you can use the Noise Reduction tool to balance it out.
Conclusion
Lightroom is a comprehensive tool that offers various ways to fix the blurry photos. With methods like the Sharpening Panel, Adjustment Brush, and Clarity adjustments, you can enhance your photos and make them look professional. You now know how to fix a blurry photo in Lihgtoom but sometime this process may take longer than usual.
However, if you want a quicker solution, AI-powered tools like HitPaw FotorPea can be a perfect solution. Powered by AI, this amazing tool offers speed and convenience and can provide effective results in just one click. And the best thing is, using HitPaw FotorPea requires no additional skills.


 HitPaw Univd (Video Converter)
 HitPaw VoicePea
  HitPaw VikPea (Video Enhancer)

Share this article:
Select the product rating:
Daniel Walker
Editor-in-Chief
My passion lies in bridging the gap between cutting-edge technology and everyday creativity. With years of hands-on experience, I create content that not only informs but inspires our audience to embrace digital tools confidently.
View all ArticlesLeave a Comment
Create your review for HitPaw articles