Revive Your Images: How to Edit Photos with Bad Colors
While performing professional photography, you might place the camera wrongly and end up with bad colours.
You may also get the images' bad colors if there is not enough light on the subject you're aiming to click the credentials of. The good thing here is that you can fix the bad colors and we'll introduce how to edit a photo with bad colors.
Part 1. 4 Tips for How to Edit Photos with Bad Colors
Editing photos can improve the color quality by looking at the four key areas: contrast and brightness, saturation and vibrance, white balance, and individual color adjustments. All these approaches involve different levels of precision and control, enabling the elimination of the color cast, fine-tuning of specific colors, and upscaling of dull images. You can look at how to apply these 4 techniques to fix the images' bad colors.
1. Adjusting White Balance
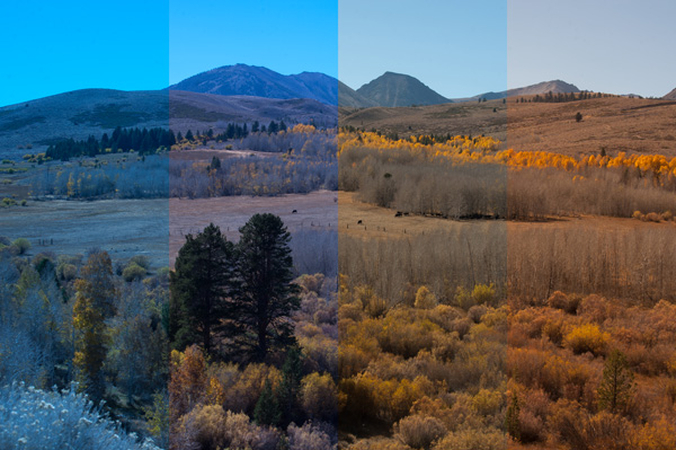
Correcting the white balance is handy when a picture has an unnatural color cast caused by a shoot creating the magenta tint, green, yellow, and blue.
1. Temperature:
You can control the yellow and blue tones in the photos by adjusting the temperature controls. If you take a photo under cool light, it could turn blue, and you can adjust the picture's temperature to balance the images' colors. Similarly, if you notice that the photo is too warm, you'll need to drag it to a blue color to correct the colors.
2. Tint:
This adjustment lets you fix the magenta or green color casts. If the image has a greenish hue, you must slide the tint towards magenta. This will eliminate the greenish hue and make the image look relevant and attractive.
2. Enhancing Saturation and Vibrance
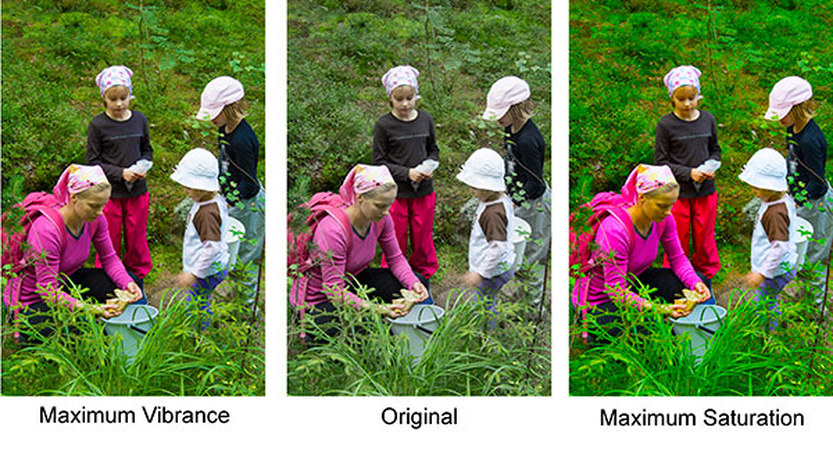
Enhancing the vibrance and saturation could help make the image look vivid when the photo's color appears dull.
1. Saturation:
You can use the slider to increase the all colors's intensity effortlessly. Small increments might also fix the bad image colors affecting the photos' color positively.
2. Vibrance:
The tool comes up with a sophisticated and subtle nature compared to the saturation.
Opting for the Vibrance tends to increase the intensity of the muted colors without messing up with the saturated colors. Doing so helps you boost the overall cold of the images without making the vibrant areas and skin tones too harsh.
3. Tweaking Contrast and Brightness
Although brightness and contrast can't change the color directly, they can affect the direction of the colors getting perceived by changing the overall time of the photos. Adjusting the brightness and contrast could help you make the images' colors look good and improve their clarity.
1. Contrast:
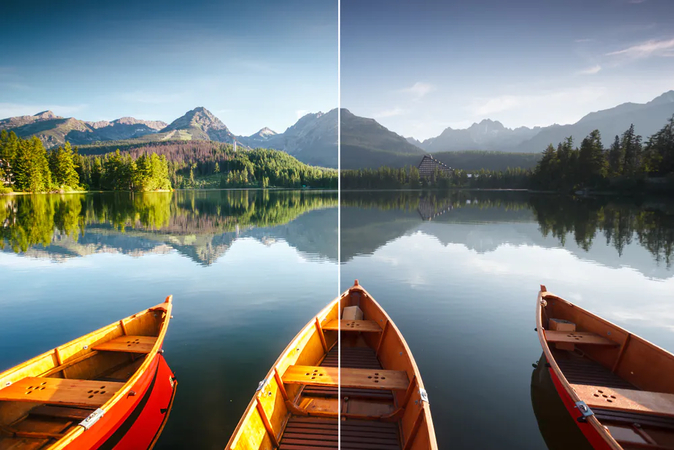
Increasing the contrast will deepen the dark area, brightening the lighter areas of the photos.
Doing so assists you in making the colors look more vibrant, but too much contrast can cause the images to lose details in the highlights and shadows. Although lowering the contrast could make the photos look flat, it can help bring out the subtle colors.
2. Brightness
You can alter the image's overall light level by customizing the brightness of the images. If you over-brighten the images, you can wash out the colors, and underexposing them might make the colors look muddy. Customizing the brightness and contrast could be the balancing act, allowing you to maintain the colors' natural feel.
4. Fine-tuning Individual Colors
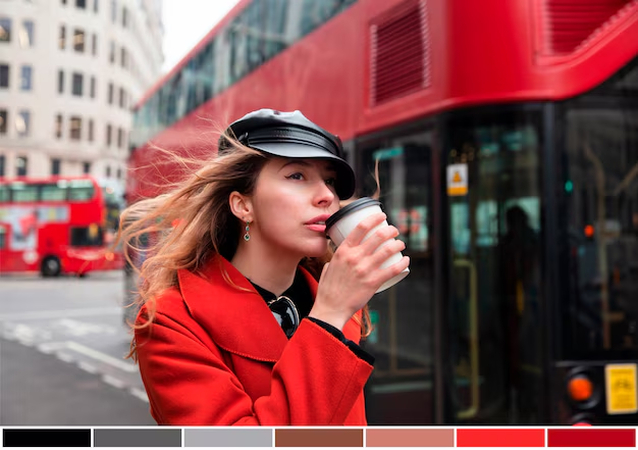
If you want to go for the precise colors editing, you've got the leverage to use the Hue, Luminance, and Saturation to tweak the specific colors without messing up with the rest of the photos.
1. Hue:
It lets you shift the specific colors's tones. For instance, if the sky in the image looks too purple, you can customize the blue hue slider to make the sky look more exciting.
2. Saturation:
If one color is too weak or strong compared to the others, you can control and adjust the saturation of the colors independently. Doing so helps you to control the greens in landscapes, skin tones and color pops in the images.
3. Luminance:
Luminance holds the ability to control the individual colors' brightness. For instance, you wish to brighten the sky's blue color without altering the overall exposure of the images. You can also create a subtle contrast through Luminance adjustments within the specific color ranges.
Part 2. The Best Tool to Correct Photo Colors with HitPaw FotorPea
HitPaw FotorPea might be your first choice if you want to automatically fix the colors of the photographs after learning how to manually edit a photo with poor color. With this tool, you can explore 9 mind-blowing AI models, including the low-light model, which lets you upscale the credentials of the images quickly. Because HitPaw FotorPea supports batch processing, it is able to adjust the color of numerous photographs at once.
Features
- Enables you to correct the colors of the images through low light model
- Prompts simple user interface
- Doesn't affect the quality of images
- AI powered photo quality enhancing
- No watermark detected
- No ads found
Correct the photo colors with HitPaw FotorPea?
Step 1: You must install and then run the software after going to HitPaw FotorPea's official website. To enhance the quality of your photo, click the Image Enhancer option and import the desired file.

Step 2: The nine gorgeous AI models are now shown on the screen. The light and color quality of the photos will be enhanced by choosing the Low Light Model.
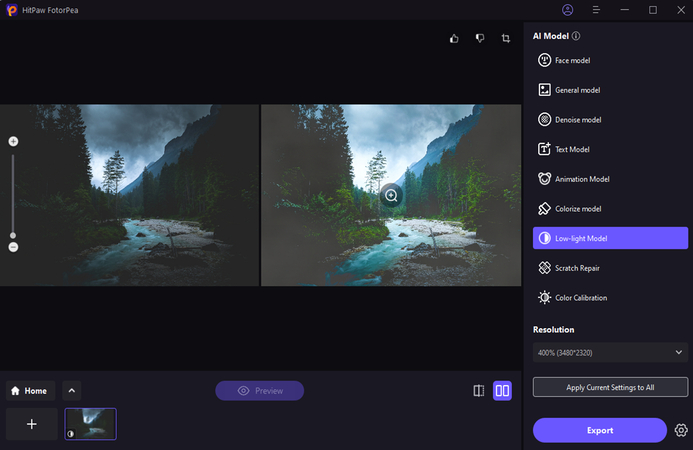
Step 3: In this phase, you'll need to tap the Preview button to review your changes and press the Export icon to download the images.
Part 3. FAQs on How to Edit Photos with Bad Colors
Q1. How can I make a poor-quality image better?
A1. You can rely upon multiple corrective techniques to fix the issues in Gbe images, including poor lighting, low contrast, and bad colors. You may use this leverage to fine-tune the individual colors of the photographs, alter the white balance, brighten and contrast, increase vibrance and Saturday, and lessen noise and sharpening.
Q2. How to smooth a pixelated image?
A2. If the resolution of the images looks lower than you expect, pixelation will make it difficult to see the images appropriately by the naked eye. Although adding details to pixelated images is also impossible, you can enhance them by reducing the noise, using the blur tool, upscaling the image, and using sharpening techniques.
Bottom Line
If you're dealing with the bad colors on the images and want to learn how to edit a photo with bad colors, this post could be a game changer. We have shown how the 4 tips, including adjusting the white balance, enhancing the vibrance and saturation, tweaking the brightness and contrast, and fine-tuning the individual colors, could elevate the quality of the colors.
The HitPaw FotorPea is the greatest tool available for adjusting the color of your photos so they appear amazing and commendable. Nine AI models are offered by HitPaw FotorPea to improve image quality. It also provides AI-powered technology and an easy-to-use UI.


 HitPaw Edimakor
 HitPaw Univd (Video Converter)
  HitPaw Watermark Remover

Share this article:
Select the product rating:
Daniel Walker
Editor-in-Chief
My passion lies in bridging the gap between cutting-edge technology and everyday creativity. With years of hands-on experience, I create content that not only informs but inspires our audience to embrace digital tools confidently.
View all ArticlesLeave a Comment
Create your review for HitPaw articles