Full Guide on How to Adjust Contrast on Cutout Images
The contrast of the images is fairly important to make the images look stunning and exciting. Since you tend to click the images in natural light, controlling the environment isn't possible. What you can do is to adjust the contrast of the images to make it relevant and that's what this guide is all about.
If you're looking to learn how to adjust the contrast on cutout images, this post is all set to introduce fascinating ways to help you customize the contrast of the images efficiently.
Part 1. How to Adjust Contrast on Cutout Photoshop?
When it comes to adjusting the contrast of the images, Adobe Photoshop remains one of the best ways to edit the photos and make them according to the requirements. Adobe Photoshop offers various features to customize the brightness and contrast of the image and those ways are listed below.
1. Through Contrast/Brightness Adjustment Layer
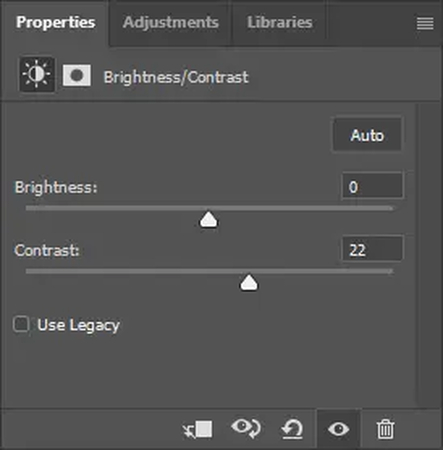
The Contrast/Brightness adjustment layer helps you to alter the number of shades between the darkest areas and lightest areas of an image. In other means, you've got the leverage to customize the tonal range of the images.
If you tend to move the brightness slider, it will favour the shadows and highlights making the images darker or brighter. However, if you want to move your contrast slider, you tend to shrink or expand the photo's tonal range. If you're looking to broaden the tonal range, it will increase the contrast of the images.
Follow the detailed guide below to use the contrast and brightness adjustment layer of Adobe Photoshop.
Step 1: Navigate to the Later button, choose the New Adjustment Layer icon, and select the two Brightness/Contrast buttons.
Step 2: Drag the slider that tends to control the contrast to your right side to enhance the contrast of the images. This type of contrast will range between -50 and 100.

2. Using the Curves Adjustment Layer
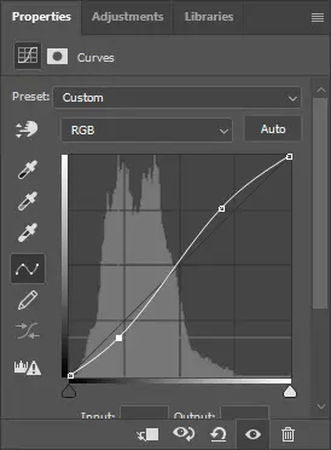
The Curves Adjustment is another fascinating tool that helps you to customize the tonal range of your images. Rather than using the slider via contrast and brightness adjustment, the curves will represent the tonal range as your straight diagonal, enabling you to move the control points down or up.
In this scenario, you've got the leverage to use the Curves tool's background to improve the contrast of the images. Here's how to adjust the contrast on the Cutout adjustment via the Curves Adjustment Layer
Step 1: Navigate to the Layer button and choose the New Adjustment Layer before hitting the Curves button.
Step 2: Visit the highlights press on the curve line and define the control points. Next, you'll need to drag the control point to your left or upside. In the next stage, you'll need to press on the curve line in your shadow area before defining the control point. Proceed ahead by dragging the control point to the down or right side. This way you'll be able to customize the contrast of the images making it look wonderful and spectacular.

Part 2. The Best Tool to Adjust Images Contrast with HitPaw FotorPea
Using Adobe Photoshop to customize the contrast of the images is surely worth your attention but Adobe Photoshop could end up affecting the quality of the images and new users might also find it difficult to use Adobe Photoshop. Thus, you can rely upon the color calibration model of the HitPaw FotorPea that allows you to adjust the lighting of the images appropriately eliminating overexposure or underexposure of the images.
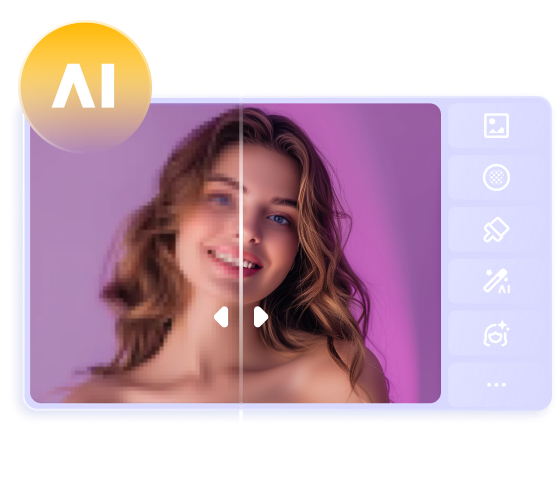
While adjusting the contrast of the images, HitPaw FotorPea tends to maintain the quality of the photos and since it offers AI powered technology, you'll be able to adjust the color calibration of the images automatically.
Features
- Enables you to adjust the contrast of the images through the Color Calibration model
- Customize the contrast of multiple images simulataneosly
- No image quality loss was detected when adjusting the contrast of the images
- Compatible with Mac and Windows
- Preview the images before downloading
- Explore the 9 stunning AI models
How to make color calibration with HitPaw FotorPea?
Step 1: Visit the official website of the HitPaw FotorPea and click on the Download button to download the software on the computer. Next, you'll need to install the HitPaw FotorPea on the PC and start the tool afterwards. Upon launching the software, you'll need to press on the AI Enhancer button and then click on the Choose Files button.
Doing so helps you to import the photos you want to apply the color calibration model into. HitPaw FotorPea is also compatible with batch enhancing, meaning you can import multiple images simulataneosly and since it supports plenty of image formats, importing the images in various image formats is also possible.

Step 2: After navigating to the main window of the HitPaw FotorPea, you'll need to select the Color calibration as doing so helps you to adjust the parameters of the lighting on the images.

Step 3: Click on the Preview button to review all the attributes of the images, as doing so allows you to apply the color calibration model to the images quickly. After getting the images reviewed you'll need to select the Export button to download the photos into the computer.
Part 3. FAQs of How to Adjust Contrast on Cutout
Q1. How to adjust monitor contrast?
A1.
If you want to customize the monitor contrast, you'll need to acess the monitor settings and visit the Brightness/ Contrast section by using the directional buttons. After choosing the Contrast, you'll need to adjust its value by using the ''-'' or ''+'' buttons.
Set the contrast setting to the %70-80% and adjust it according to the lighting and comfort of the environment. Next, you'll need to quit the menu and save your adjusted settings, and most of the monitors will apply the changes automatically.
Q2. How do I fix high contrast?
A2.
High contrast could occur courtesy of the system accessibility settings, graphics driver issues and monitor configuration. If you're a Windows user, you can launch the settings and click on the Ease of Access button afterwards. Press on the High Contrast icon and enable the High Contrast by toggling the switch.
If you want to apply the changes, you're required to restart the computer. If you're a Mac user, you'll need to visit the System Preferences and choose the Accessibility button and Display icons afterwards. Unchecking the Increase Contrast will then help you to fix the high contrast.
Conclusion
Adjusting the contrast of the images is compulsory to make the images look exciting and relevant. We've listed Adobe Photoshop as an appropriate way to learn how to adjust the contrast on Cutout Photoshop.
Although Adobe Photoshop is an appropriate way to customize the contrast of the images, it brings in the hectic user interface, so aiming at the HitPaw FotorPea is by far the best way to adjust the contrast on the images. It brings in the colour calibration model to improve the credentials of the images' lighting and this tool offers all the necessary ingredients to make the lighting of the photos according to your requirements.


 HitPaw Edimakor
 HitPaw VikPea (Video Enhancer)
 HitPaw Univd (Video Converter)


Share this article:
Select the product rating:
Daniel Walker
Editor-in-Chief
My passion lies in bridging the gap between cutting-edge technology and everyday creativity. With years of hands-on experience, I create content that not only informs but inspires our audience to embrace digital tools confidently.
View all ArticlesLeave a Comment
Create your review for HitPaw articles