Clarity AI Image Upscaler & Enhancer: Transform Your Visuals with AI
Images could play a brilliant role in promoting the business, and you can also click the images for beautiful memories. Unfortunately, clicking the perfect images in one go isn't a possibility, and that's where the role of the photo quality enhancer comes into play.
Although you can watch out for several photo quality enhancers, Clarity AI remains one of the most exciting photo-enhancing tools. Tune into this guide to learn everything about Clarity.AI and we'll also talk about the step-by-step guide to use the Clarity photo enhancing tool.
Part 1. What is Clarity AI Image Upscaler & Enhancer?
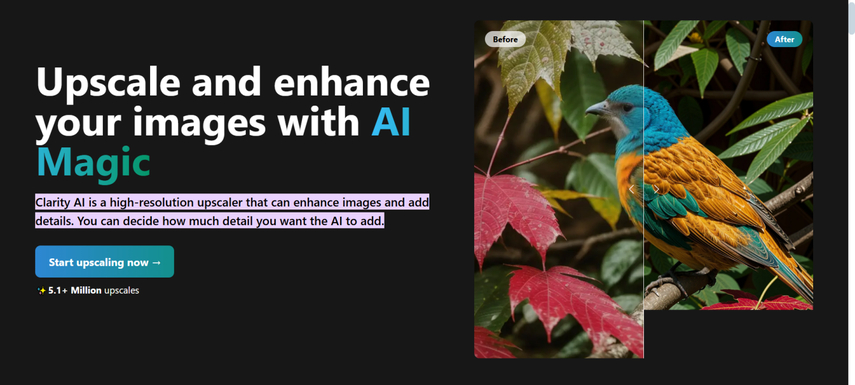
Clarity AI Image Enhancer and Upscaler is a powerful advanced tool that relies upon artificial intelligence to improve the overall quality of images and enhance the image resolution. Apart from enabling you to enhance the overall credentials of the images, Clarity AI also allows you to produce the AI-generated images by entering the text description.
With this tool, you can surely make the images look visually appealing, more detailed, and sharper. Regardless of which type of the images you want to edit, Clarity ensures that the images look stunning and attractive. While enhancing or creating the images, this tool tends to maintain the quality of images, and since Clarity.AI supports the batch creation, you've got the chance to create multiple images simultaneously.
Features
- Allows you to upscale the photos to up to 4K allowing you to preserve the details
- Helps you to reduce the noise of the images
- Adjust the brightness, saturation and tones
- Supports batch processing meaning you can enhance the creation the multiple images simulataneosly
- Offers the simple user interface, no prior knowledge required
- Compatible with Mac, Windows, and online
Part 2. How to Use Clarity AI: Step-by-Step Guide
Clarity.ai relies upon neural networks to assess each pixel of the photos and lets you to enhance the credentials of the images effortlessly. This tool offers a high-quality feature that helps you to replicate the patterns and textures, and fine-tune the details of images. If you want to enhance the images or intend to create the photos, you can look at the detailed guide below to use the Clarity AI.
Step 1: Visit the official webpage of the Clarity AI and then press on the Upscale button before importing the photo you want to enhance.
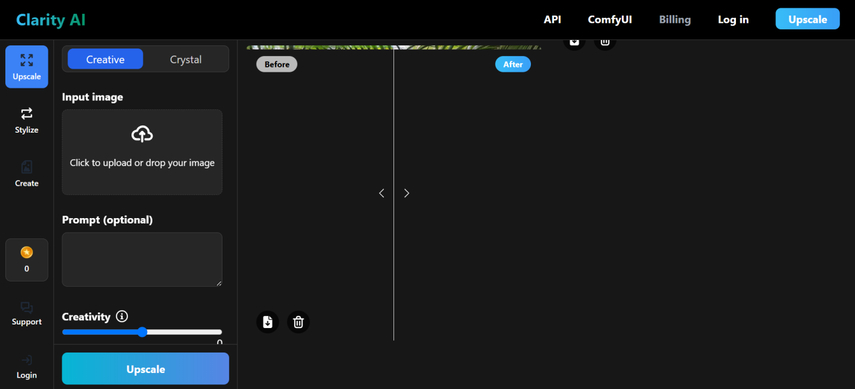
Step 2: Once you're done importing the images, you'll need to click on the Prompts button to apply the custom changes to the images through text description.
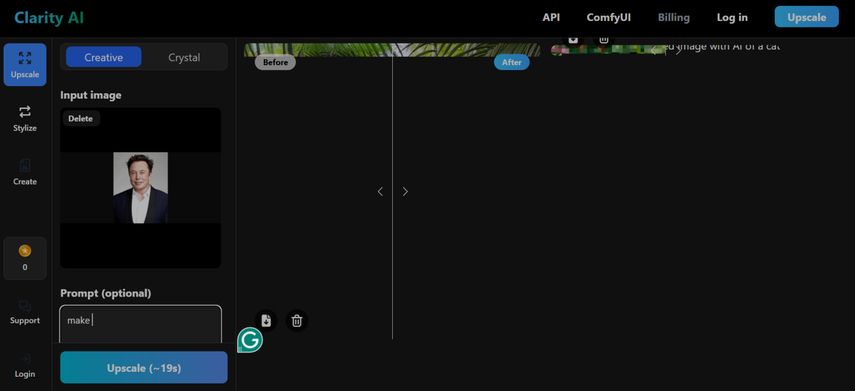
Step 3: After selecting all the necessary parameters, you'll need to tap on the Upscale button and doing so, begin enhancing the images appropriately.
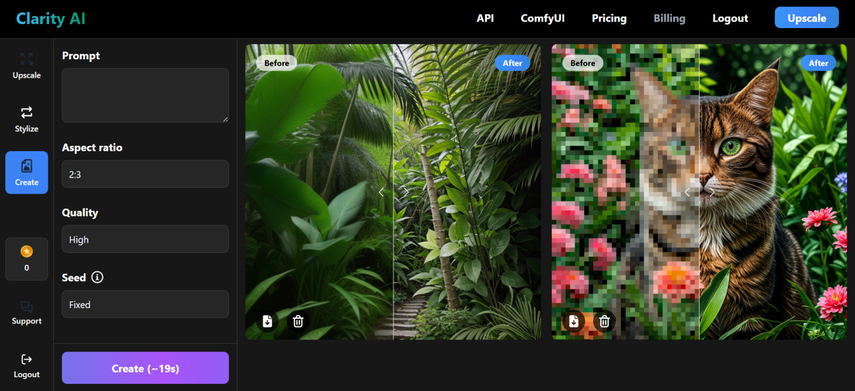
Step 4: If you want to create the AI generated images via text prompts, you can click on the Create button, and then you can type in the written text description of what you want to create.
Now, you've got the leverage to select the appropriate quality, seed and aspect ratio. Tap on the Create button afterwards to initiate creating the AI generated images based on the text descriptions you've entered.
Part 3. The Best Alternative to Clarity AI with HitPaw FotorPea
Clarity.AI is an appropriate tool to create and enhance the images, but it doesn't perfrom the necessary operations on the images quickly. Hence if you want to enjoy the ads-free experience while creating and enhancing the images, HitPaw FotorPea enables you to elevate the quality of the images to the next level.
Apart from bringing in the simple user interface, HitPaw FotorPea ensures that you could enhance the quality of multiple images simulataneosly.
HitPaw FotorPea is compatible with the Mac and Windows, and when it comes to image generation, you've got the chance to apply the stunning styles and designs to the images. On top of that, HitPaw FotorPea doesn't input the watermark in the exported images, offering the amazing free trial version.
Features
- Perfect alternative to Clarity AI to create and enhance the images
- Compatible with Mac and Windows
- Retains the original image quality while enhancing and creating the images
- Enables you to enhance the multiple photos simulataneosly
- Explore the 9 outstanding AI models
- No watermark was detected during the photo enhancing and image creation
1. Enhancing the images
Step 1: Visit the timeline of the HitPaw FotorPea and then download the software afterwards on the computer. In the next stage, you'll need to install the tool and click on the Install icon to install the software and then you'll need to start the software.
Click on the AI Enhancer button and then hit the Enhance Photos Now button to import the image you wish to enhance. Since HitPaw FotorPea supports the batch processing, you can upload the multiple images simulataneosly.

Step 2: In this phase, you'll need to enter the 9 flawless ai models on the images, and the significant thing to like about the HitPaw FotorPea is that it allows you to apply the multiple AI models to the images.
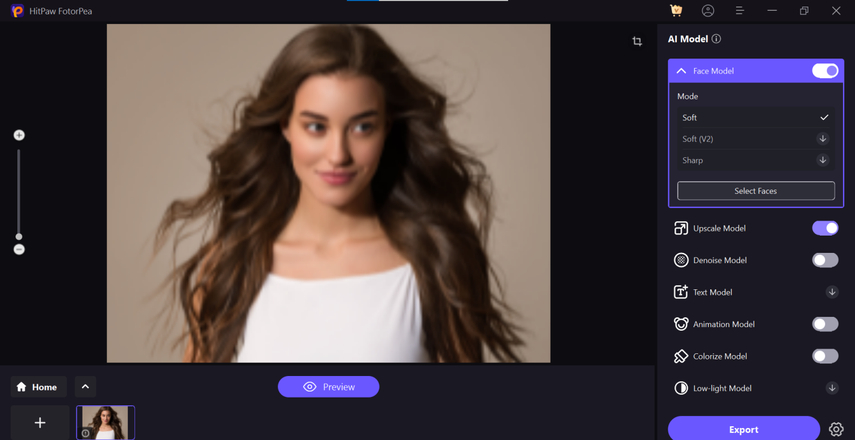
Step 3: After applying the preffred AI models, you'll need to tap on the Preview icon to initiate applying the exciting AI models to the images. Apart from reviewing the images, you can also download the enhanced images by hitting the Export button.
2. Generating the images
Step 1: After starting the HitPaw FotorPea, you'll need to tap on the Enhancer button and choose the AI Generator icon afterwards. Next, you'll need to click on the Type What you Want to see and the type in the text description of what you wish to create.
If you don't like the initial results of the images, you can replace the text description with a new one.
Apart from enabling you to create the AI generated images through text description, HitPaw FotorPea also allows you to upload the photos and then apply the outstanding filters and effects to the images.

Step 2: In this phase, you'll need to select the image style, design, and resolution of the images. Fortunately, you can also select the number of images you want to create, and if you want to generate multiple photos, HitPaw FotorPea also supports the batch creation.
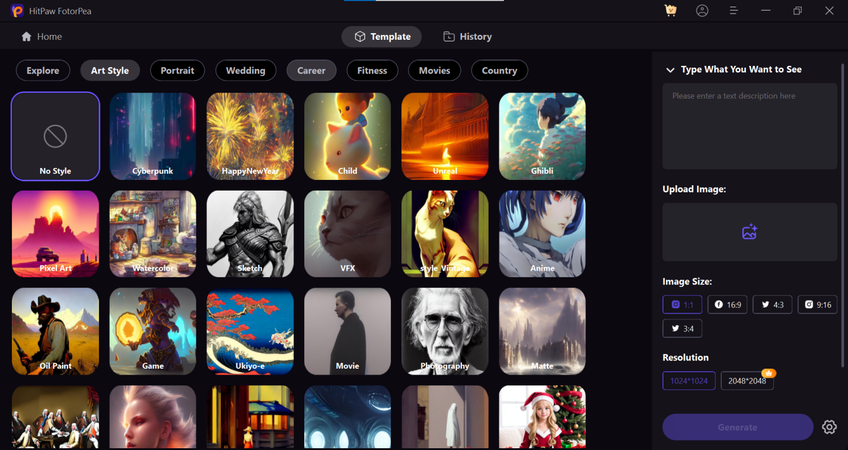
Step 3: Once you're done selecting the image styles, you'll need to hit the Generate button.
Doing so will let you create the images quickly, provided you've got the fast internet connection. After reviewing the generated images, you'll need to hit the Download button to export the images to the computer.
Final Thoughts
When it comes to enhancing the images or generating the photos through text description, Clarity.ai appears to be one of the most prominent ways to customize the images. Although the effectiveness of Clarity.AI in enhancing and creating images is huge, it could take extra time to generate the results, and annoying ads could appear your way during the image generation and image enhancement.ss
Thus, HitPaw FotorPea becomes the best alternative to the Clarity AI that allows you to enhance the images enabling you to create the photos effortlessly. It supports the batch creation, meaning you can create and enhance the multiple photos simulataneosly.


 HitPaw Edimakor
 HitPaw VikPea (Video Enhancer)
 HitPaw Univd (Video Converter)


Share this article:
Select the product rating:
Daniel Walker
Editor-in-Chief
My passion lies in bridging the gap between cutting-edge technology and everyday creativity. With years of hands-on experience, I create content that not only informs but inspires our audience to embrace digital tools confidently.
View all ArticlesLeave a Comment
Create your review for HitPaw articles