How to Add Film Grain in Photoshop: A Step-by-Step Guide
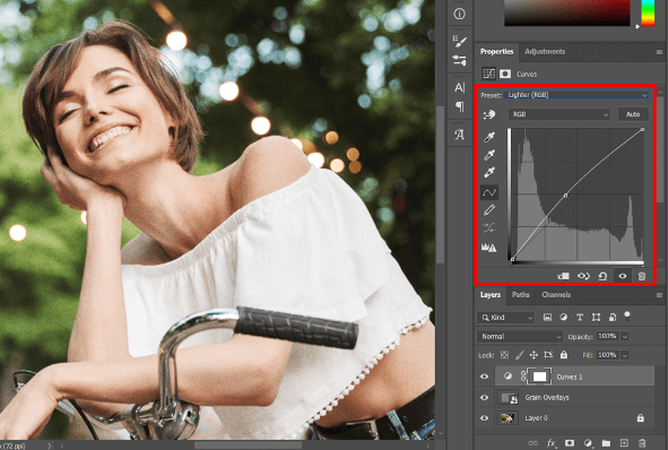
In terms of photography, film or movement grain is also known as grain simply because it introduces a certain degree of grain in the images. It also means that by adding Grain in this digital age that now provides a photograph of the light accurately, you are bringing a tangible texture that provides it with a purpose of memory, tradition, and realism.
This tutorial is on how to work with the film grain in Photoshop. It is based on three principles and in addition to the three principles, there are other guidelines on how to improve your images and the section in questions and answers. Lastly, you will be preparing yourself to apply the grain to the photos on your own.
Part 1. How can you Add Grain to a Photo in Photoshop?
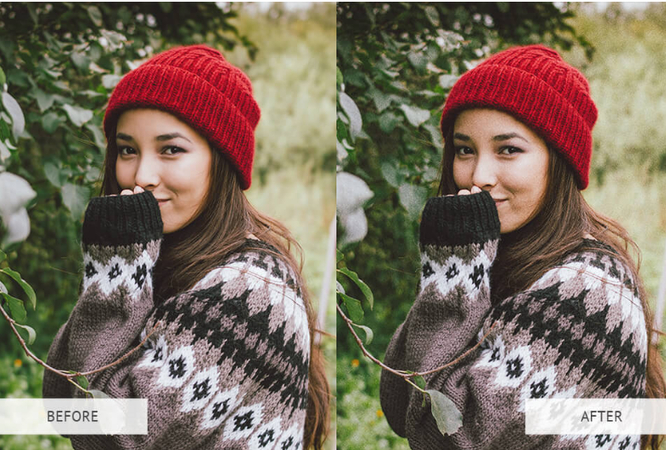
Here are three methods to add film grain to your photos in Photoshop:
Method 1: Converting Layer to Smart Objects for Noise Addition
This method allows us to include or exclude grain and make changes to it if necessary.
1.First of all, open the picture in Adobe Photoshop program.

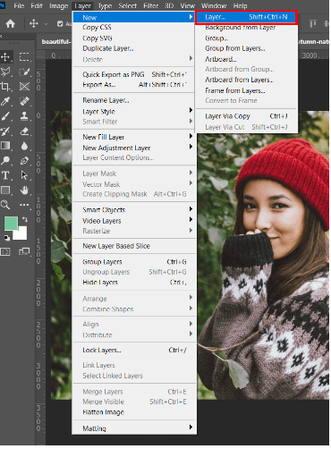
2.Locate the Layers panel.

3.Next, duplicate the background layer in the image in order to work on the copy of the image while keeping the original one intact.
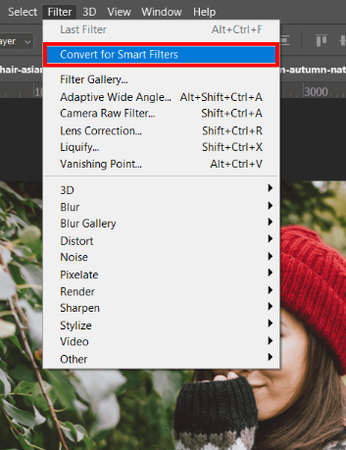
4.After all layers are selected, navigate to the Layers panel and, right click on the duplicate later on the right. When done, you can now choose convert to smart object.

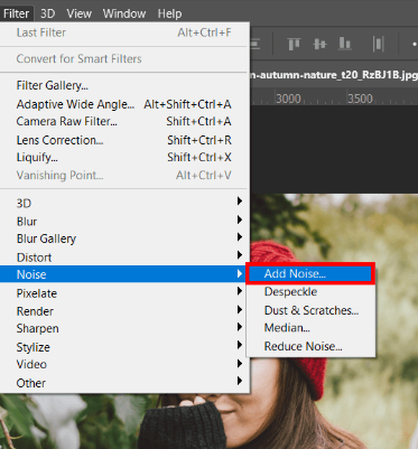
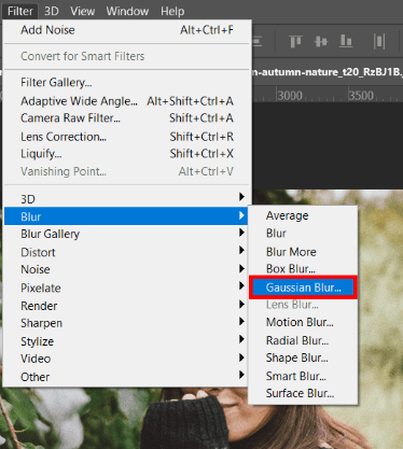
5.If you're going to filter, moving towards the top menu bar, you select noise from there.

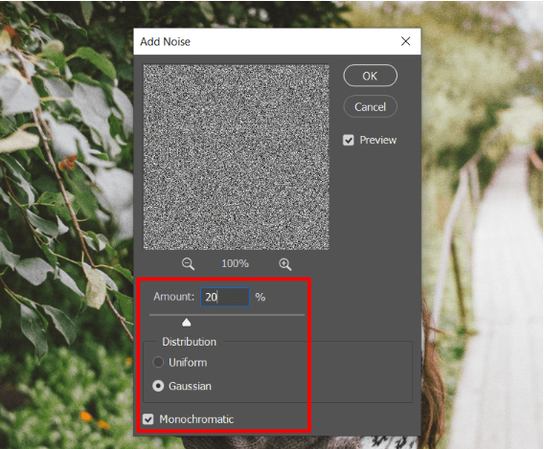
6.The final window shall be the Add Noise window. Currently, you have Grain's distribution rights.

7.For increasing the amount of more detailed grain, the slider should be moved to the right, and for decreasing the volume of such grain, it should be moved to the left. Greater values suggest a denser weight.
8.These are Gaussian, which creates a fine grain, and Uniform, which creates a random grain pattern.

9.Select this so that the grain is Only Grayscale to avoid color noise being introduced into the image.
10.Click OK now the noise is added.
Method 2: Adding a Grain Overlay to Photos
This method chooses a pre-made grain texture.
1.Search for suitable grain texture of good quality on the Internet, or simply select the files provided.

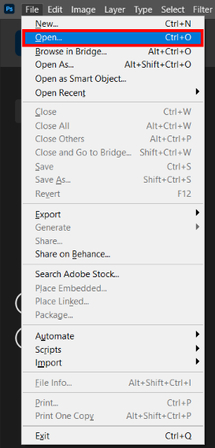
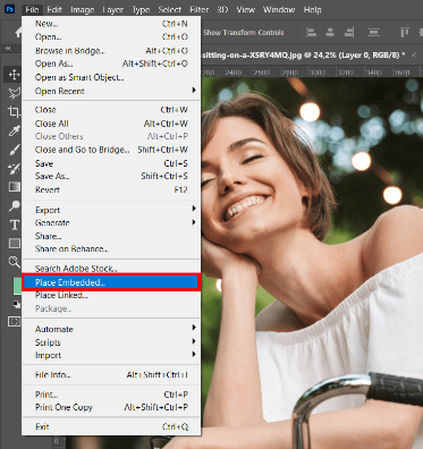
2.Now, return to the first visual. On the toolbar, click File, navigate to Select Place, and select the grain texture from a list.

3.It will look like a separate layer is added to the texture.

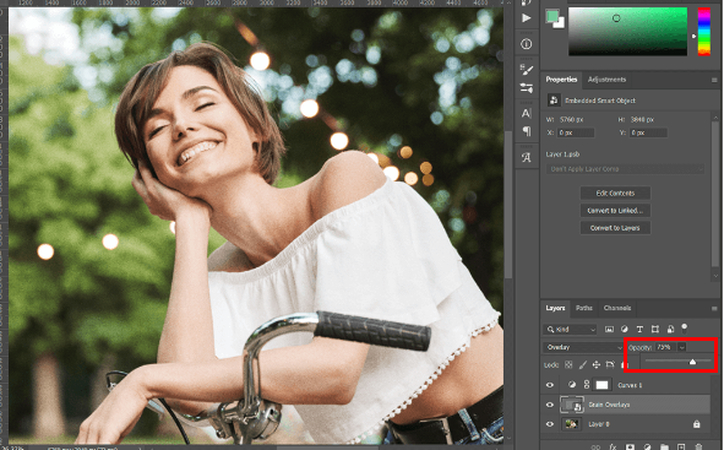
4.To control the grain effect, change the opacity of the layer.

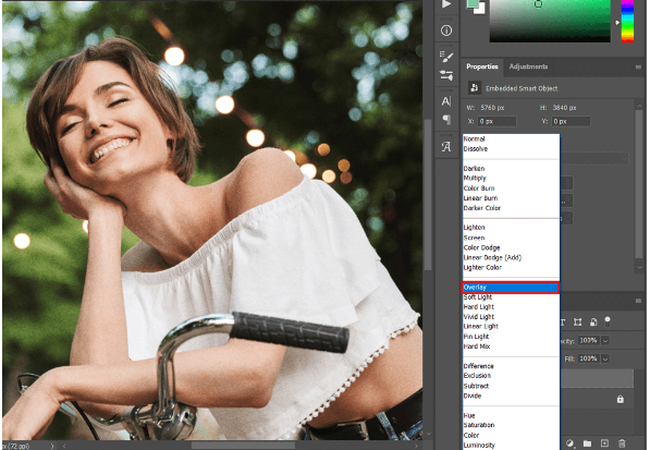
5.Set a blending mode like Overlay or Soft Light to achieve the required grain look.
Method 3: Accessing the Film Grain Filter in Photoshop
This method opts for a built-in Photoshop filter. This is a specialized feature specifically for adding film grain.
1. In the Layers panel, make sure that you are working on the layer where you have decided to add Grain.
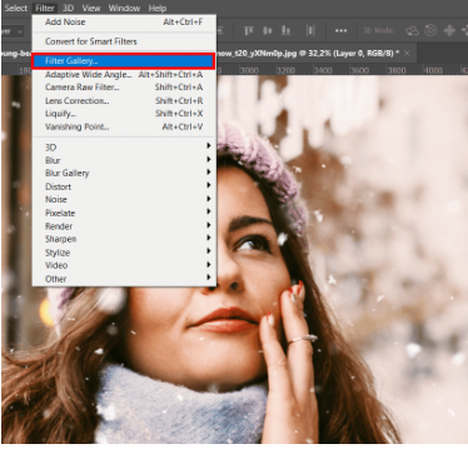
2. Now, move to the top menu bar. You will see the filter; from there, select noise and then film grain.
3. The Film Grain window will appear. You can use them in the following ways:
- Adjust the slider to control the intensity of the Grain.
- Adjusts the grain visibility in brighter areas of the image.
- Adjusts the grain visibility in darker areas of the image.
- Controls the size of the individual grain particles.
- Controls how the Grain is distributed throughout the image.
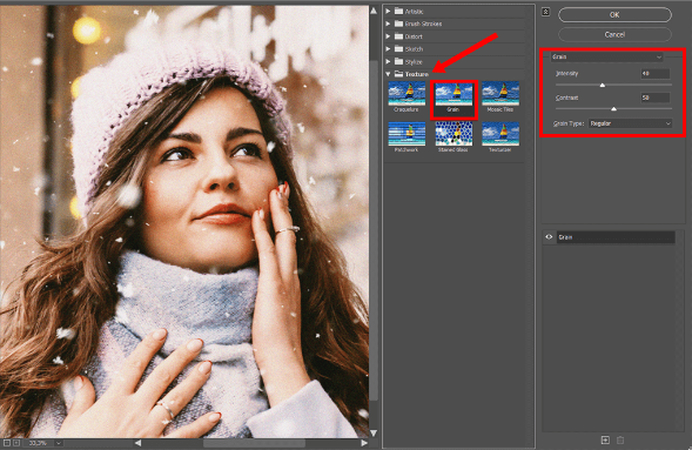
4. Now click on OK to apply the film grain effect.
Part 2. Bonus Tips to Enhance Grain Effect on Photos
Even though you can add film grain in Adobe Photoshop, there are more things you can try to improve grainy pictures further. For this reason, you can consider using HitPaw FotorPea, one of the most powerful AI-based photo editing tools out there.
HitPaw FotorPea offers a comprehensive suite of photo editing tools, including features specifically designed to enhance images with Grain.
Key Features for Enhancing Grainy Photos:
HitPaw FotorPea - All-in-one Photo Editing Tool for Win & Mac
Secure Verified. 212,820 people have downloaded it.
- Tweak the degree of graininess of your blurry image
- Adapt and change the color and contrast
- AI noise reduction tool to make photo clear
Secure Verified. 212,820 people have downloaded it.
How to Use HitPaw FotorPea to Enhance Grainy Photos:
Step 1.Upload your grainy image into HitPaw FotorPea.

Step 2.You have the option to use the "Noise Reduction" tool if you are looking to subtly reduce any excessive graininess.

Step 3.Preview and save the image in the format you want.

AI Tools to Fix Grainy Photos Easily
Part 3. FAQs about How to Add a Grain Effect in Photoshop
Q1. How to create a grainy effect in Photoshop?
A1. Go to Filter > Noise > Add Noise, make sure the distribution is set to Gaussian and check the Monochromatic option.
Q2. What is the procedure followed to modify the level of Grain in the film?
A2. When working in Photoshop, the amount of film grain that can be added to your photograph can be fine-tuned using the 'Amount' slider in the 'Add Noise' filter or the layer of grain texture layer that has been added onto the photo's layers. Remember that a movie may require a different background than a documentary and that you should change the settings accordingly.
Conclusion
You can also use film grain overlays in your digital images to introduce an antique, rich, and artistic feel to your pictures. In Photoshop, one can employ the 'Add Noise' filter, use grain textures, or employ some of the most sophisticated photo editing tools, such as HitPaw FotorPea. Thus, using these techniques and having fun with the settings, you can make pleasant images that will associate people with traditional film photography.




 HitPaw Univd (Video Converter)
 HitPaw VoicePea
  HitPaw VikPea (Video Enhancer)

Share this article:
Select the product rating:
Daniel Walker
Editor-in-Chief
This post was written by Editor Daniel Walker whose passion lies in bridging the gap between cutting-edge technology and everyday creativity. The content he created inspires the audience to embrace digital tools confidently.
View all ArticlesLeave a Comment
Create your review for HitPaw articles