3 Tools to Turn My Photo into AI Glasses Designs
After creating your photo, it might have happened that you wanted to add the glasses to your face in the images. In this scenario, you might want to learn how to add the glasses to the images.
Fortunately, you can find several ''my photo to AI glasses'' tools that can help you to add flawless and AI-generated glasses to the images making them look flawless and splendid. Despite the presence of multiple options, finding the best option remains a daunting thing, but this guide is all set to introduce the 3 mind-blowing methods to add the glasses to the images.
Part 1. 3 Tools to Try My Photo to AI Glasses
1. The Best Tool to Add Glasses to Photos with HitPaw FotorPea
In HitPaw FotorPea you've got the best option to create the AI generated images with the people appearing in the images wearing the glasses. HitPaw FotorPea only asks you to type in the text description of what you want to create, and if you want to upload the custom images and would love to instruct the HitPaw FotorPea to apply the glasses effects to the images, this tool brings in the stunning adding glasses feature for you.
On top of that, HitPaw FotorPea will ensure that the quality of the images remains superb while creating the images and there will not be any watermark in the images.
Features
- Best my photo to AI glasses tool to make the images look standout
- Offera simple user interface no need prior knowledge
- Retains the image quality when creating the AI-generated images
- Compatible with Mac and Windows
- Lets you to select from the several types of terrific image creation styles
- Allows you to create multiple photos simultaneously
How to add glasses to a photo with HitPaw FotorPea?
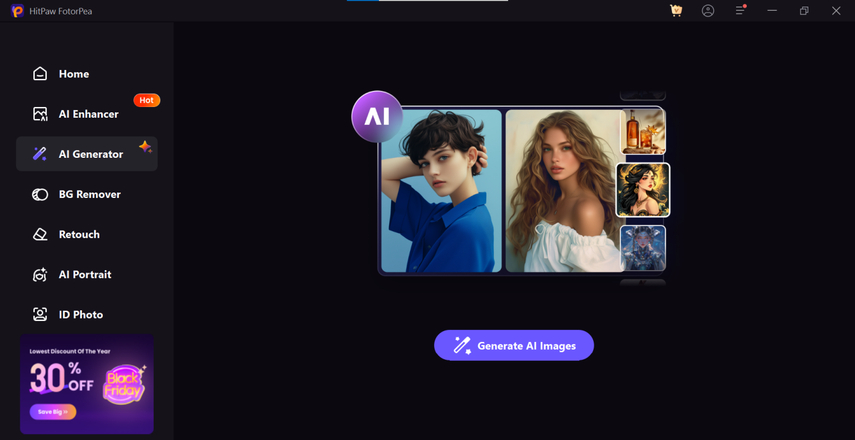
Step 1: Once you're on the HitPaw FotorPea's official website, you'll need to find the program and click the "Download" option. Upon clicking the Install icon you'll be able to install the HitPaw FotorPea and then start the software afterwards. You can initiate the proceedings of adding the glasses to the images by hitting the AI Generator and Generate AI Images options.
Step 2: Jump into the Type What you Want to See button and input the written text description of what you want to create from hereon. HitPaw FotorPea apart from allowing you to create the images with the glasses through mere text description, also allows you to upload the custom images.
To do it, you'll need to press on the Upload button and this way you'll be able to import the images into the HitPaw FotorPea's timeline. HitPaw FotorPea is also compatible with the batch creation, meaning you can now import multiple images simultaneously.
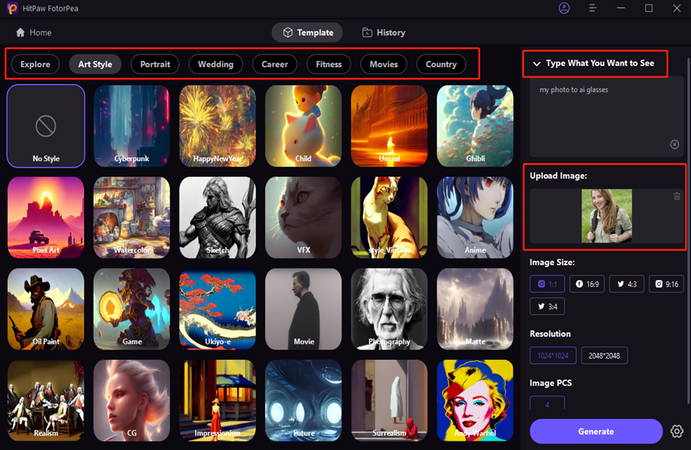
Step 3: After entering the text description and selecting the appropriate styles and designs, you'll need to tap on the Generate button and this software starts creating the images. If you've got a fast internet connection, HitPaw FotorPea won't take any extra time to create the images and after generating the images, you'll need to review the credentials of the images.
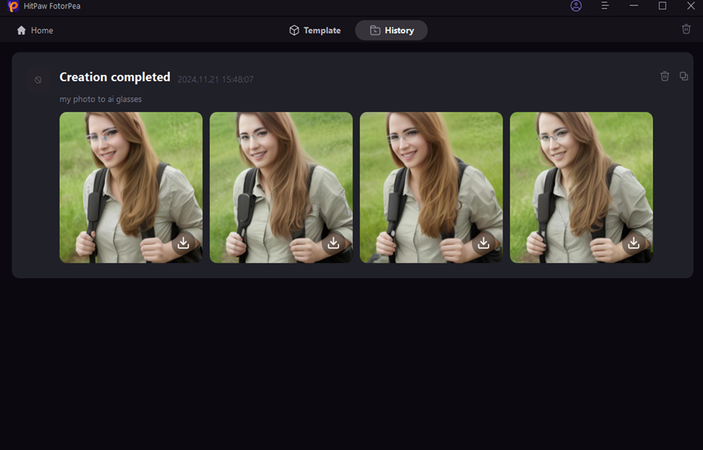
Upon getting satisfied with the photos, you'll need to click on the Download button and doing so will help you to download the images into the destination folder on your computer.
2. Media.io
If you're looking for another my photo to AI glasses tool, going for the Media.io won't be a bad option. Since it is online tool it, doesn't ask you to install the software, and it only requires you to import the photo before starting to create the attractive images.
While adding the glasses to the images, Media.io will ensure that the quality of the images remains retained, and it doesn't bother inserting the watermark into the images provided you've got a subscription to Media.io.
Features
- Offers a simple user interface
- Allows you to add the glasses to the images automatically
- Doesn't ask for an Installation
- No watermark detected for premium users
- Offers the free trial
- Compatible with multiple operating systems
How to add the glasses to the images via Media.io?
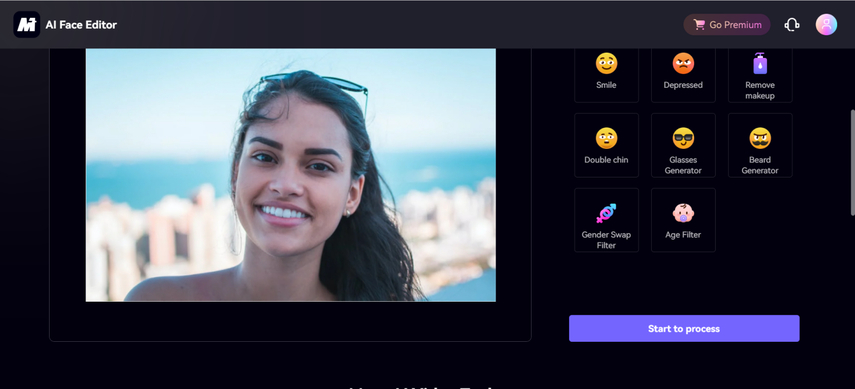
Step 1: After opening the web browser on the computer, you'll need to visit the official timeline Media.io Add Glasses to Photo button and input the photo you want to add the glasses into.
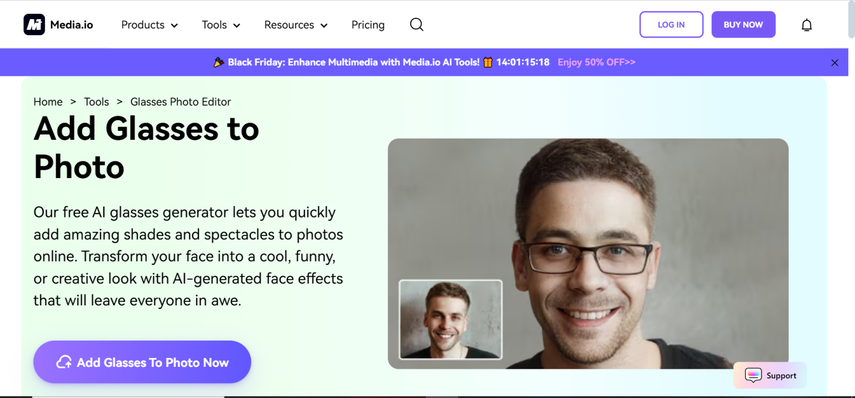
Step 2: After importing the photo into the timeline of Media.io, you'll need to choose the ''Start to Process'' button to initiate adding the glasses to the images. Once you're done adding the glasses to the images, you'll need to ensure that you're satisfied with the outcomes of the image. Upon getting happy with the results, you'll need to download the images into the destination folder on your computer.
3. Imagineme
Despite trying all these options if you're still struggling to get the most reliable my photo to AI glasses tools on board, you can try out the Imaginme. Like Media.io, this tool also doesn't ask you to install any software and the quality of this tool is such that you'll be able to add the glasses to the images effortlessly.
On top of that, this tool gives you a leverage to select the favourite text description after selecting the AI model to ensure that the the progress of adding the glasses to the images remains smooth and outstanding.
Features
- Allows you to add the glasses to the images quickly
- No image quality loss detected
- Doesn't insert the watermark in the images
- Offers the affordable premium package
- Allows you to enter multiple text descriptions simultaneously
- No Installation required
- Offers the affordable premium package
How to add the glasses to your photos through HitPaw FotorPea?
Step 1: Navigate to the official website of the Imaginme and click on the Start Creating button.
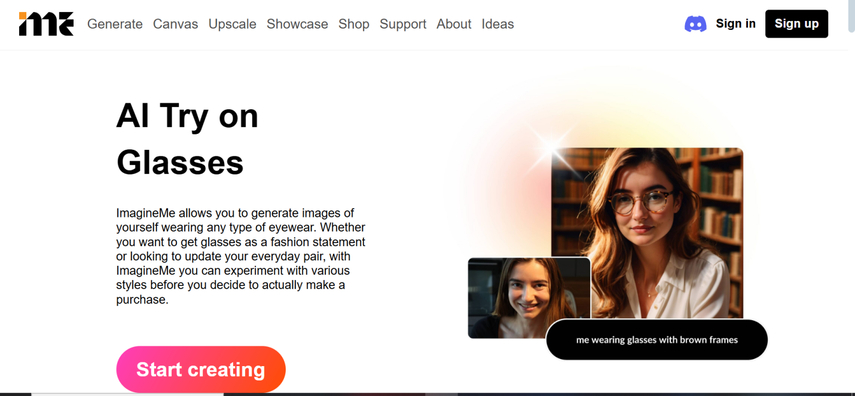
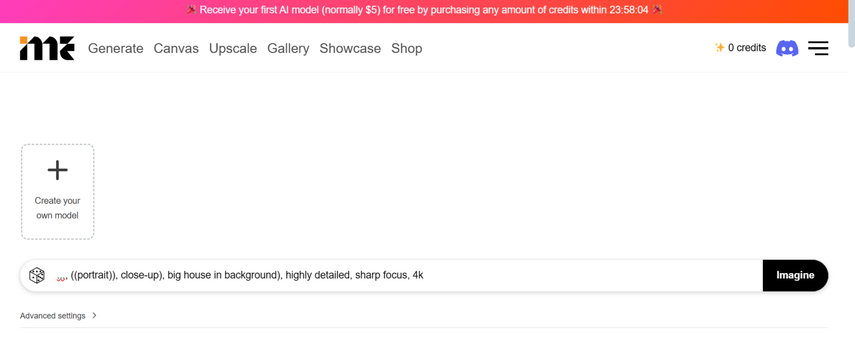
Step 2: Now, you can either select the custom model or click on Create your own model to import the photo you wish to add the glasses into. After importing the photos into the interface of the Imaginme, you'll need to input the text description of what you're willing to create. Once you're done inputting the relevant text description, you'll need to choose the Imagine button to let the tool add the glasses to the uploaded images.
The process is most likely to take a few moments depending upon the speed of the internet, and if you've got a stable internet, you'll be able to add the glasses to images quickly.
Bottom Line
Searching for the ''my photo to AI glasses'' tool has been made simpler courtesy of this guide. We've listed the brilliant methods in this post to help you add the glasses to the images. All the options are worth your attention, but HitPaw FotorPea takes precedence as it offers a flawless user interface, and it doesn't tinker with the image quality while adding the glasses to the images. HitPaw FotorPea also supports the batch creation and there won't be any watermark in the images.


 HitPaw Edimakor
 HitPaw VikPea (Video Enhancer)
 HitPaw Univd (Video Converter)


Share this article:
Select the product rating:
Daniel Walker
Editor-in-Chief
My passion lies in bridging the gap between cutting-edge technology and everyday creativity. With years of hands-on experience, I create content that not only informs but inspires our audience to embrace digital tools confidently.
View all ArticlesLeave a Comment
Create your review for HitPaw articles