Rotate Image in Photoshop: Easy Steps
Rotating an image in Photoshop is a simple step that all photographers dealing with photographs need to learn. If you wish to level the tilted horizon, fix a photo with skewing problems, or prepare a creative photo, Photoshop can do it in one or two easy steps. In this tutorial, we guide you through how to rotate image in Photoshop and briefly touch on some of the best options for those using online programs or other software. You, either a professional user or new user, will find everything that you need from this tutorial.
Part 1: How to Rotate Image in Photoshop
Rotating an image in Photoshop is simple, and there are a variety of methods to achieve it. Here’s a step-by-step guide to how to rotate image in Photoshop.
Step 1: Select the Image
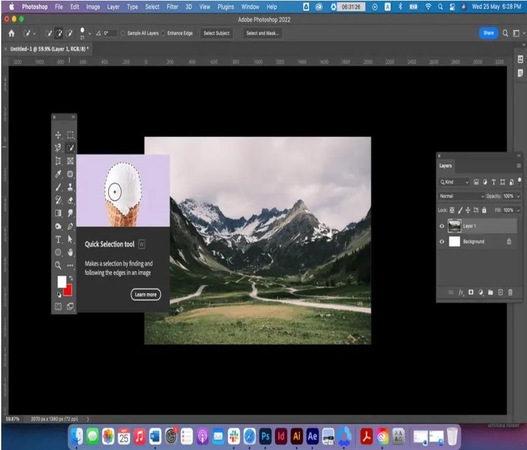
Begin by selecting the image you want to rotate using the Selection Tool (V), also known as the Quick Selection Tool. This allows you to work on the image without affecting the entire canvas.
Step 2: Access the Rotation Tool
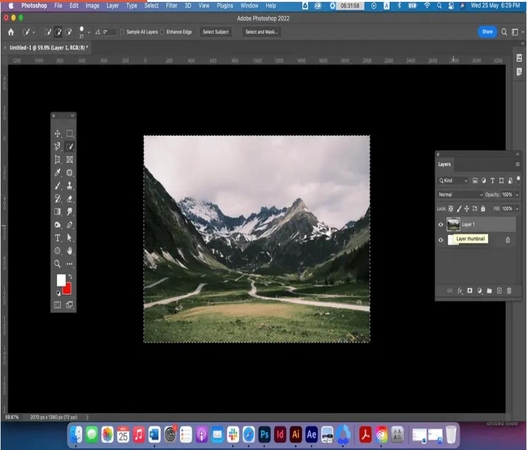
Click on the Rotate button in the toolbar and select “Free Rotate Layer” or press Ctrl + T to activate the transformation mode. This enables you to manually adjust the image’s orientation without rotating the entire workspace.
Step 3: Rotate the Image
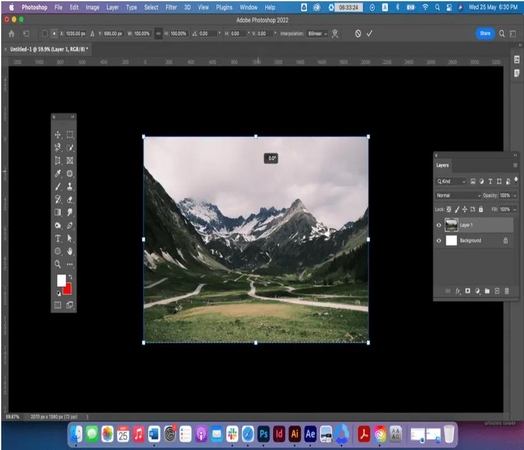
Drag the corners of the bounding box that appears around your image to Photoshop rotate image it clockwise or counterclockwise. You can also use the arrow keys for finer adjustments. To ensure precision, align key elements of the image with the grid lines for a straightened look.
Part 2: Best Photoshop Alternatives for Rotating Images
If you’re looking for simpler or alternative tools for how can i rotate an image in Photoshop, here are some great options. These tools provide quick and efficient solutions, and many of them are free or easy to use.
1. Canva – Best for Quick Online Rotations
Canva is a basic, non-fatiguing online graphical program that can be employed even by beginners and experts alike. Rotating images with Canva is easy without exerting too much energy, making it a perfect program to utilize for instant rotations. It has a basic drag-and-drop feature with other graphics such as templates, how do you rotate an image in photoshop, text overlay, and objects. Canva gives the user a choice of rotating the images by click-dragging on a rotation handle or by entering an angle.

2. Fotor – Best for Batch Rotations
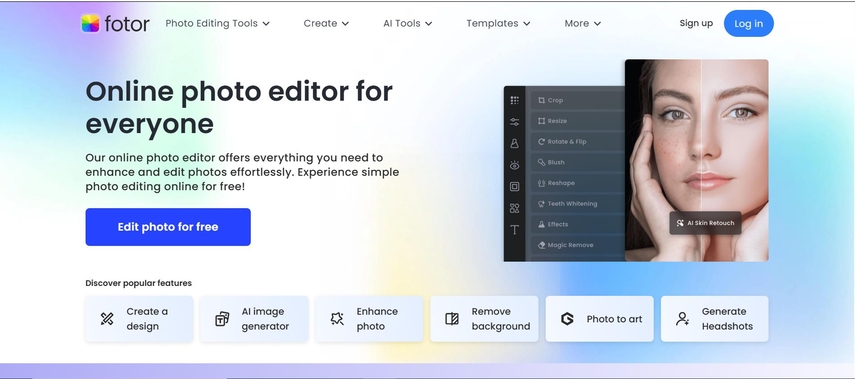
Fotor is a web-based image editor ideal for batch processing. It is an excellent tool for those who want to rotate dozens of images at a time. Fotor also has a set of image editing tools, including filters, enhancements, and text. Fotor's rotation tool gives you the option of rotating photos separately or in batches. You can rotate photos by designated values or enter a specific degree. It copes best with users who possess a set of images to turn.
3. Ezgif – Best for Simple Image Adjustments
Ezgif is easy, web-based software that suits best to execute basic image edit tasks. Sure, it is likely best celebrated as a GIF editor, Ezgif is also easy enough to operate in order to flip an image. It's ideal for those who don't want to feel a nuisance to an image editor but want to be in a position to edit somewhat without needing to learn a horrific amount. You can merely rotate a photo with Ezgif by uploading the photo to the website, choosing the angle that you like, and saving your rotated photo. It is quick and doesn't require you to register.

4. HitPaw Univd for Image & Video Editing
HitPaw Univd is integrated software full of features and specially designed for video and image editing. If you are interested in rotating a static image, applying filters, or cutting video with custom options, then HitPaw Univd is easy to manage and has lots of tools for both. HitPaw Univd is the best option for users who need to edit images and videos from a single place without having to deal with multiple soft wares. It is easy to manage and has pro-level features that make photo and video editing more convenient and easy.
Key Features of HitPaw Univd:
- All-in-One Platform: Edit videos and images all from one app, and make your life easier.
- Intuitive Interface: Single look and feel which makes editing easy for all.
- Advanced Video Editing: Cut clips of your video; add effects and transitions without restrictions, etc.
- Image Rotation and Adjustment: Rotate, cut, and change your image directly with full control.
- High-Quality Output: Provides premium image and video export with no detail loss.
Easy Way to use HitPaw Univd
Step 1: Cutting VideosIn the Edit section, select the Cut feature and add your video.
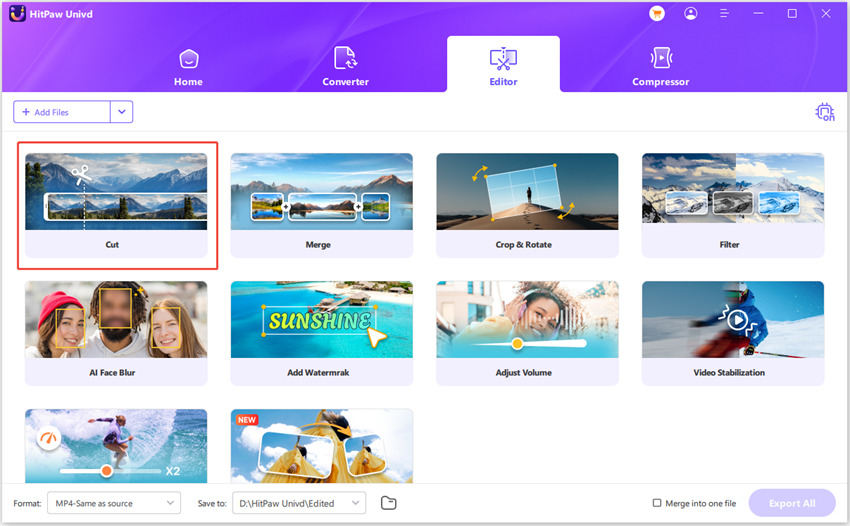
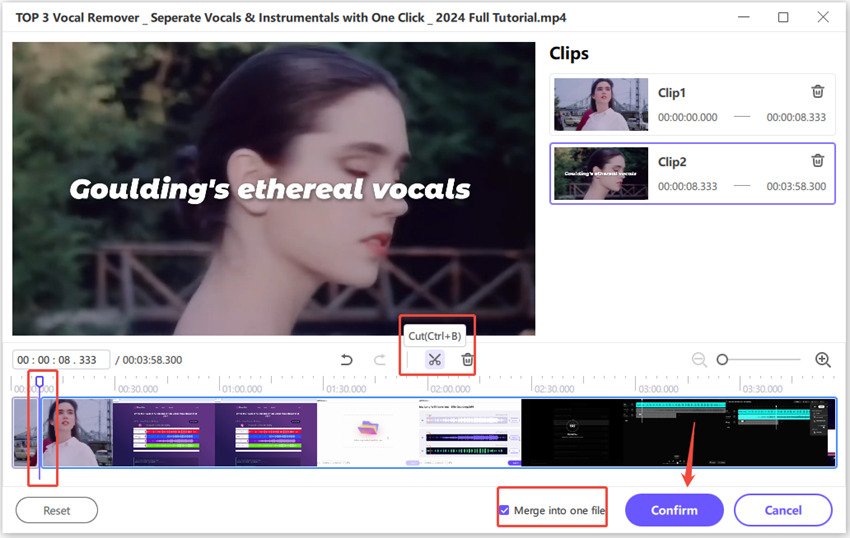
Drag the playhead to the desired point and click the scissor icon to split the video. Repeat to create more clips. To merge the clips, check the “Merge into one file” option and click Confirm to export.
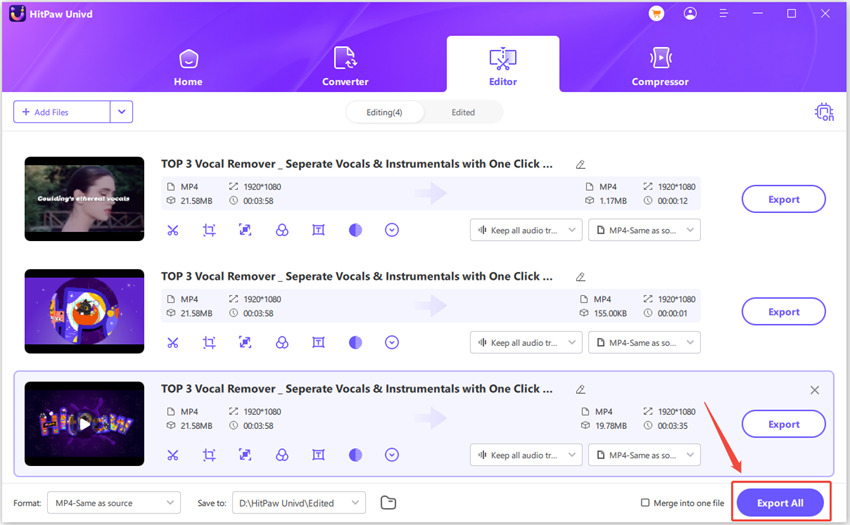
Preview your cut video, select an output format, and export as a single file or all files.
Step 2: Merging Videos
In the Edit section, add videos to merge, select an output format, and check the “Merge into one file” option. Click Export All to combine the videos into one.
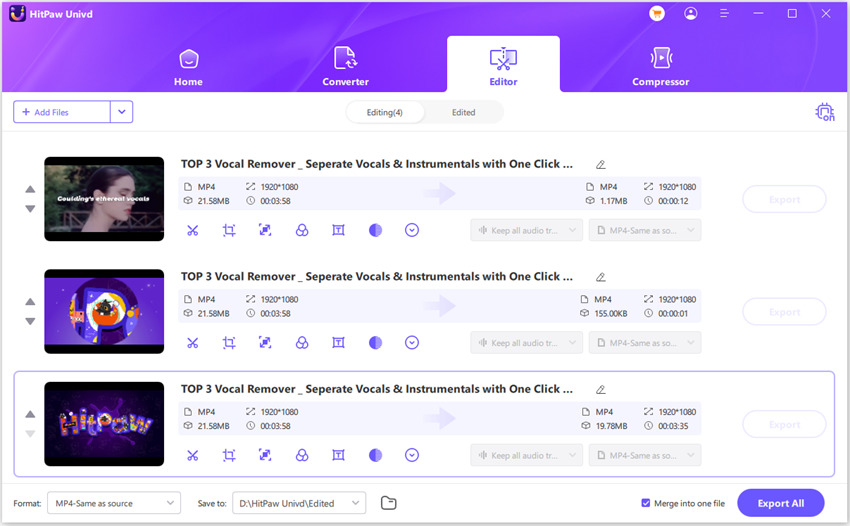
Step 3: Cropping and Rotating Videos
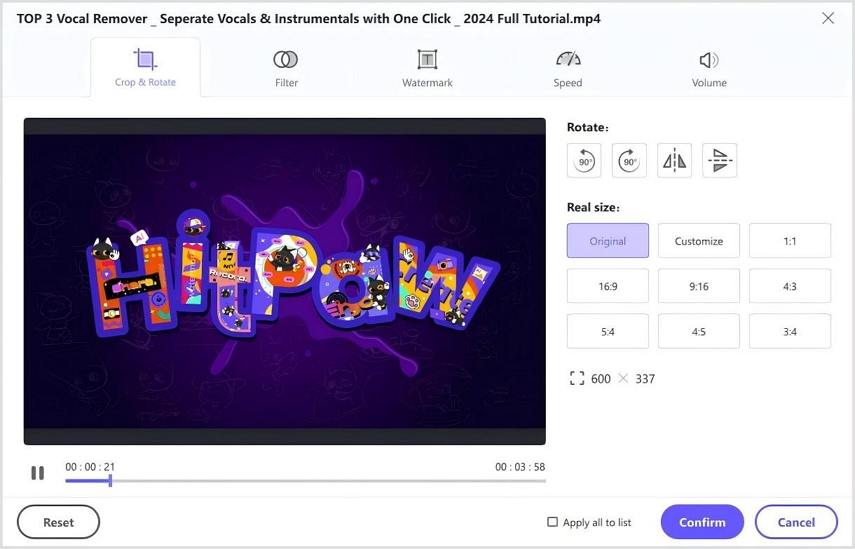
In the Crop & Rotate section, rotate videos clockwise, counterclockwise, or upside down. To crop, drag the edges of the frame or select a preset ratio. After previewing, export the cropped video in your chosen format. For batch cropping, ensure all videos share the same resolution.
step 4: Adding Filters
Apply preset filters like black and white, scenery, or landscape with a single click. Fine-tune brightness, contrast, saturation, and more. Use the “Apply all to list” option to apply settings across all imported videos.

Step 5: Adjusting Video Speed
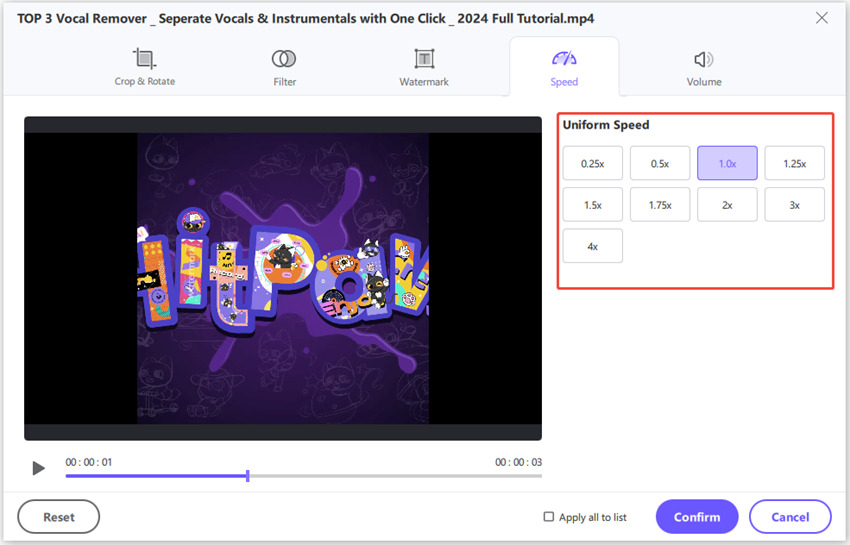
Easily change video speed from 0.25x to 4x in the speed settings. Preview the effect in real time and use “Apply all to list” to adjust all imported files simultaneously.
Step 6: Adding Watermarks
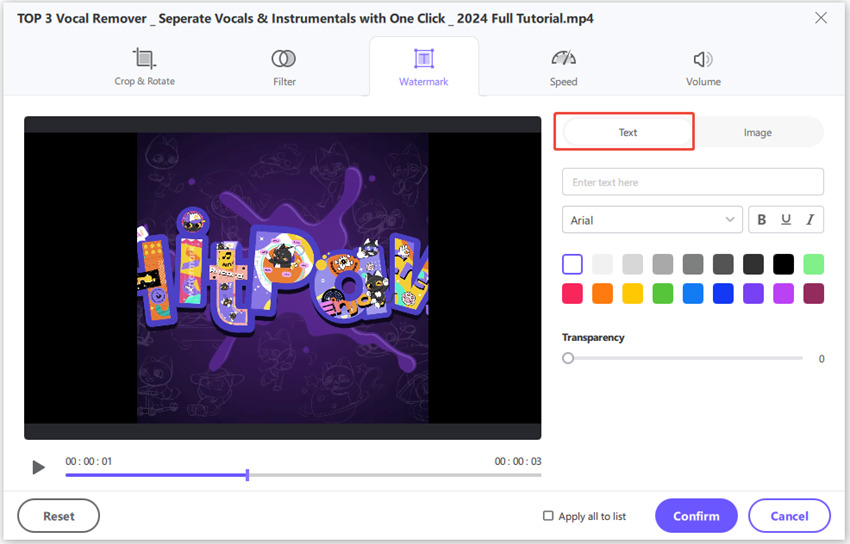
Add text or image watermarks to videos. Adjust text fonts, colors, sizes, and transparency, or drag them to the desired position. For image watermarks, upload and position them as needed. Ensure videos have the same resolution for consistent watermark application.
Step 7: Stabilizing Videos (Windows Only)
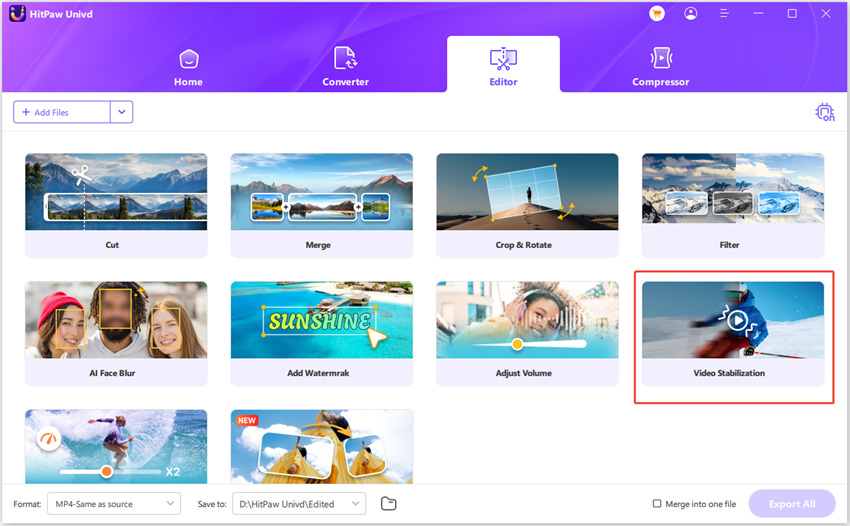
Stabilize shaky footage from devices like GoPro, drones, or smartphones. In the Edit tab, select Video Stabilization, import your video, and let the program automatically analyze and stabilize the footage at a 50% ratio.
Part 3: FAQs About how to rotate image in Photoshop
Q1. How do I rotate only part of an image in Photoshop?
A1. To rotate part of an image, use one of the selection tools to select the area. Then, proceed to Edit > Free Transform and rotate part of the selected image.
Q2. What is the shortcut for rotating an image in Photoshop?
A2. To rotate a picture in Photoshop, hold down the shortcut key Ctrl + T on a PC or Cmd + T on a Mac to open the Free Transform tool. Then, turn the picture around by dragging from the top left of the bounding box.
Q3. How can I rotate an image without distorting it?
A3. To prevent distortion, keep holding down the Shift key while rotating the image. It will restrict rotation by 15 degrees at a time without distorting the image proportion.
Q4. Can I rotate text layers separately in Photoshop?
A4. Yes, you can rotate text layers separately. Just select the text layer in the Layers panel, and then free transform the text separately from the rest of the image using Free Transform (Ctrl + T or Cmd + T).
Conclusion
Rotating a picture in Photoshop is a very easy process with many tools at your hands. For those how to rotate image in Photoshop preferring ease of use with a simple solution, others such as HitPaw Univd offer the whole package to edit images as well as video.


 HitPaw Edimakor
 HitPaw VikPea (Video Enhancer)
 HitPaw FotorPea



Share this article:
Select the product rating:
Daniel Walker
Editor-in-Chief
My passion lies in bridging the gap between cutting-edge technology and everyday creativity. With years of hands-on experience, I create content that not only informs but inspires our audience to embrace digital tools confidently.
View all ArticlesLeave a Comment
Create your review for HitPaw articles