3 Tools for Photo Editing for Birds to Make Stunning Images
All the wildlife photographers will agree upon this that capturing the birds in their natural habitat is just the half job done. The real magic happens during the editing process. Whether you are improving the colors or sharpening the feather, bird photography editing is what truly transforms the raw captures into captivating images.
As editing helps to highlight the natural beauty of the birds and bring out the intricate detail, knowing the ins and outs of how to edit bird photos effectively is highly important. In this article, we will dive deep into the 3 powerful methods to enhance your bird photography.
Method 1: Best AI Photo Editing Software for Bird Photography — HitPaw FotorPea
As we all known, bird photo editing usually require significant practice and time. However, if you're looking for a quick solution, AI-powered tools like HitPaw FotorPea. Known for its comprehensive editing features, this powerful tool can enhance your bird photos effortlessly.
Features of Choosing HitPaw FotorPea as Bird Photography Editing
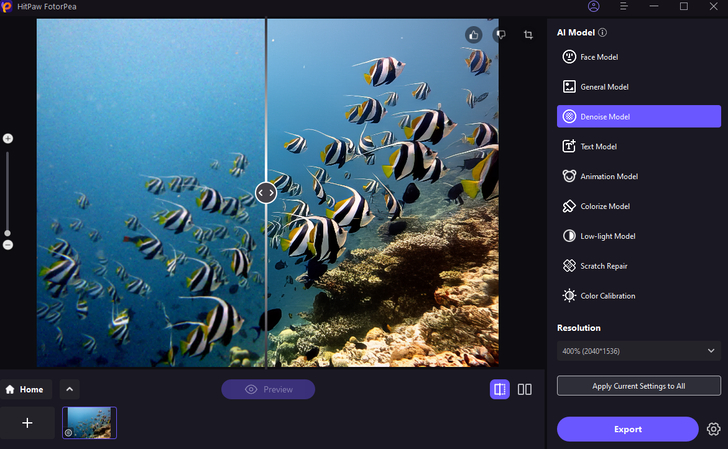
1. Improved Noise Reduction
Using the advanced AI algorithms, HitPaw FotorPea minimizes noise without losing important textures. Even the images taken under challenging conditions such as low light or fast-moving subjects can benefit from this feature.
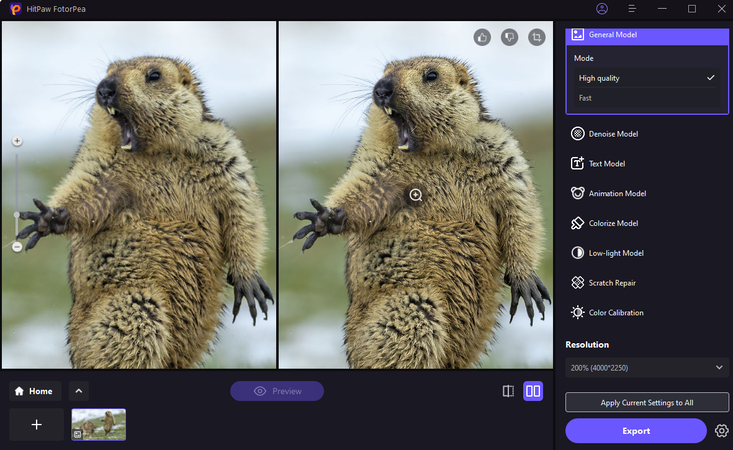
2. Texture Enhancement
Unlike traditional tools, HitPaw FotorPea can detect and enhance subtle textures like feathers and eyes with just a single click. The advanced AI algorithm of HitPaw FotorPea ensures these details are highlighted naturally, giving you sharp and realistic images.
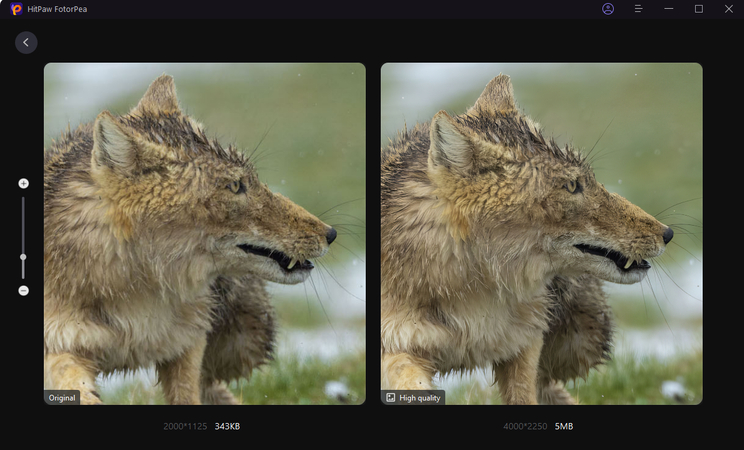
3. Adding Details Naturally
HitPaw FotorPea excels at restoring missing details. If you think that parts of the bird appear underexposed or soft, HitPaw FotorPea can fill in these areas with lifelike precision.
How to Enhance Bird Photography with HitPaw
Wondering how to use HitPaw FotorPea to enhance your bird photography? Follow these steps:
Step 1: Download and Install Hitpaw FororPea
Visit the official website and download HitPaw FotorPea. Then Install it.
Step 2: Upload the Image you want to enhance
Now from the main menu, select “AI Enhancer” and click on “Choose File” to upload the photo

Step 3: Select the desired AI Model
Now, from the given option, select the desired AI model to enhance the image. There are plenty of ai models to choose from such as, Face Model, General Model, Denoise Model, Colorize Model, Color Calibration, Scratch Repair, Low-light Model.
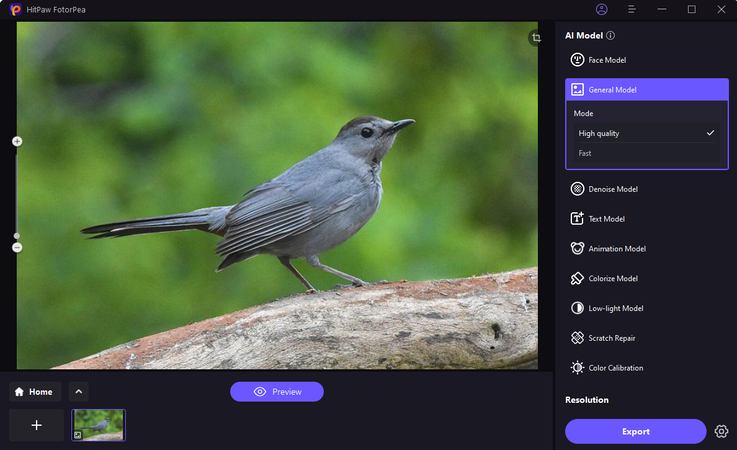
Then click on preview and it will start the processing. Wait for few seconds as AI is enhancing the image automatically
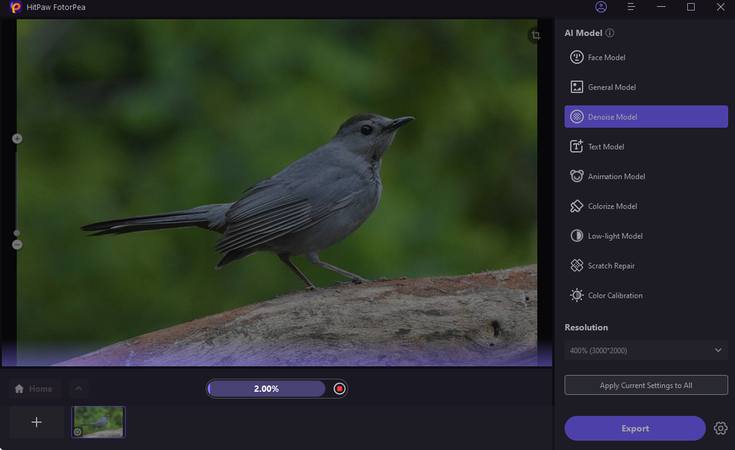
Step 4: Export the final image
Now, see the changes and compare before and after image. Once satisfied, click on Export and download the image to the desired location.
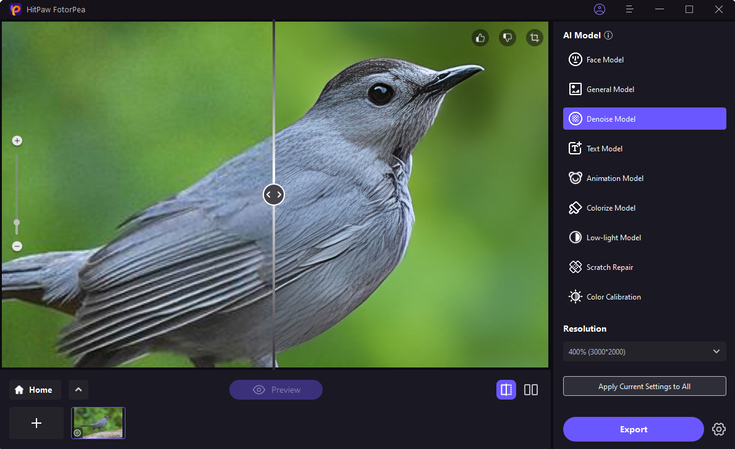
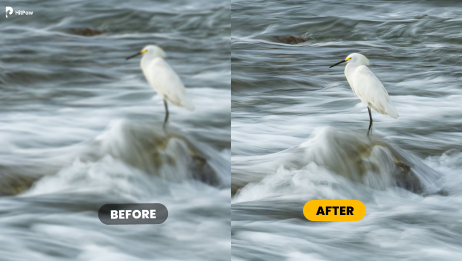
Before and After Comparison
- Original: Grainy, low-detail image with a noisy background.
- Processed: Clean, detailed image with smooth textures and sharp focus on the bird.
Video Tutorial for How to Make Photo HD
Method 2: Editing Bird Photos in Lightroom
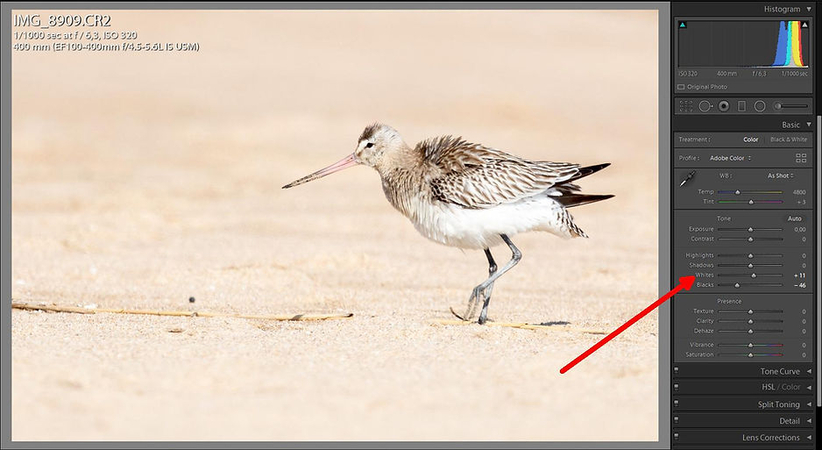
Adobe Lightroom needs no introduction. This is one of the most popular photo editing tools, especially among wildlife photographers. With its simple and easy-to-use interface coupled with comprehensive editing capabilities, this tool allows photographers to fine-tune their images without overwriting the original files. Using this, you can easily enhance exposure, contrast, and sharpness, which are essential for bird photography editing.
Best Practice to Edit Bird Photo with Lightroom
1. Basic Adjustment on Exposure, Contrast, and Color
The first step in editing bird photos in Lightroom is adjusting exposure. Since birds are often photographed in natural lighting, the brightness might need correction. Therefore, start with brightening dark areas and pay special attention to the bird's eye. To ensure proper exposure balance, use histogram.
Then apply gentle contrast to add depth without crushing blacks, and make sure to maintain feather details in shadow areas. If required, enhance vibrance slightly to bring out plumage colors. This all together will balance light across the image.
2. Using Presets for Consistent Results
Presets can speed up your workflow and maintain consistency in your editing workflow. You must use Lightroom presets to enhance sky tones, sharpen feathers, or increase saturation. Besides this, you can also customize presets according to the specific lighting conditions in which the photos were taken. However, make sure to maintain a natural look while enhancing key features.
3. Enhancing Details and Sharpness
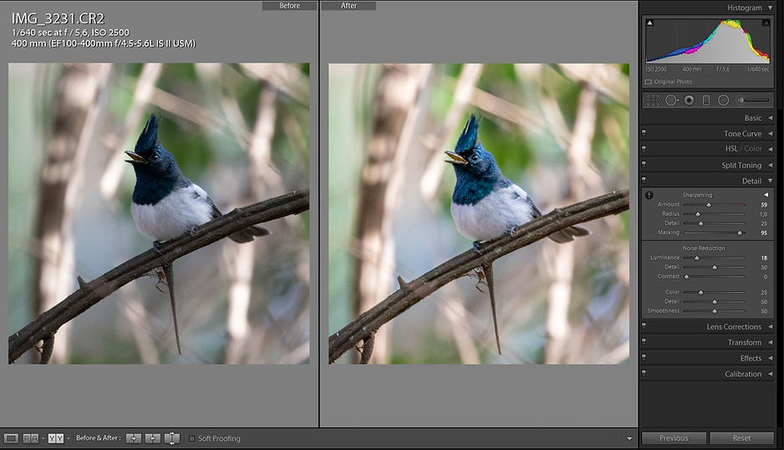
As bird feathers contain intricate details, the use of sharpness while editing the photo becomes essential. Therefore, to make them standout, use the sharpening tool under the "Details" tab. To avoid sharpening smooth areas, make sure to use making and apply targeted sharpening to further details. And if the image is taken at a high ISO setting, don't forget to adjust noise reduction to reduce graininess.
Step-by-step Guide to Editing Bird Photos in Lightroom
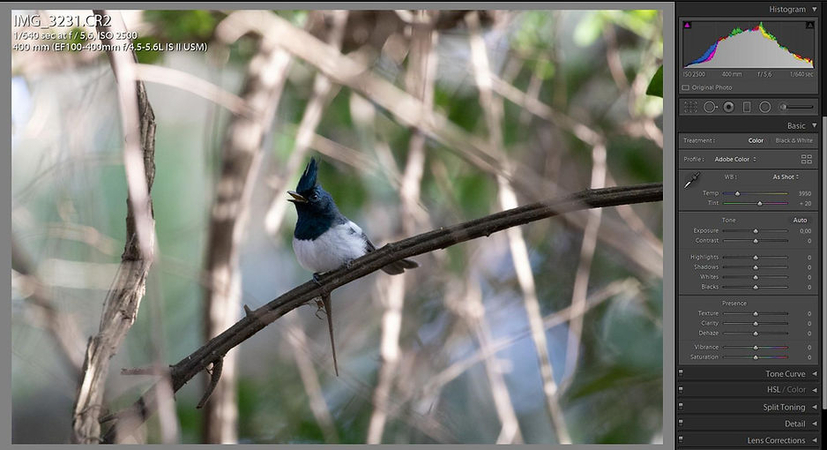
Step 1:Import your raw image into Lightroom and correct any lens distortion and chromatic aberration.

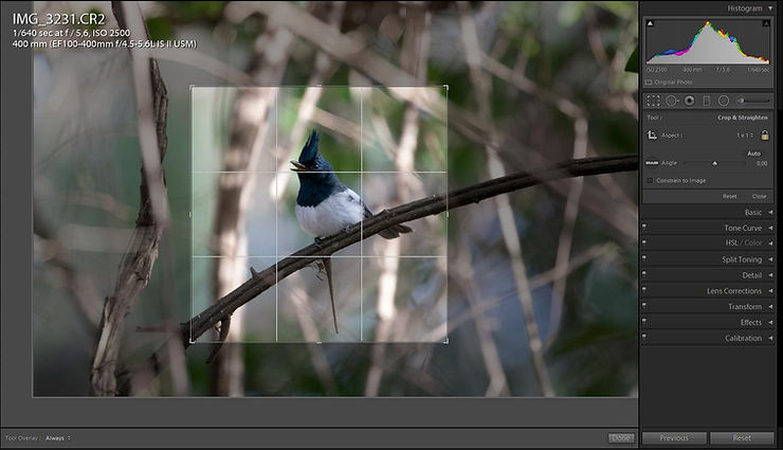
Step 2:Crop the image to make sure it is in the best aspect ratio. It will help you focus on the subject and improve the composition overall.

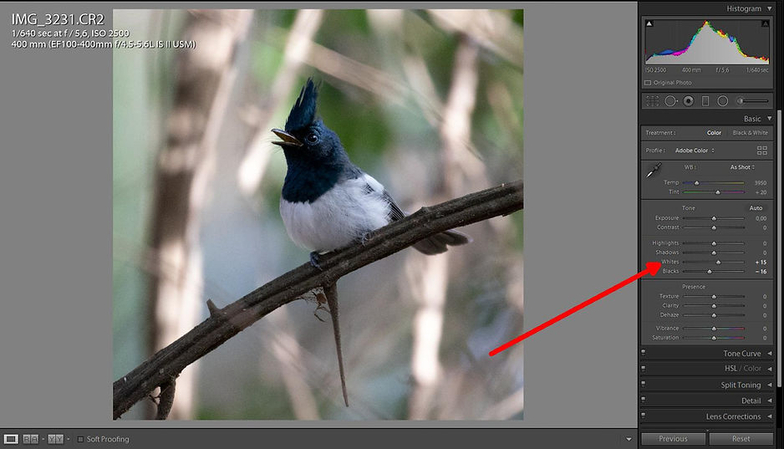
Step 3:Now adjust the black and whites effectively. You can do it by holding down the shift key and double clicking on the respective slider.

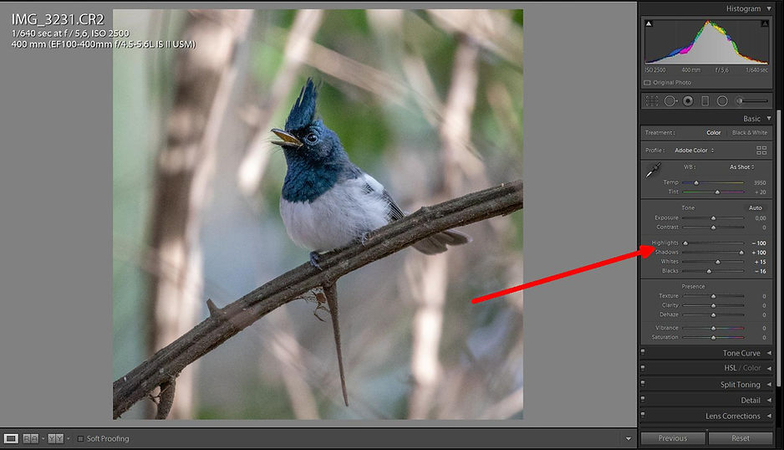
Step 4:Now reduce the highlight and set the shadow to get the best results

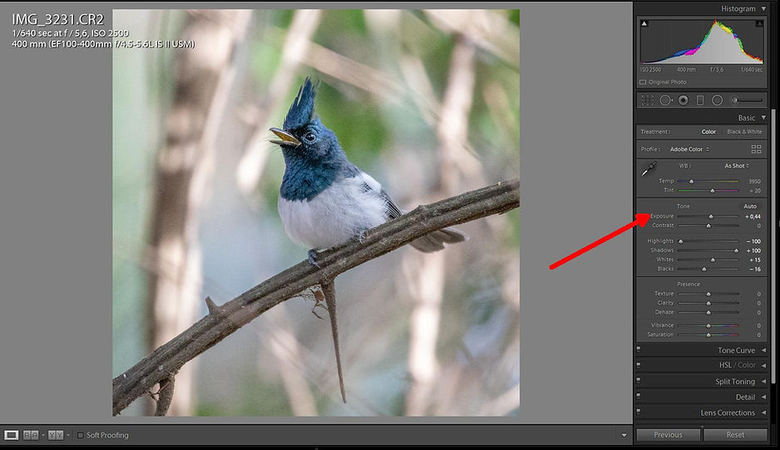
Step 5:Adjust the exposure if required and while adjusting, focus primarily on the bird rather than background.

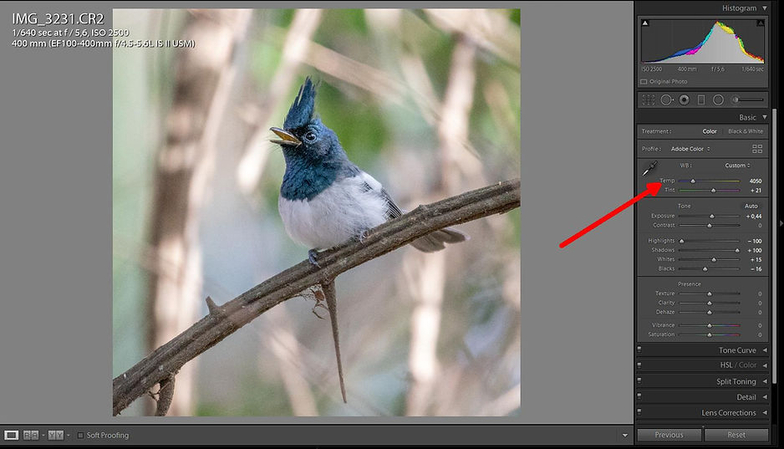
Step 6:Now adjust the white balance, tint, clarity, texture and dehaze till you get satisfactory results

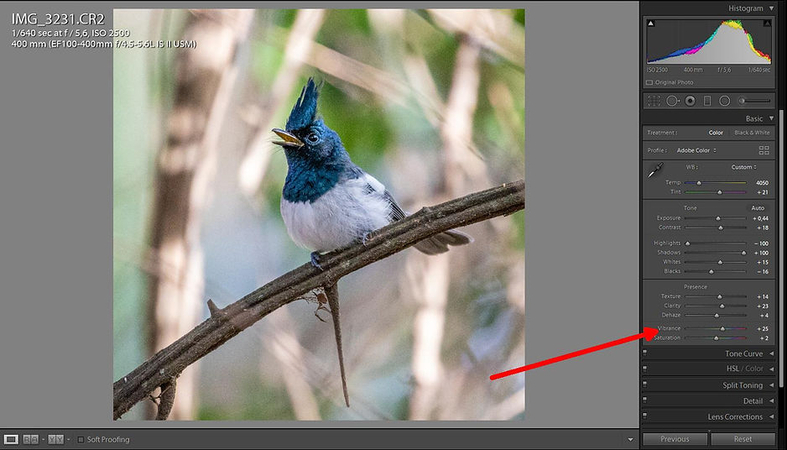
Step 7:To bring some color back into the photo, raise the vibrancy and make a slight increase in saturation by

Step 8:Use the Lightroom new features an AI-Powered Denoise tool, to reduce the noise and grain, especially in low-light conditions. (To use it, navigate to the Detail panel in the Develop section, click on the Denoise button, and adjust the slider to your preference). Then compare the before and after result.

Method 3: Bird Photo Editing in Photoshop
If you are looking for more advanced and intricate bird photo editing, Adobe Photoshop can be your best companion. Unlike Lightroom, this amazing software offers deeper control over masking, retouching, and background removal. Since it offers more precise control over your editing process, it is ideal for those who need to fine-tune specific elements of an image.
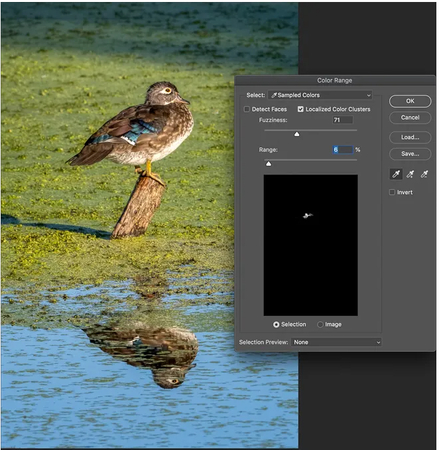
Tips on Editing Bird Photos with Photoshop
1. Basic Adjustments on Brightness, Contrast, and Hue
To start with, balance the brightness and contrast of the photo. Suppose your bird image looks dull; you may increase the brightness and bring it to life. You can also tweak the hue to correct any unwanted color casts, while applying selective brightness adjustments to highlight important features is crucial.
2. Removing disturbing elements
As Birds photos are often taken in unpredictable environments, there can be some elements in the background that can distract from the subject. But with Photoshop, you don't need to worry about anything because its Content-Aware Fill or Clone Stamp tool allows you to remove distractions like stray branches or unwanted objects seamlessly.
3. Denoising in Photoshop
Noise can ruin a bird photograph, particularly in low-light conditions. However, the noise reduction feature of Photoshop helps clean up grainy images, and the best part is, without disturbing the essential details. You can find this option under Filter > Noise Reduction.
Step-by-Step Guide to Bird Photo Editing in Photoshop
- Open the image in Photoshop.
- Adjust brightness, contrast, and hue.
- Use the Clone Stamp or Content-Aware Fill tool to remove distracting elements.
- Apply noise reduction under the Filter tab.
- Mask the subject for a clean, isolated background if needed.
Conclusion
Bird photography editing requires a combination of technical skills and creative vision. There are some amazing tools available that can help you bring your raw bird photos to life. However, mastering these tools may require significant practice and time.
But if you don't have time and are looking for a quick solution, HitPaw FotorPea can be your best friend. Powered by AI, this amazing tool offers a faster, more automated solution. So whether you're looking to enhance the photo or make a certain part clearer, this tool will help you achieve the best results.



 HitPaw Univd (Video Converter)
 HitPaw VoicePea
  HitPaw VikPea (Video Enhancer)


Share this article:
Select the product rating:
Daniel Walker
Editor-in-Chief
My passion lies in bridging the gap between cutting-edge technology and everyday creativity. With years of hands-on experience, I create content that not only informs but inspires our audience to embrace digital tools confidently.
View all ArticlesLeave a Comment
Create your review for HitPaw articles