How to Delete Filter Blur in GIMP: A Step-by-Step Guide
GIMP comes up with the blur filter that helps you to blur the part of the images to hide the important information of a photo before uploading it on the social media platforms. What if, after adding the blur filter to the images, you want to eliminate the blur from the images? Can you delete the blur filter in GIMP?
Getting rid of the filter in GIMP is fairly simple as this guide is all set to introduce brilliant ways to help you know how to delete filter in GIMP.
Part 1. How to Delete Filter Blur in GIMP
The interface of the GIMP looks manageable, as even newcomers won't find it difficult to add or remove the blur filter from the GIMP. Deleting the filter blur in GIMP doesn't ask you to do much, as you can look at the guide below to know how to delete filter blur in GIMP.
Step 1: After launching the photo into the timeline of the GIMP, you'll need to locate the suitable part of item of the photo where you're looking to measure the motion blur. GIMP comes up with the Measure tools for the uninitiated as it looks like the compass and divider from the geometry box.
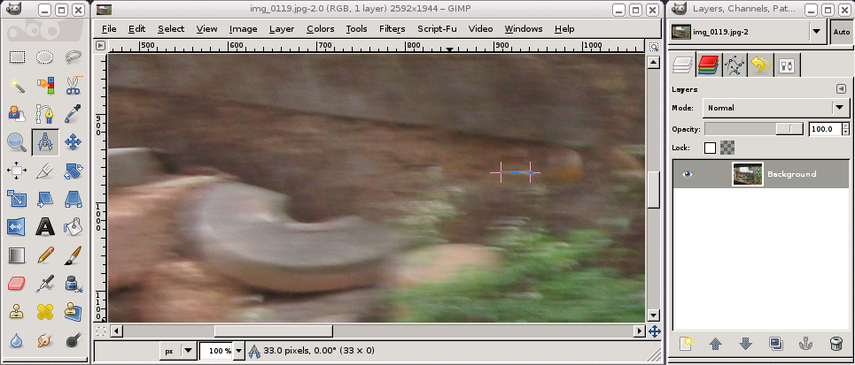
Step 2: You can now expect the top 2 to produce the sort of difference between the more blurred version of the photo and the original picture. This way you can remove this difference from the original state to acquire a better image.
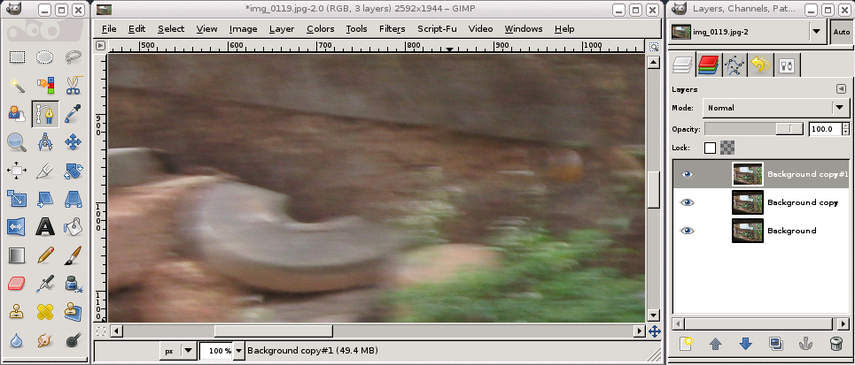
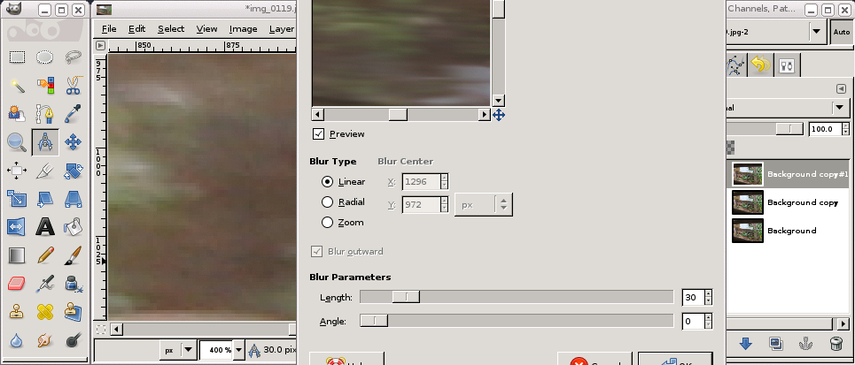
Step 3: If you've got a slow enough computer or large enough photo on which went on to run the Unsharp mask, you could have noticed the blurring icon before the masking. Instead of blurring all the parts in all directions, we used the motion blur because we wanted to eliminate the motion blur. If you don't understand what we did here, you can assume that we fight motion blur with more motion.
Since we've measured the motion blur in Step 1, you can use it to fill in the filters' parameters before selecting the blur and motion blur buttons. You'll need to ensure that you're doing this for your top layer. In this phase, you'll have to subtract or add the multiple of the 90 to produce the right motion blur.
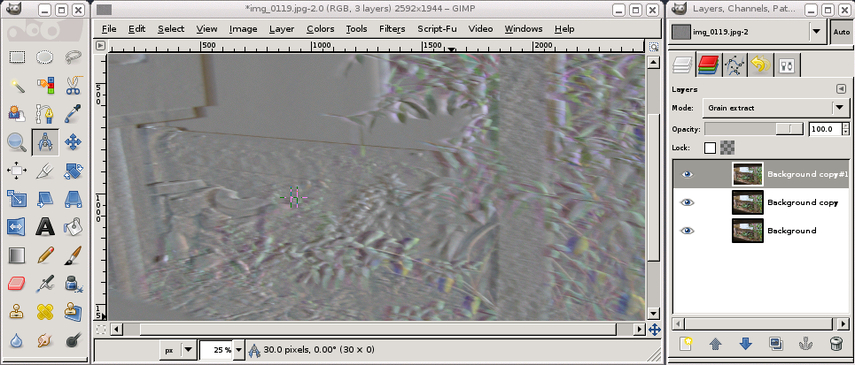
Step 4: Ensure that you've chosen the top layer in your layers dialogue box before changing the mode to the grain extract. After creating the new layer group, you'll need to move the 2 layers to your new group.
In the next phase, you'll need to play with the Levels and Colors button and the layer group to your liking. After each unblurring, if more blur is left, you can repeat the same operation again and again and doing so will make the images look shaper than the original images.
Part 2. The Best Tool to Deblur Images with HitPaw FotorPea
Removing the blur from the images through GIMP could end up consuming a lot of extra time so looking for an alternative that doesn't take extra time when eliminating the blur from the images makes complete sense. HitPaw FotorPea appears to be the most substantial way to enhance the quality of the images, and while improving the quality of the photos, HitPaw FotorPea tends to maintain the quality of the images.
On top of that, HitPaw FotorPea prompts the 9 stunning AI models that help you to improve the overall quality, removing the noise and other shortcomings from the images. Luckily, HitPaw FotorPea also prompts batch processing, meaning you can import multiple images simultaneously before enhancing the credentials of the photos and this thing tends to save a lot of your extra time by offering the simple user interface.
Features
- Lets you delete the blur from the images quickly
- Offers a simple user interface with no technical required
- Supports Mac and Windows
- Allows you to enhance multiple images simultaneously
- Preview the images before exporting them
- Does not insert the watermark on the images
- Supports multiple image formats
- Prompts the affordable premium package
How to enhance the photo quality with HitPaw FotorPea?
Step 1: After getting into the official webpage of the HitPaw FotorPea you'll need to get the software installed in the PC. After installing the tool, you'll need to start the software and hit the AI Enhancer button.
Click on the Choose File button afterwards to upload the photos you want to enhance. Since HitPaw FotorPea is compatible with the processing, you've got the chance to upload multiple photos simultaneously as doing so helps you to save a lot of time. Moreover, regardless of which format of the photo you wish to enhance, you can upload it to the HitPaw FotorPea's timeline as it is compatible with multiple image formats.

Step 2: After uploading the photo to the computer, you'll be able to see the 9 reliable AI models on the screen, including the Color Calibration model, scratch Repair model, animation model, colourize model, low light model, text mode, general model, and face model. You can try all the AI models one by one to explore all the credentials these AI models come up with for you. To apply the preferred AI model, you'll only need to click on the desired AI model, and this way, you'll be able to use the AI model on the particular photo.
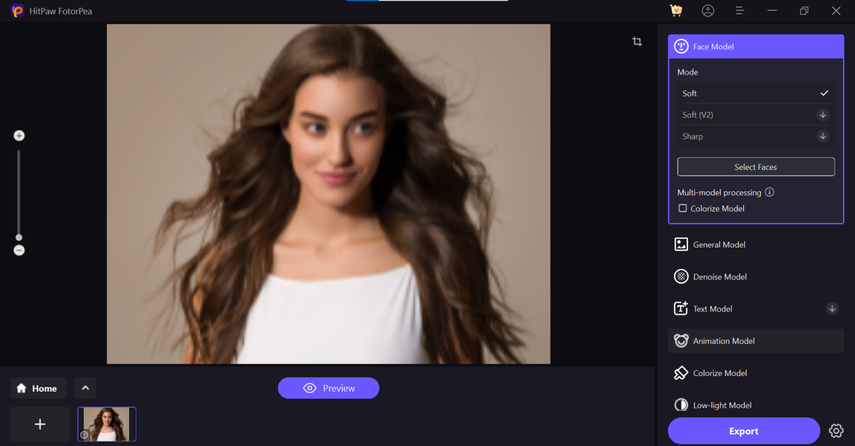
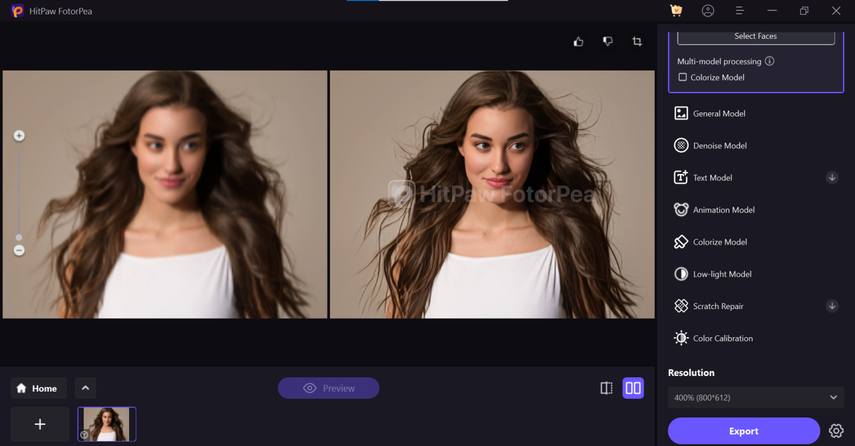
Step 3: Once you're done selecting the preferred AI model, you'll need to click on the Preview button to apply the favourite AI model to the images. Next, you download the modified images into the computer by hitting the Export button.
Part 3. FAQs of How to Delete Filter Blur in GIMP
Q1. What is the blur filter in GIMP?
A1. The blur filter in the GIMP is a brilliant tool that tends to soften the image details by decreasing the sharp images and blending the pixels. It is used to create the out-of-focus effect and smooth effect perfect for emphasizing a certain area or eliminating the noise from the images.
Q2. What is filter blur?
A2. Filter blur is a brilliant effect on photo editing that will diminish the sharpness by blending the pixels. The technique tends to smooth out the texture and soften the details enabling you to produce a sense of depth, focusing on the parts of the images and reducing the image noise.
Bottom Line
After inserting the blur filter of the GIMP on your images, if you wish to get rid of the annoying blur from the photos, this post has listed the step-by-step guide for you. The steps listed in this post will ensure that you can eliminate the annoying blur filters from the photo without affecting the quality of the images.
Since eliminating the blur from the image through GIMP could end up consuming a lot of time, you can opt for the HitPaw FotorPea to enhance the photo quality. The 9 AI models of the HitPaw FotorPea will ensure that you completely change the dimensions of the images, making them look flawless and worth watching.


 HitPaw Edimakor
 HitPaw VoicePea
  HitPaw Univd (Video Converter)


Share this article:
Select the product rating:
Daniel Walker
Editor-in-Chief
My passion lies in bridging the gap between cutting-edge technology and everyday creativity. With years of hands-on experience, I create content that not only informs but inspires our audience to embrace digital tools confidently.
View all ArticlesLeave a Comment
Create your review for HitPaw articles